Just FYI our TTR mounts we, and Whoosh now carries, are not solid, they are poly. However these inserts still retain the stock rubber which rots away.... replacing to a new stock mount won’t fix it, a couple years and your stock rubber will be bad again...
-
Sign Up! To view all forums and unlock additional cool features
Welcome to the #1 Fiesta ST Forum and Fiesta ST community dedicated to Fiesta ST owners and enthusiasts. Register for an account, it's free and it's easy, so don't hesitate to join the Fiesta ST Forum today!
Powerflex Motor Mount Inserts
- Thread starter koozy
- Start date
I understand that. However, I thought to try this first and see if I can get a few years out of them at least. I am sure the shock will be much less. If they are destroyed again in a few years I will simply replace them with complete aftermarket mounts. That was just more money than I was willing to part with right now. I hate to say it, but I now consider mounts (OEM) to be a semi-disposable item. More than likely, I will get a few great years out of these and will then upgrade again to full aftermarket mounts.
Another on you tube:
https://youtu.be/P4OJ6OF5Rec
Just saying... search, this has happened to more than one, adding these inserts puts extra stress on the stock mounts and shears the bolt....
Not saying you guys don't have awesome products, but it's odd that you're on a thread about a different product sold by the same guy that sells your products, saying the latter is defective. I've been at over 300 ft/lbs of torque for over 2 years now, and done hundreds of WOT runs/datalogs/dynamometer sessions, and when I took my stock mount out last week it was in perfect shape. Other factors for these failures could be at work.
I understand that. However, I thought to try this first and see if I can get a few years out of them at least. I am sure the shock will be much less. If they are destroyed again in a few years I will simply replace them with complete aftermarket mounts. That was just more money than I was willing to part with right now. I hate to say it, but I now consider mounts (OEM) to be a semi-disposable item. More than likely, I will get a few great years out of these and will then upgrade again to full aftermarket mounts.
I'm sure your mounts are superior. Manley and I are in the same place, just looking for a cost-effective alternative to an entire mount upgrade. Plus I'm not ready for the NVH that your mount might add being mostly solid, from what I know of solid mounts having put a few on my cars over the years. Plus, by your same logic, adding your mounts will put stress somewhere else and cause it to break. Whatever the weak link is will break next, and a solid mount upgrade is sure to help speed up that process.
Not saying you guys don't have awesome products, but it's odd that you're on a thread about a different product sold by the same guy that sells your products, saying the latter is defective. I've been at over 300 ft/lbs of torque for over 2 years now, and done hundreds of WOT runs/datalogs/dynamometer sessions, and when I took my stock mount out last week it was in perfect shape. Other factors for these failures could be at work.
Yes and yes. Please get me that part number or a link to purchase when you can, and a quick DIY for removal if you're able, it will help when I install soon.
I could not have said it any better myself. Those are my thoughts EXACTLY!
Here is the part #: C1BZ-6068-C
It is known as an upper bracket. I got it from Gaudin Ford in Vegas. They had the cheapest part+shipping price. You might ping Steve@tasca who is a vendor on this forum and see what he can do for you. You're in GA so I am guessing shipping is going to be different for you than for me in PDX.
Here is what you have to do:
*Disconnect positive and negative terminals using 10mm socket. Be careful not to touch them together (I placed a piece of wood between the positive connector and the positive terminal because the cable is pretty short and likes to snap right back into place.
*Remove battery tie-down using 10mm socket. You may need a slightly deeper socket for this one. I am guessing you have that already. If not, you may want to get a metric deep socket set.
*Before removing the battery, remove the MAF sensor so it doesn't get bumped. It also allows more clearance for the tray and the battery to come out.
*Remove the battery
*You should see a few bolts in the bottom of the tray. IIRC, one of them is an 8mm so make sure to have that size handy.
*Remove the induction hose so you can more easily access the ECU connectors.
*This next part was the most difficult, mostly because the ECU connectors are fragile and can be a headache if broken.
*The ECU connectors have a little tab that you have to push down and at the same time you pull the little white lever back until you hear a click. You can then pull them out. There are two. The bottom one is at a weird angle so be careful how you are pulling. (This forum post on the Boomba bushing install has a great explanation: http://www.fiestast.org/forum/fiest...-racing-shifter-bracket-bushings-install.html)
*Remove the 10 mm bolts for the battery tray and carefully remove the entire tray. Be careful of the exposed pins that the ECU connectors plug into. I would cover it with a towel so minimize any potential damage.
*You will now see the black plate that covers the mount. Remove the bolts to allow it to be wiggled free. This is where you may need two people. I had my dad pull up on the airbox while I wiggled that black plate over the bolt. The plate has a downward facing lip that makes it difficult to clear the bolt that is sticking up. If you don't have two people or don't want to deal with that, just remove the airbox.
*Jack the transmission up. I needed to put the car on Rhino Ramps to get my jack to clear under the front bumper. It's the same procedure that you did with the passenger-side, except you want to jack the transmission up. You don't have to jack it up very far, just enough to relieve the tension on it.
*You can now get to the mount. It has both 18mm and 15mm bolts. The upper bolts are 18mm and the lower bolts are 15mm, just as the passenger-side.
*Remove the mount from the car.
*Push the insert into the new mount. Make sure to coat the entire insert in lithium grease of CV joint grease. In addition to making it easier to push in, it will help prevent squeaking. Make sure to use both insert pieces as that small piece will hold the insert in place!
*Install new mount and tighten 18mm large bolts to 125nm (92.2 ft-lbs) and 15mm to 89nm (65.64 ft-lbs).
*Release jack to allow transmission to sit at correct height.
*Reinstall black plate and tighten bolts. Again, you may need two people if you haven't removed the airbox to get the plate in the correct position.
*Reinstall battery tray with bolts and reconnect ECU connectors.
*Reinstall battery and plug ECU connectors back in.
*Reinstall battery tie-down.
*Reinstall induction hose and plug MAF sensor back in.
*Reinstall battery connectors.
*Enjoy your new mount!
Here is a video that will show you how to remove the battery tray and induction hose: https://www.youtube.com/watch?v=F6Ju0TxeWMI&t=109s&index=4&list=WL
I hope this helps. Removing the ECU connectors, battery tray, and black plate are the most difficult part.
Last edited:
Hi Jeff,
I could not have said it any better myself. Those are my thoughts EXACTLY!
Here is the part #: C1BZ-6068-C
It is known as an upper bracket. I got it from Gaudin Ford in Vegas. They had the cheapest part+shipping price. You might ping Steve@tasca who is a vendor on this forum and see what he can do for you. You're in GA so I am guessing shipping is going to be different for you than for me in PDX.
Here is what you have to do......
Thanks again!
Another question. Obviously these inserts remove much of the stock flex and give a performance advantage. But do they also take load off the stock mount rubber? I recently blew a right-side mount and was planning on installing the inserts to beef the stock mounts. But if all the engine forces still pass through the original rubber, perhaps these inserts aren't actually protective of the OE mounts.
Another question. Obviously these inserts remove much of the stock flex and give a performance advantage. But do they also take load off the stock mount rubber? I recently blew a right-side mount and was planning on installing the inserts to beef the stock mounts. But if all the engine forces still pass through the original rubber, perhaps these inserts aren't actually protective of the OE mounts.
Got my driver's side mount insert installed today, along with some Boomba shifter plate bushings...was in the same area, what the heck.
Install took 90 minutes for both mods start to finish. Definitely remove the airbox, it only takes a second and you have much more room to work. This install is pretty straight forward, and dude provided a walk through a few posts back. Main thing as he said is be careful with the ECU plug-ins. And don't drop your ECU.
Some report codes after unplugging/re-plugging, but I didn't get one. You will need to reset your driver's side window auto-up. Just put it down, raise it up, then hold and you'll feel a gentle click in the button, you're good.
Impressions....very nice. Subtle, and since I'd already done the passenger side there was minimal gain here. But still it helped. If you do this mod you definitely need to do both sides along with inserts for the RMM or a full replacement RMM upgrade. There is a tiny bit more NVH but it's nothing bothersome, only a tiny (I installed the "street" mount vs. the firmer "race" mount). It's hard to tell realistically how this changed the car since I installed the solid tranny mount bushings at the same time, but between the two mods, which both lent to the same change/feel, the car feels great. You're more connected to the car, and you can feel it slightly, a bassy feeling all around. It's noticed most when releasing the clutch after a shift, when the car goes back into gear, there is less jerk, the car just goes. Same thing whether upshifting or downshifting. It makes the car feel faster because there's less play/movement. As I've said about other similar mods, it feels like the difference between running with loose shoelaces (no insert) vs. tightened shoelaces (insert added). More confidence, more connection, feels faster.
Interestingly, my stock mount was in near perfect condition. I suppose my grandma driving style is to blame.
If you're in the USA don't be confused by the install instructions, they're written as if the car is right hand drive so it's backwards.
Another interesting observation, I thought someone said earlier somewhere that the base Fiesta and ST had the same mounts. My mount was labelled "ST" which indicates otherwise......
Thanks to all for pioneering the install/review of this one....I'd count it an "A priority" mod, it will improve the feel of the car noticeably whether or not there are power upgrades. For what these cost it's a must-do upgrade IMHO.
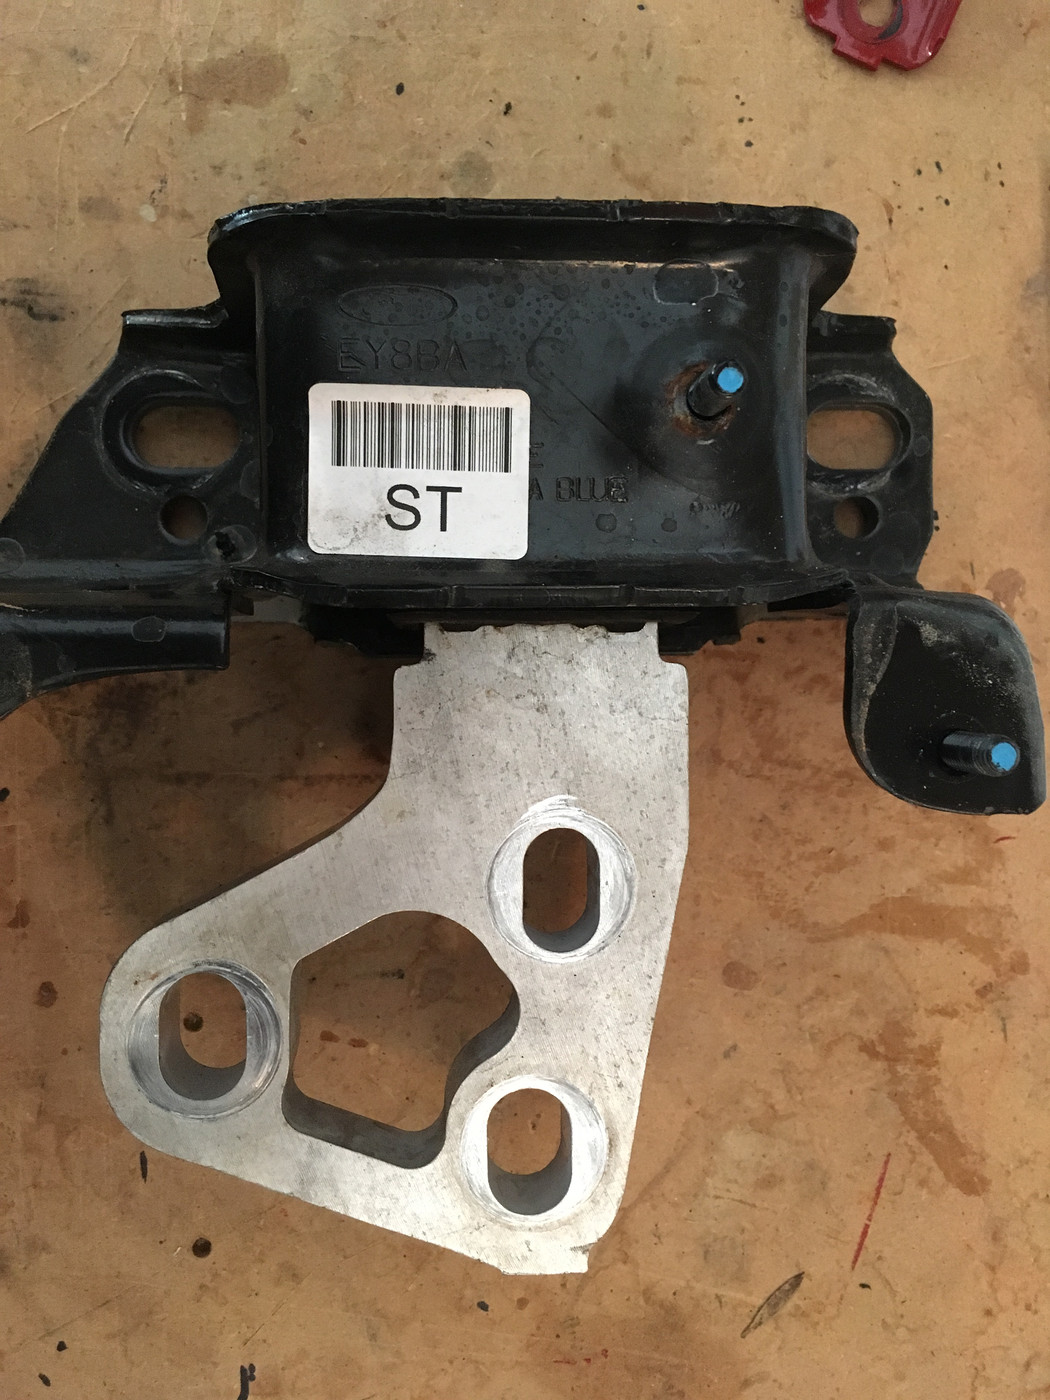
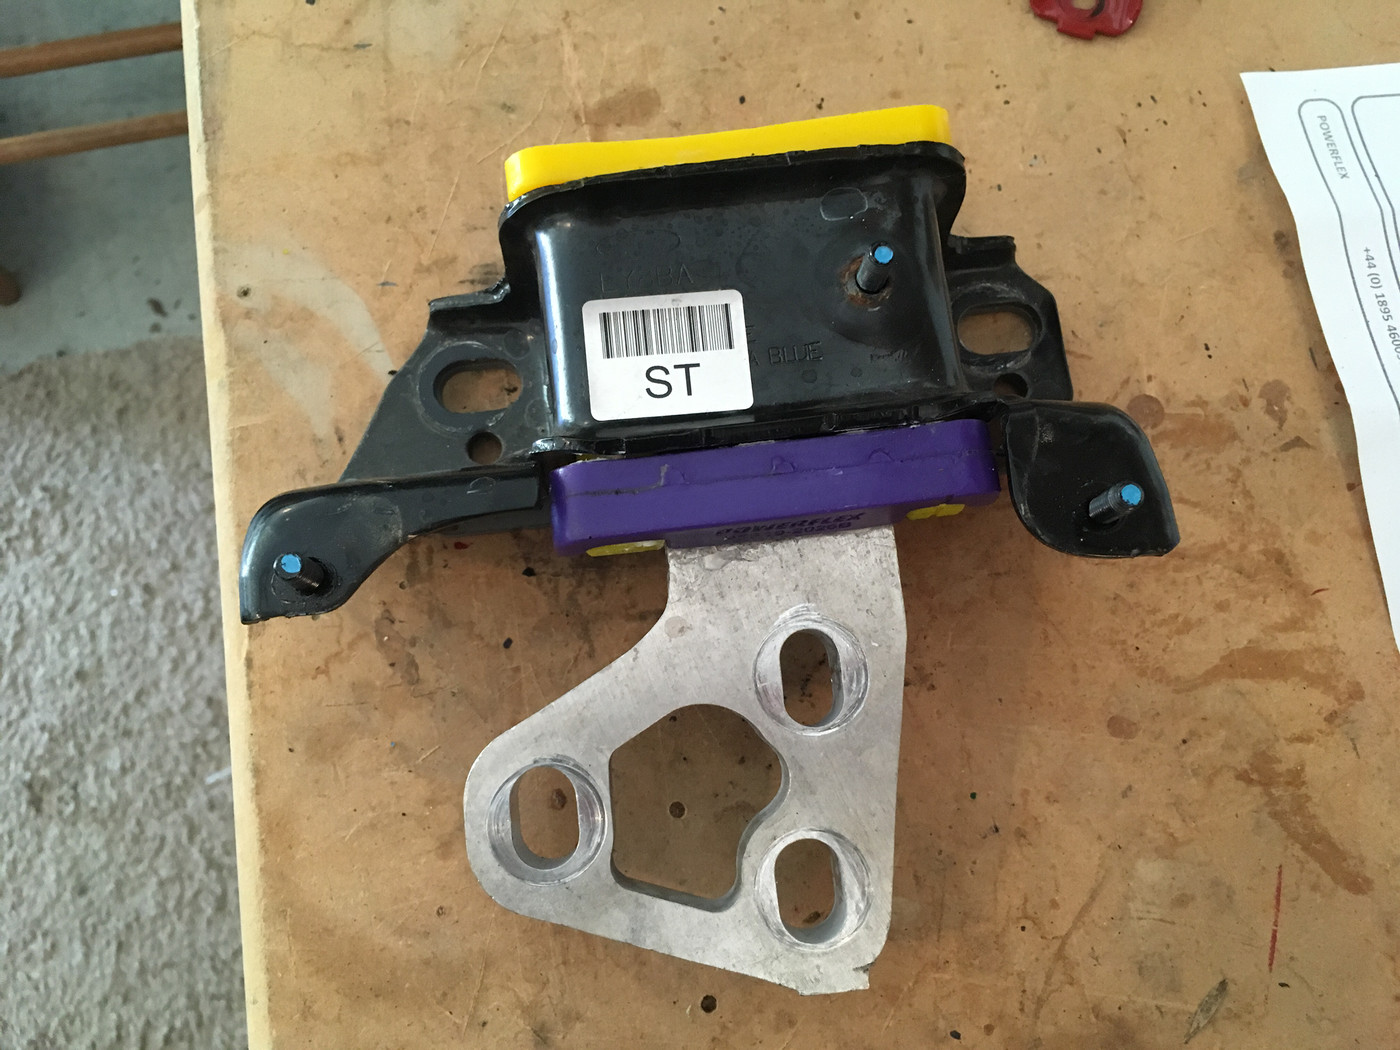
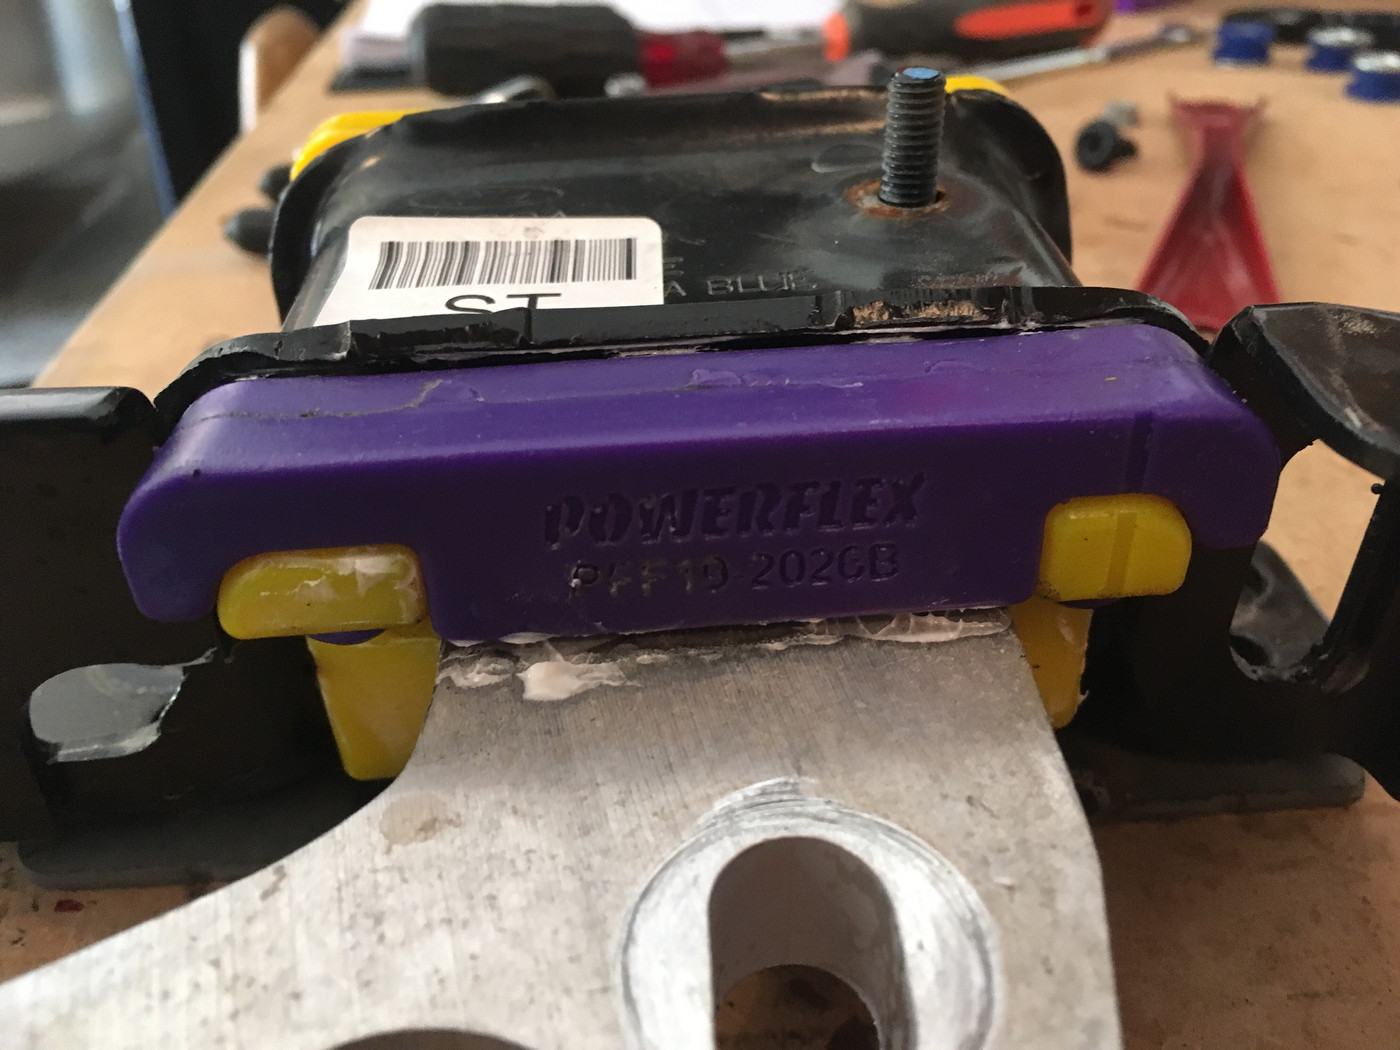
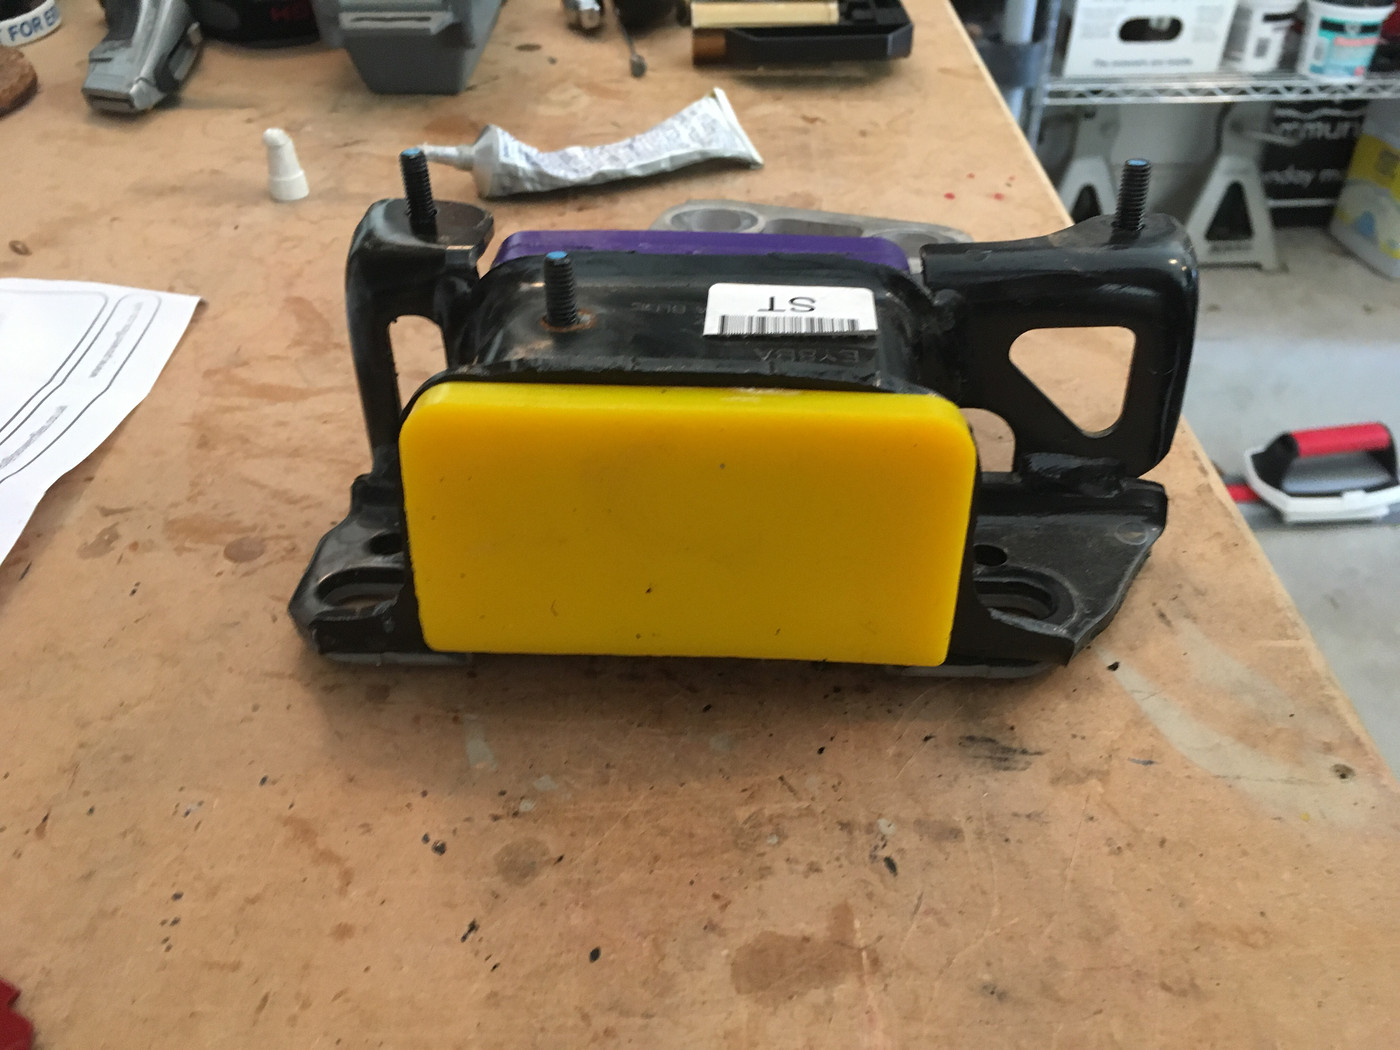
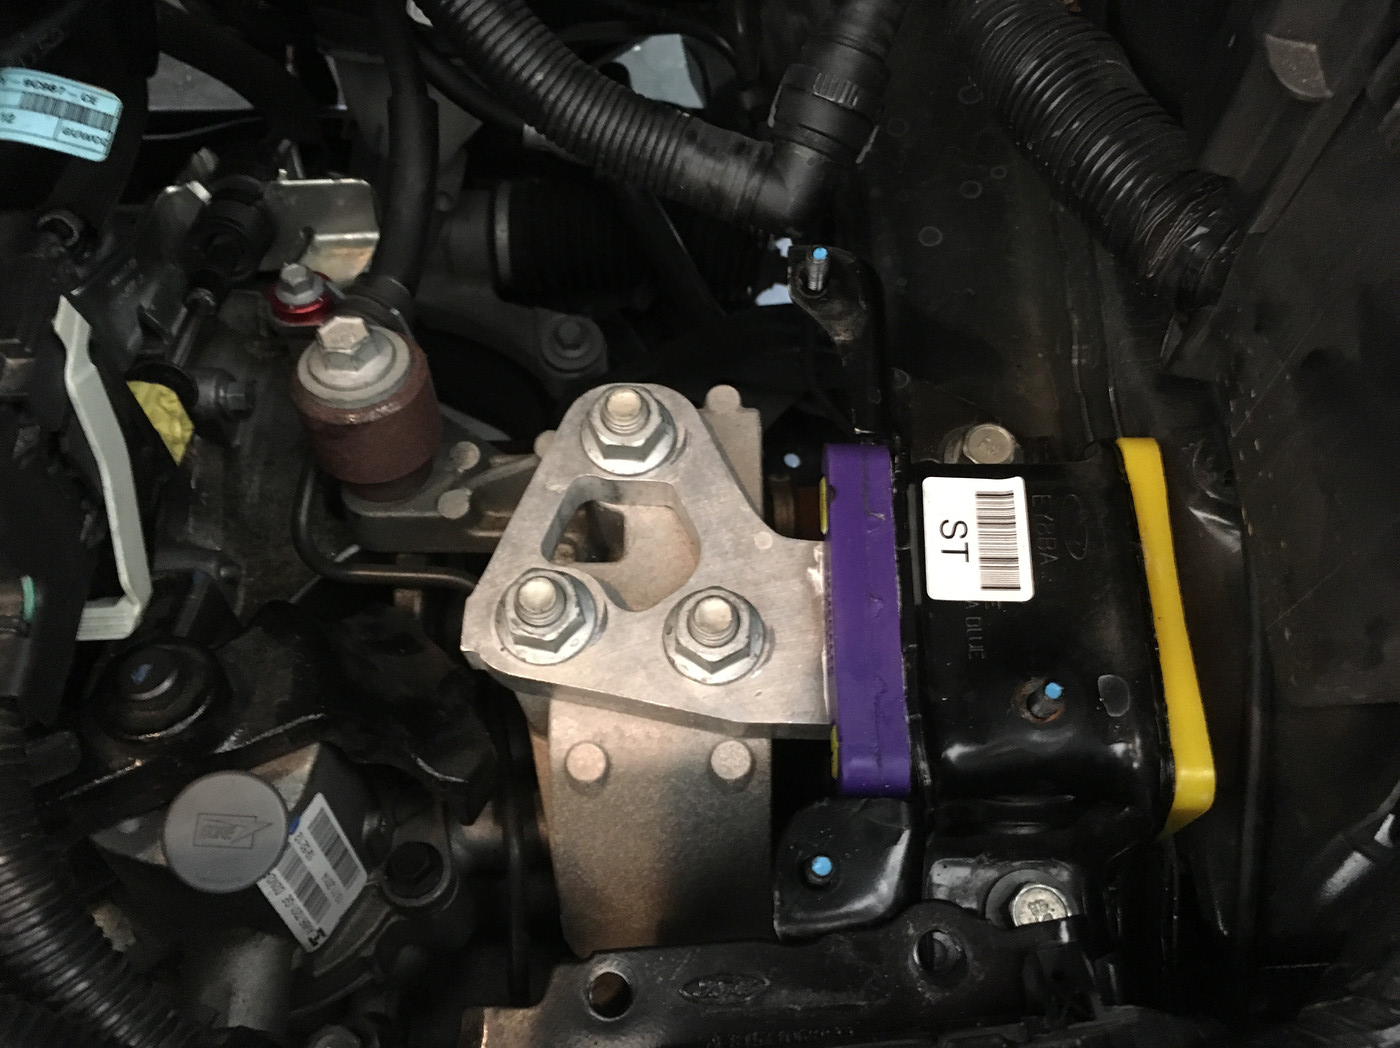


OK, sorry to be blunt, but can't figure out which ones I should order... I already have an RMM I like but ordered a traction bar and someone said these mounts help a lot. So problem is that Whoosh has the trans and upper front ones, gonna order those, and don't need the one for the factory RMM, but Powerflex shows an additional one that Whoosh doesn't carry that is $50.99 retail called "Lower engine large bushing"... is this just another more basic option to beef up the factory RMM or something else to consider?
https://powerflexusa.com/fordfiestamk70708-lowerenginemountlargeBushing-pff19-1521.aspx
https://powerflexusa.com/fordfiestamk70708-lowerenginemountlargeBushing-pff19-1521.aspx
street inserts for the sides are all you'll need along with the RMM you have. I would suggest adding the ARP pass side bolt upgrade
easy cure for a common issue
the link is basically the same as what we have listed for a rear motor mount insert except the one we stock can be adjusted by leaving out the inserts or adding them. When added the bushing is the same as the solid 1 piece
street inserts for the sides are all you'll need along with the RMM you have. I would suggest adding the ARP pass side bolt upgrade
easy cure for a common issue
street inserts for the sides are all you'll need along with the RMM you have. I would suggest adding the ARP pass side bolt upgrade
easy cure for a common issue
Edit: I see the complete passenger side mount but out of my price range for now anyway... So for sure doing the upper engine mount insert and the ARP pass side bolt for now, I wonder if the trans insert helps much.
Thanks Ron, love your great advice! So when you say sides, there is the one upper but then the transmission one? And I'll look at that ARP too, thanks again man!
Edit: I see the complete passenger side mount but out of my price range for now anyway... So for sure doing the upper engine mount insert and the ARP pass side bolt for now, I wonder if the trans insert helps much.
Edit: I see the complete passenger side mount but out of my price range for now anyway... So for sure doing the upper engine mount insert and the ARP pass side bolt for now, I wonder if the trans insert helps much.
usually a few weeks later most order the trans insert too
by far the most popular is the passenger side street insert w/ ARP bolt upgrade
usually a few weeks later most order the trans insert too
usually a few weeks later most order the trans insert too
Sent from my LG-H932 using Tapatalk
Huh, I can't find anything for the passenger side other than that very spendy complete mount, do you carry the passenger insert still? Also, I sent you an email about combined shipping after I made a separate order for the trans mount insert, that's three orders for you in a couple of days when I could have combined, sigh...
Sent from my LG-H932 using Tapatalk
Sent from my LG-H932 using Tapatalk
thank you for the orders
-Ron
$10 refunded for shipping
thank you for the orders
-Ron
thank you for the orders
-Ron
Similar threads
-
Advice on Powerflex inserts for transmission mount and passenger sode motor mount
- Started by jm2628
- Replies: 4
-
FS Powerflex passenger Front Upper Engine Mount Insert (street)
- Started by tri-pedaler
- Replies: 4
-
-
SLD ROUND 1: B6/Swift, SoCal Garage Works, Cobb AP, Pierce Motorsports, Whoosh, Mishimoto, Powerflex. MONTEREY, CA
- Started by Fiestig
- Replies: 25
-
Complete Powerflex motor mount bushing review
- Started by chevrier.kevin
- Replies: 11
-
SLD Powerflex Upper Motor mount bushing W/ ARP bolt replacement
- Started by TyphoonFiST
- Replies: 4
-
Pineapple slice review (Powerflex pass side motor mount insert)
- Started by Bonesaw
- Replies: 29
-
Powerflex bushings NOW available at whoosh motorsports
- Started by ron@whoosh
- Replies: 10
-
Powerflex Rear Motor Mount Bushing Inserts for Fiesta ST - Fix the RMM problem!
- Started by BlueBomber
- Replies: 17
