• Sign Up! To view all forums and unlock additional cool features

    Welcome to the #1 Fiesta ST Forum and Fiesta ST community dedicated to Fiesta ST owners and enthusiasts. Register for an account, it's free and it's easy, so don't hesitate to join the Fiesta ST Forum today!


Really Should Stop Modifying my Daily Driver into a Track Car

OP
Fusion Works

Fusion Works

Active member
Premium Account
Messages
723
Likes
959
Location
Huntsville, AL, USA
Thread Starter #87

Made up an adjustable front end link. Only need one to remove the preload at ride height. Its pretty but I ended up dropping the other front link Sunday at Barber to try and stop the inside front wheel from spinning on corner exit.


M-Sport fan

9000 Post Club
Messages
14,431
Likes
6,988
Location
Princeton, N.J.
#88
That's a work of art! [thumb]

But for any street use at least, I'd be wary of those spherical bearing rod ends knocking like jackhammers over shitty roads. [:(]


OP
Fusion Works

Fusion Works

Active member
Premium Account
Messages
723
Likes
959
Location
Huntsville, AL, USA
Thread Starter #89
You have to use quality rod ends. I tend to stick with teflon lined FK rod ends and they don't make noise. Of course my bar is still disconnected. LOL. Car feels nice with no front bar.


OP
Fusion Works

Fusion Works

Active member
Premium Account
Messages
723
Likes
959
Location
Huntsville, AL, USA
Thread Starter #90
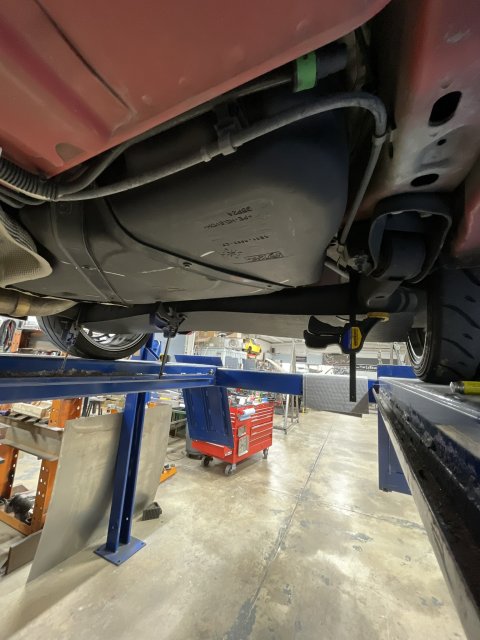
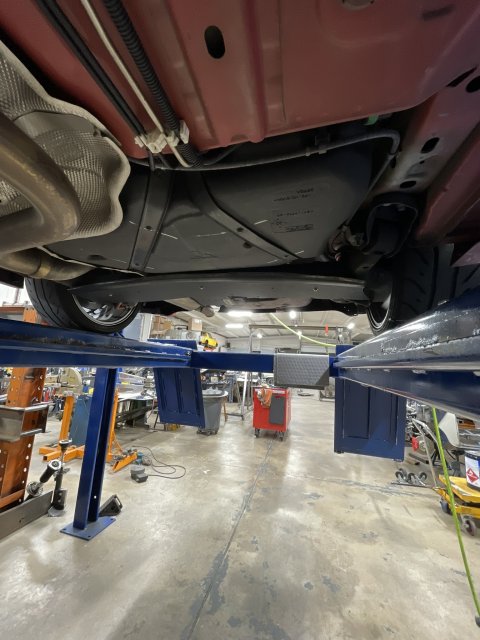
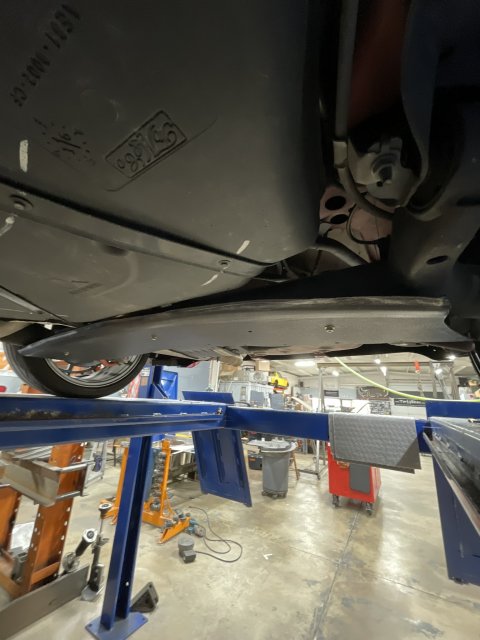
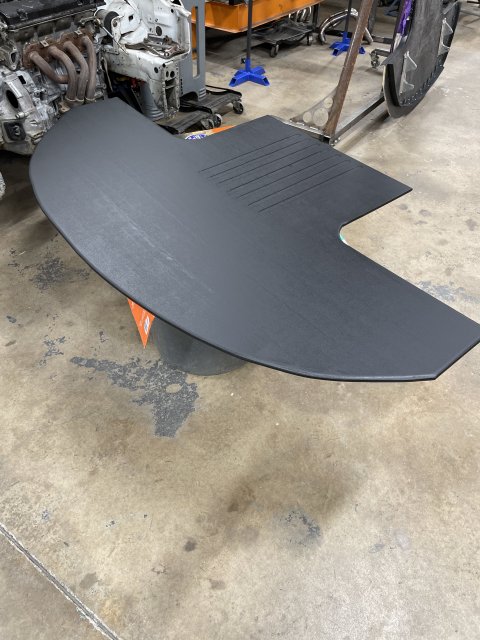
Been working on some aero improvements leasing up to Barber later this month. The rear beam is an upside down U shaped stamping with a bunch of sharp turbulence causing edges. For many years I have kicked around the idea of a close out type panel, but never wanted to make it out aluminum. So today I tried out a bit of plastic forming and made a panel to close out the bottom of the beam. The front edge is up turned in a nice smooth bull nose and the rear flicks up slightly to transition into the rear splitter later in life.
71046364349__B63382A4-1A6F-486F-A0F0-935069F0596F.JPEG
71285359187__D0F3DD84-E4CA-4A6B-8EA7-82645B36B190.JPEG 71285361031__B84E1316-2458-402D-BBC4-063931F56803.JPEG
I used a recycled piece of ABS plastic I pulled off my truck. Had a deep airdam on my pickup truck and decided to tone it down from 11 for a little better ground clearance. I think I have the process down to replicate it. Now I need to get some stainless hardware in a low profile format and make it permanent.


OP
Fusion Works

Fusion Works

Active member
Premium Account
Messages
723
Likes
959
Location
Huntsville, AL, USA
Thread Starter #91
Also started planning out the new 5in deep splitter to meet the SCCA TT regs. My last splitter was 3in but the Grid Life Staff made me hack it up in the paddock of Barber last month as our interpretations of 3in were in conflict. :(

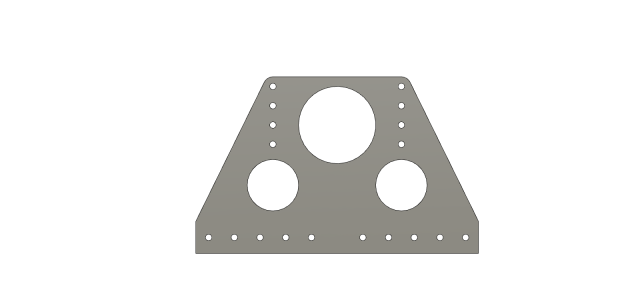
I mentioned building some making some new splitter brackets and started a thread to see if anyone was interested, but apparently I have run afoul of one of the moderators interpretation of "for sale". I drew up the new brackets and think I am going to give Send Cut Send a shot at making them, I need four, but I know there are some other track guys out there that might want some as well.
Splitter mounting bracket V6 v1.png
This will allow me some adjust-ability and it makes the splitter easy to remove. Like my current brackets, I just hold this in with two .250 stainless spring pins per side and a pair of bolts in the rear on the subframe. IMG_1382.JPG
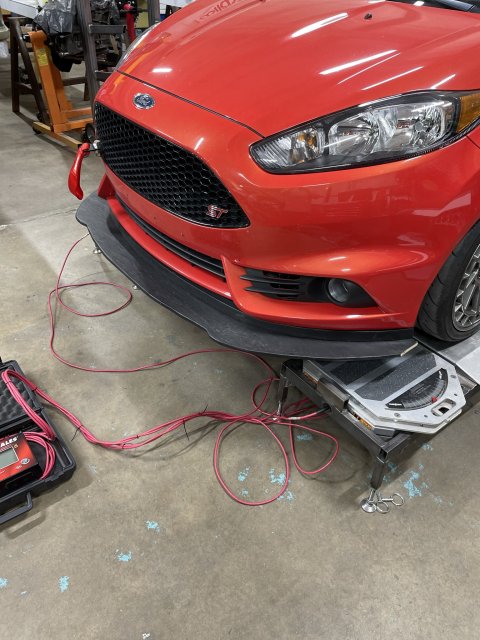
The new splitter is.500in marine grade plywood, the current one and the one pictured is .625 regular plywood. Its been bomb proof if not a bit heavy. The whole shebang weighs 20lbs, so hoping the new version will drop some weight off the nose. Plus putting it closer to the ground should make more negative lift. 70801249838__C45E928D-A8E1-4092-ACB9-DAD3BD52A847.JPEG


OP
Fusion Works

Fusion Works

Active member
Premium Account
Messages
723
Likes
959
Location
Huntsville, AL, USA
Thread Starter #92
Along side all these other things, Yes I am like a squirrel and work on a half dozen things at a time, been looking into some rear beam locating collars. My beam and Woods247 beam have shifted a couple of times on track and while I know why mine did, (its in the avatar pic), Matt's probably did it under normal track usage. I ask one of the Bspec prep shops if they had seen the issue and they hadn't. Oh well, on with my own path.

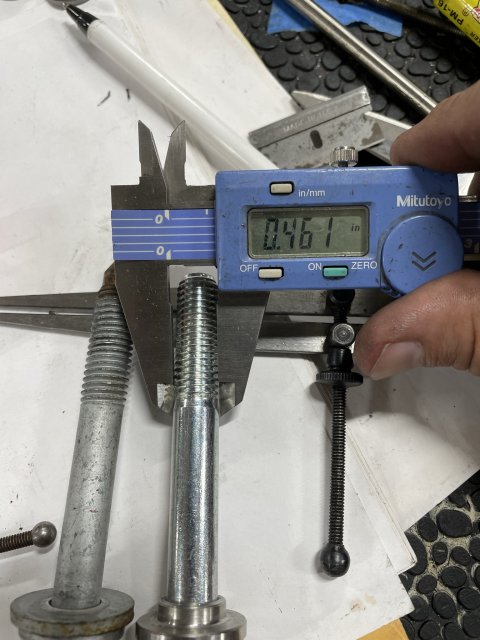
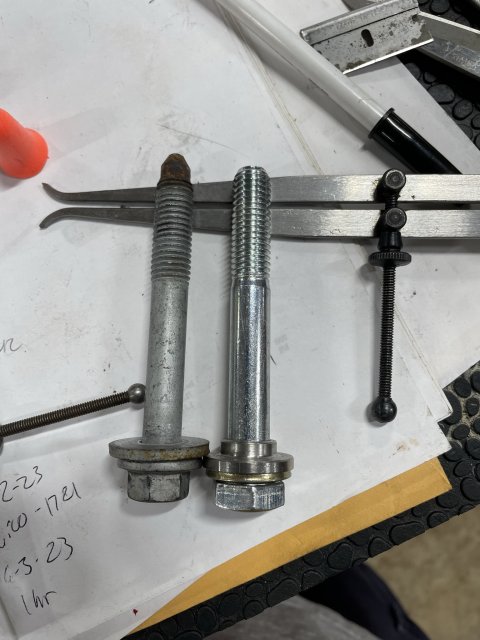
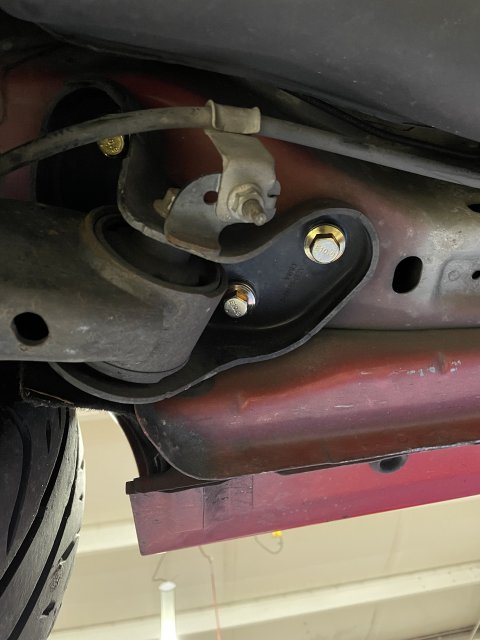
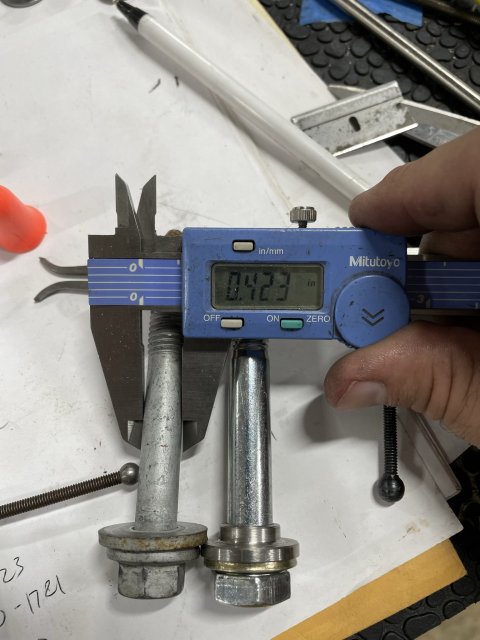
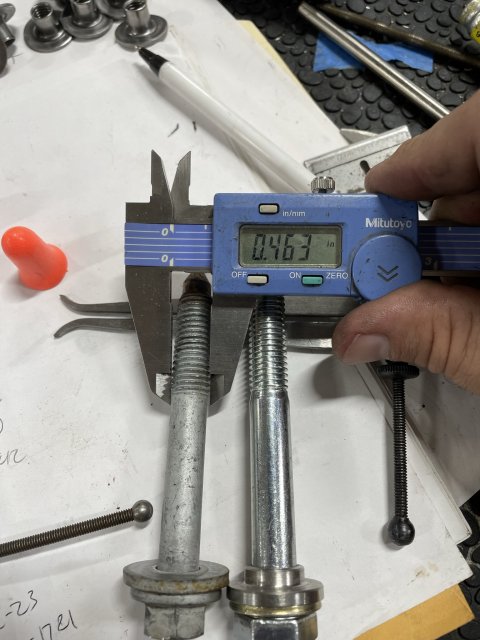
The OE bolts are a stupid design. Must have been cheap for Ford to make them this way, but damn its a dumb way to lock something down that needs to stay in place.
IMG_2985.JPEG
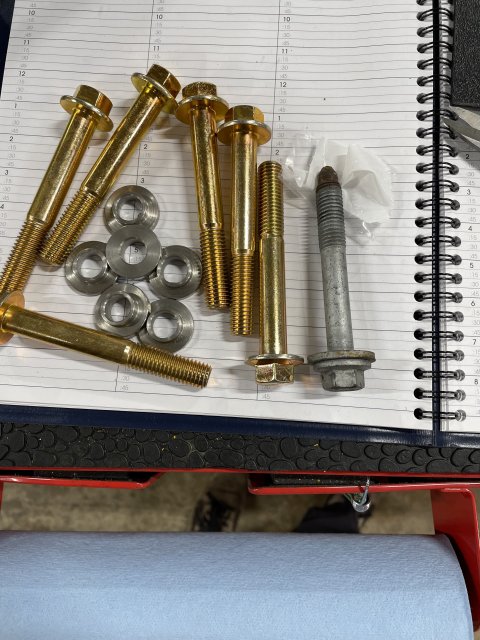
Notice how the shank on this bolt is smaller than the threads. The hole in the body and the whole in the beam mounting points are 33% larger than the bolt shank. WTF Ford. How hard would it have been to make the shank larger and thus get the subframe located better? Pretty sure the front bolts do a much better job of this. Ford did a nice job with the washer, I think they are trying to rely on the friction created by the washer to keep things from sliding. Probably more than fine in normal operation, but not bouncing over curbs at RA and Barber.
IMG_2986.JPEG

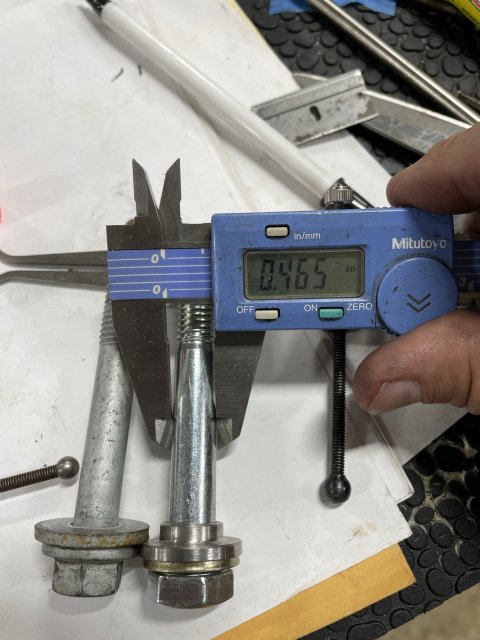
This is just a regular grade 12mm 8.8 bolt I had laying around. Notice how the shank has a much larger diameter than the threads. This is beneficial in that it gives more bearing area for my locking collars to push against and it makes the bolt stronger. I am gonna order some grade 10.9s (equivalent to OE hardware) and change all of the OE bolts when I finish the collars.
IMG_2987.JPEG
IMG_2988.JPEG

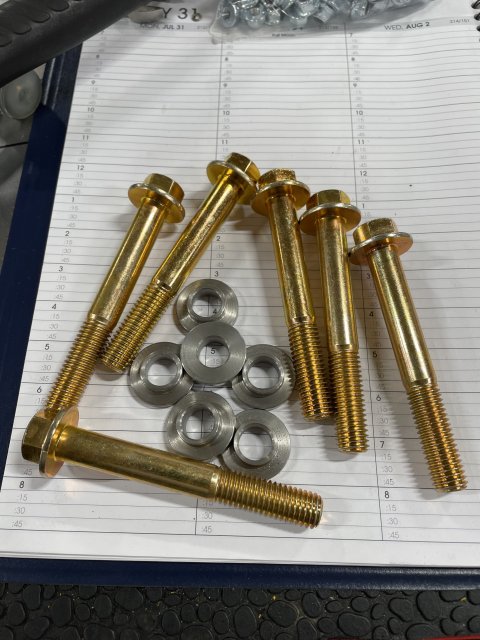
I noticed someone on the Fecebook group is making them, but they made theirs out of aluminum. I don't need to tell you why that is a poor choice of materials in this case. The sample I made up this evening is 303 stainless. Its plenty strong enough and will resists corrosion better.

I am debating whether I need all three holes to have these or if I only need them on two holes per side. Theoretically once the bolts and collars are tightened into place, all of the holes may not allow for collars to line up correctly. Will have to check that as I get into it. I may find that not all of the bolt holes in the beam mounts line up enough to put the collars in all of the holes, but having the collars in will work better than the current arrangement.


Attachments

Erick_V

Active member
Messages
768
Likes
900
Location
Texas
#93
Been working on some aero improvements leasing up to Barber later this month. The rear beam is an upside down U shaped stamping with a bunch of sharp turbulence causing edges. For many years I have kicked around the idea of a close out type panel, but never wanted to make it out aluminum. So today I tried out a bit of plastic forming and made a panel to close out the bottom of the beam. The front edge is up turned in a nice smooth bull nose and the rear flicks up slightly to transition into the rear splitter later in life.
I used a recycled piece of ABS plastic I pulled off my truck. Had a deep airdam on my pickup truck and decided to tone it down from 11 for a little better ground clearance. I think I have the process down to replicate it. Now I need to get some stainless hardware in a low profile format and make it permanent.
I've always thought about this. As much as I love the Verus rear diffuser it doesn't go past the rear beam, which I feel (in my head at least) would have flow disrupted by the torsion bar as that's always moving. Will that mod pass SCCA TT regs for your class? I only ask because I want to eventually compete in Gridlife for their Club TR class and the rear diffuser can't go past the centerpoint of the wheels, same for the front splitter.


OP
Fusion Works

Fusion Works

Active member
Premium Account
Messages
723
Likes
959
Location
Huntsville, AL, USA
Thread Starter #94
In theory the cover may not be "legal". There is technically a gap between the "diffuser" and the axle panel though. But the diffuser really needs to go to the end of the fuel vapor canister. Pretty sure that would make it illegal. I am not shooting for any championships or anything like that. (As my miserable driving last month at Barber suggests)

I was eye balling diffuser dimensions this afternoon. HMMMM


OP
Fusion Works

Fusion Works

Active member
Premium Account
Messages
723
Likes
959
Location
Huntsville, AL, USA
Thread Starter #95
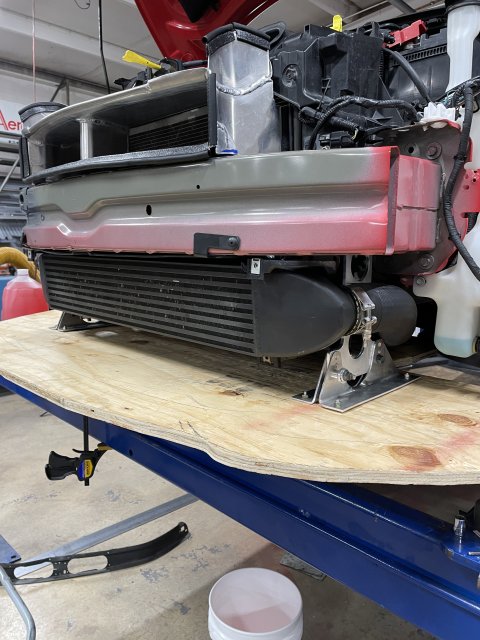
While I was under the car today staring at things, (yes this gets me in trouble a lot), I decided to do something about the trans tunnel brace/exhaust hanger support bracket. This is the brace that comes with the Thermal 3in exhaust system. Its just .250in thick aluminum plate bent to shape. I never liked that it hung down in the air stream and just had sharp square edges all over the place.


I happened to have some oval tubing that I hoarded and this seemed like a good use for a bit of it. I cut and fit the tubing over the leading edge of the tunnel brace.


This should clean up the air flow across this stupid thing.

Then I came in on the back edge and turned it into a tapered edge top and bottom. this should help fair the air in smoothly.


I am working on some spats to mount to the trailing edge of the rocker panels. Should help clean up the air around the rear wheel wells. No pics yet, but I did remove one rocker panel to replace a few clips and re-secure it. Turns out the glue and foam were holding just fine, there were a couple of clips that were broken.

Also finished up a set of rear beam mounting collars in 303 stainless. Have to wait until the bolts show up next week to install them.


Jabbit

2000 Post Club
Messages
2,244
Likes
2,902
Location
New England
#98
OP
Fusion Works

Fusion Works

Active member
Premium Account
Messages
723
Likes
959
Location
Huntsville, AL, USA
Thread Starter #99
Next week? Have to make a new set of bushings and get more bolts.
Has your beam shifted before?


Top