Thread Starter
#61
Thread Starter
#61
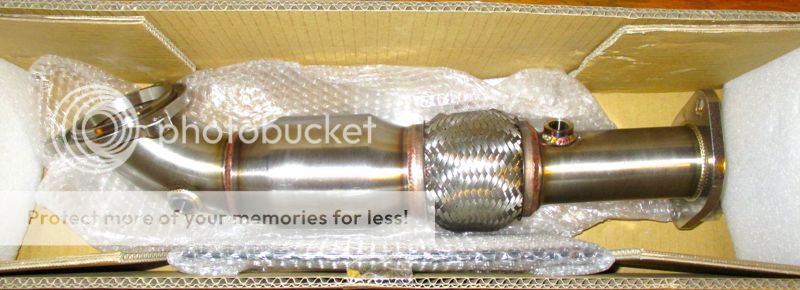
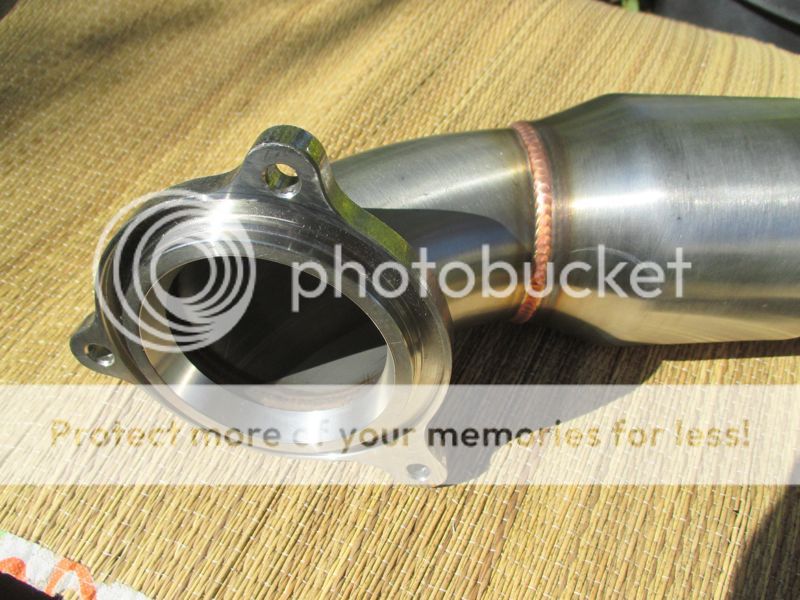
The Cobb downpipe is so pretty, too bad it won't be seen.
The intercooler swap was painless. I changed 2 factory bolts for some plastic supports for peace of mind.
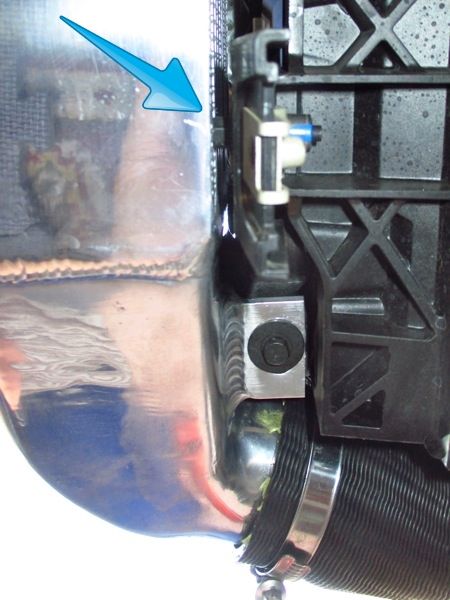
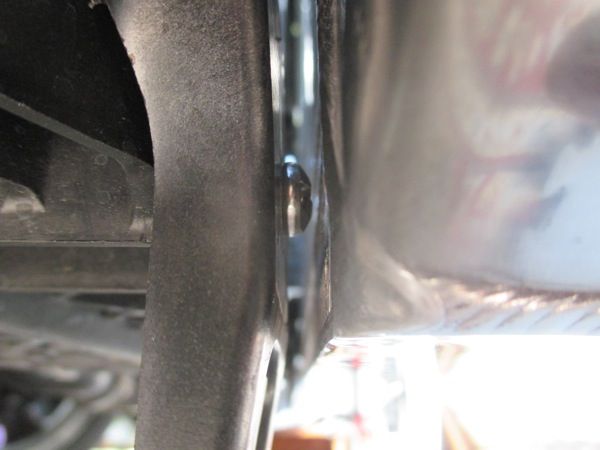
Here's a shot of the OEM bolt and the clearance with the Airtec intercooler. It fits fine and I don't think there would ever be an issue, as everything is solid and does not move.
Here's the bolt, there's one on each side.
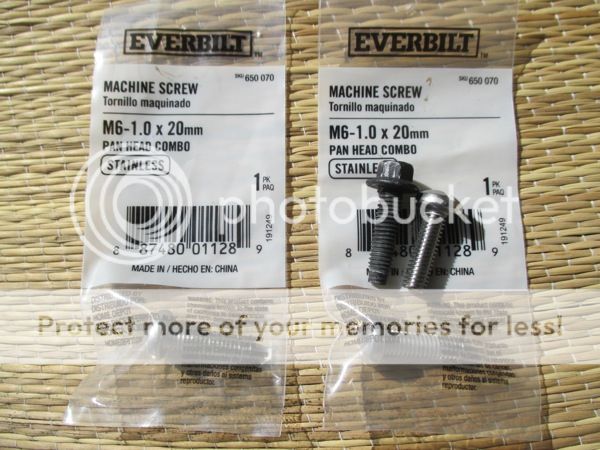
Here's what I replaced them with, they offer a tiny bit more clearance and not abrasive should contact ever occur. Bolts are from Home Depot.
Here's the clearance with the pan head bolt.
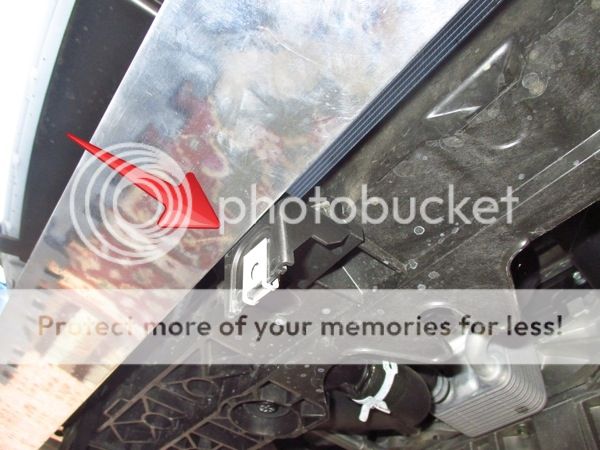
And here a shot of the center cradle mount that is removed due to the interference with the intercooler as depicted. Ideally the intercooler would be on top of the mount. It is possible to trim the mount to accommodate the intercooler if one chooses. This mount is not for the intercooler, it's for the plastic tray underneath. There's 2 other mounts that still support it fine.
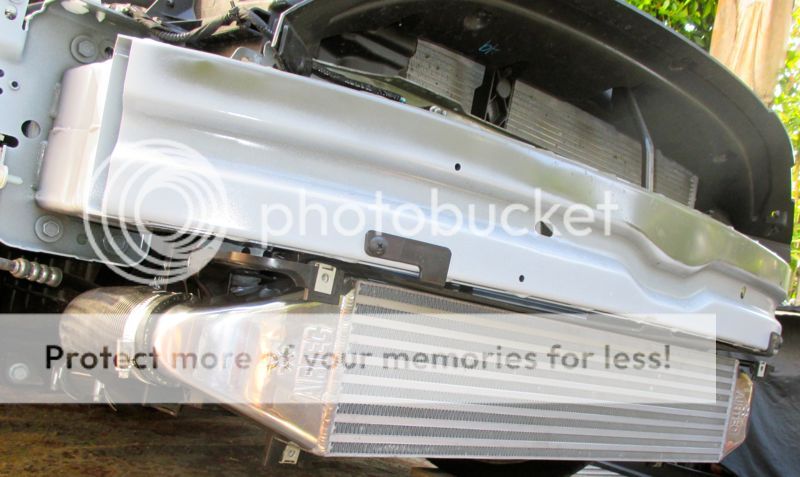
the intercooler fitted and finished.
Stage 3 is awesome! Holly Mollie it rips now, what a difference from stock. The car is a total sleeper now. The intercooler can't be seen and the cat-back is still stock. To the unaware it looks totally stock. When the honeymoon wears off I may slip in an ATP turbo kit or other similar option that becomes available.
I finished up the down pipe installation today, which was over the course of several days whenever I could get time to wrench on it. There's an appreciation for doing the job myself, but if I didn't have the time or inclination to install it myself I'd pay the $200 I've read that some are paying to have it installed. The first time is always the longest, now that I've done it I can cut the time in half.
From the get go I was determined to pull the stock down pipe from the bottom. I knew it could be done from others who have done it, but no one really showed how. After spending about 15 minutes trying to figure out how to squeeze the down pipe out, bingo it comes out. It literally fell out with ease. I found the issue to be the 2 studs for the bracket that attached to the rear torque mount. The studs take up space. Several aftermarket down pipes have done away with these studs altogether making it easier to remove and install from the the bottom.
Here's a tip for anyone looking to remove the OEM down pipe from the bottom, drop the cat-back to get it out of the way and make sure the heat shield is off the converter, once the studs are over the power steering and front sway bar, position the 2 studs towards the driver side and pull the down pipe out.
Here's a shot of the 2 studs and the position the down pipe is in that allow it to come out from the bottom. It will fall right out without much effort, easy enough for me to put it back in and snap a shot of it.
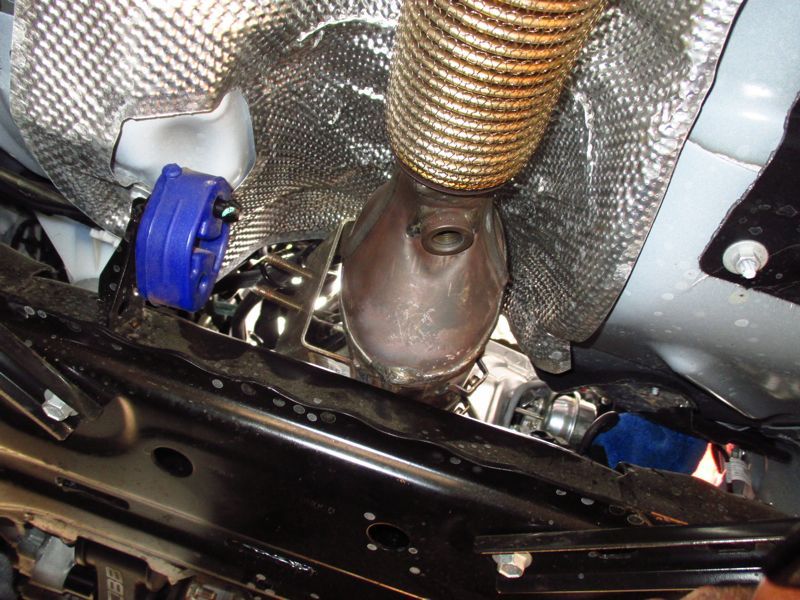
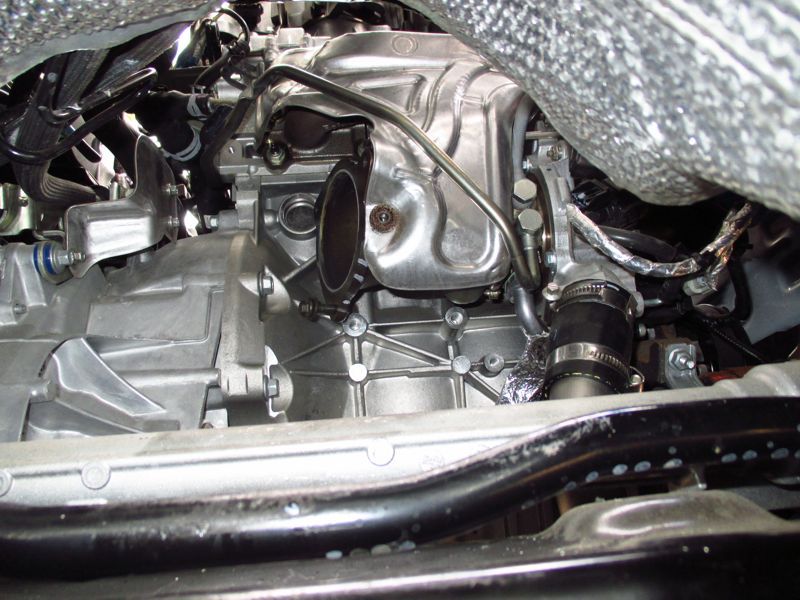
Down the tunnel with the down pipe removed.
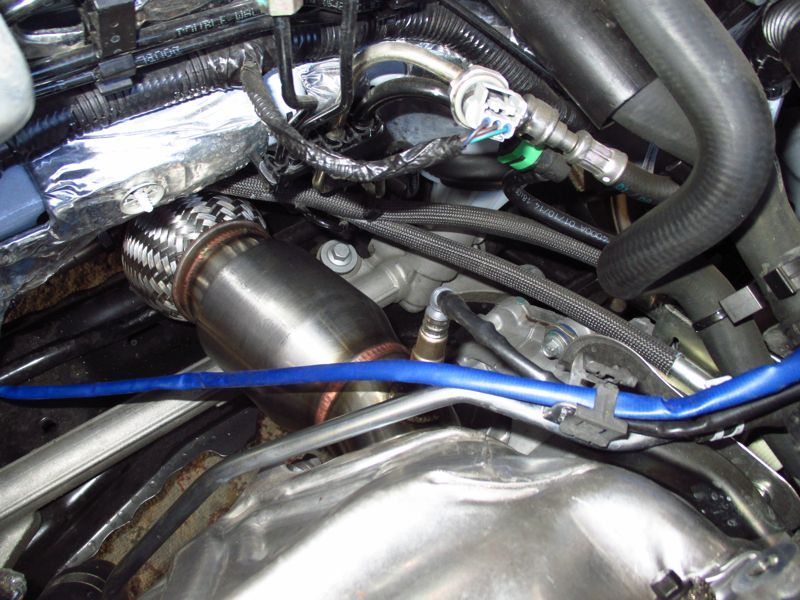
Cobb down pipe bolted in. Installing it was a breeze, since it's a lighter slimmer package sans studs compared to the stock unit. Installation is much easier without the bracket provisions. The bracket is on the OEM down pipe to help support it's weight. It's heavy compared to the Cobb unit, which does away with the bracket. Stock down pipe is 11lbs. Cobb is 7lbs. Also note that the OEM down pipe has notches on down pipe flange to turbo. This is to allow you to hang it on to the bolts during installation because of it's weight, making it a one man job and not two to thread the bolts in.


The intercooler swap was painless. I changed 2 factory bolts for some plastic supports for peace of mind.
Here's a shot of the OEM bolt and the clearance with the Airtec intercooler. It fits fine and I don't think there would ever be an issue, as everything is solid and does not move.
Here's the bolt, there's one on each side.

Here's what I replaced them with, they offer a tiny bit more clearance and not abrasive should contact ever occur. Bolts are from Home Depot.

Here's the clearance with the pan head bolt.

And here a shot of the center cradle mount that is removed due to the interference with the intercooler as depicted. Ideally the intercooler would be on top of the mount. It is possible to trim the mount to accommodate the intercooler if one chooses. This mount is not for the intercooler, it's for the plastic tray underneath. There's 2 other mounts that still support it fine.

the intercooler fitted and finished.

Stage 3 is awesome! Holly Mollie it rips now, what a difference from stock. The car is a total sleeper now. The intercooler can't be seen and the cat-back is still stock. To the unaware it looks totally stock. When the honeymoon wears off I may slip in an ATP turbo kit or other similar option that becomes available.
I finished up the down pipe installation today, which was over the course of several days whenever I could get time to wrench on it. There's an appreciation for doing the job myself, but if I didn't have the time or inclination to install it myself I'd pay the $200 I've read that some are paying to have it installed. The first time is always the longest, now that I've done it I can cut the time in half.
From the get go I was determined to pull the stock down pipe from the bottom. I knew it could be done from others who have done it, but no one really showed how. After spending about 15 minutes trying to figure out how to squeeze the down pipe out, bingo it comes out. It literally fell out with ease. I found the issue to be the 2 studs for the bracket that attached to the rear torque mount. The studs take up space. Several aftermarket down pipes have done away with these studs altogether making it easier to remove and install from the the bottom.
Here's a tip for anyone looking to remove the OEM down pipe from the bottom, drop the cat-back to get it out of the way and make sure the heat shield is off the converter, once the studs are over the power steering and front sway bar, position the 2 studs towards the driver side and pull the down pipe out.
Here's a shot of the 2 studs and the position the down pipe is in that allow it to come out from the bottom. It will fall right out without much effort, easy enough for me to put it back in and snap a shot of it.

Down the tunnel with the down pipe removed.

Cobb down pipe bolted in. Installing it was a breeze, since it's a lighter slimmer package sans studs compared to the stock unit. Installation is much easier without the bracket provisions. The bracket is on the OEM down pipe to help support it's weight. It's heavy compared to the Cobb unit, which does away with the bracket. Stock down pipe is 11lbs. Cobb is 7lbs. Also note that the OEM down pipe has notches on down pipe flange to turbo. This is to allow you to hang it on to the bolts during installation because of it's weight, making it a one man job and not two to thread the bolts in.

Last edited:
