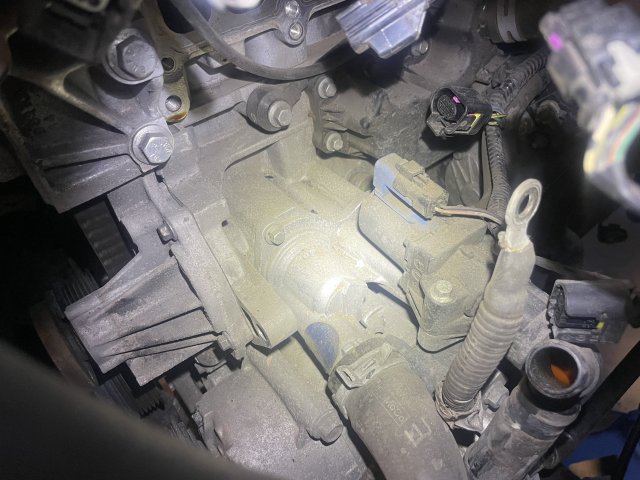
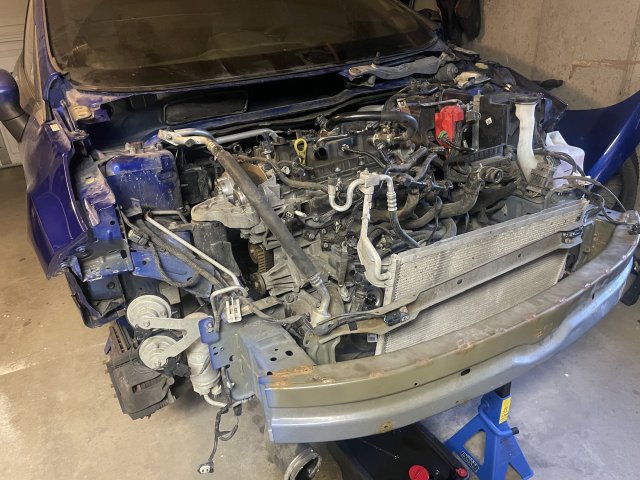
I also did the timing belt over the last weekend and here are my thoughts on the process.
Here are exact the kits that I used :
Gates timing belt kit (one note on this. Inspect carefully the contents of the kit as soon as you receive it. I had a broken impeller from the water pump, but I only checked it 101 days after receiving it, so I could not ask for a replacement. I had to order
THIS kit with rush delivery)
Gates serpentine belt kit
DPTOOL Timing tool kit
(I've seen comments on this thread about the quality of these kits. The DPTOOL kit was of good quality, I recommend it.)
And here are the extra OEM parts I ordered :
Water pump screws (6)
Water pump pulley
Water pump pulley bolts (4)
(I anticipated a rusted water pump pulley, but I was pleasantly surprised. The original one was in good condition, I could have reused it.) But I do recommend new water pump screws, with the pre-applied thread sealant. Make sure to follow the torquing sequence!!
Be prepared, you need to remove the intake manifold, the alternator, the starter motor, the engine mount, the serpentine belt and all accessories connected to it. Naturally, you need a jack to support the engine while you have the engine mount removed. I would highly suggest removing the passenger-side light and the coolant reservoir. You'll have to drain the coolant anyways, because you'll be changing the water pump and it'll gush out even though you drained the radiator. You need to remove the passenger side wheel, so you'll probably have to have the car on jack stands.
I had four ''issues'' during the process, which I'll detail below. I also did one thing differently than ALL of the guides, that most likely saved me hours of fiddling (hint, I did not need to unbolt the axle carrier). I'll detail this below as well.
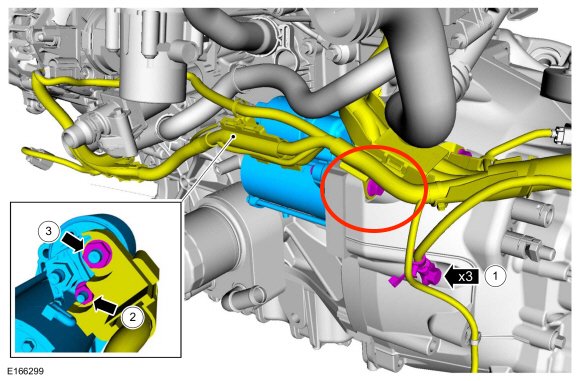
Issue 1 : Starter motor bolts
I had an extremely hard time undoing the bolts from the starter motor, especially the smaller one, which is hidden behind a very stiff portion of the wiring loom. I had to remove the cold-side pipe after the intercooler to get good access to it. Even still, it took me a good hour of swearing with 13mm sockets and swivel adapters. I was only able to reach this bolt from under the car.
Issue 2 : Main pulley stuck
Like
@jtl , my crankshaft pulley was stuck. I had to use a puller to remove it. By his account, I was very scared of damaging it and being stranded. It is a 91$ part too.
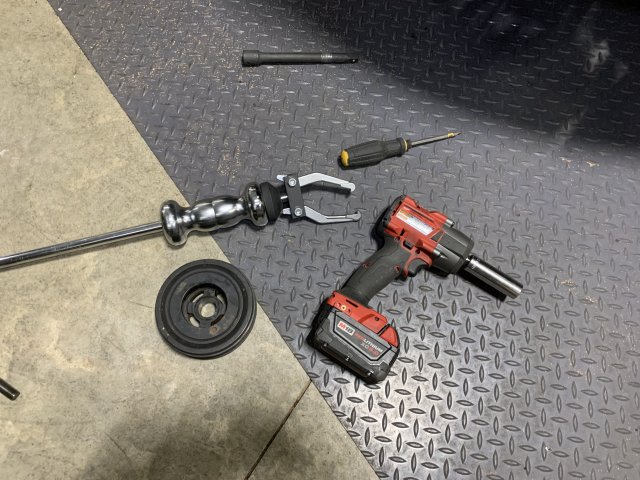
So I used a puller just like this. I took my time and only took small impact to it, and it immediately started to budge. I took a good 5 minutes of whacking carefully and I was able to remove it with no damage. As you can see, I impacted the main bolt (which is a throwaway, don't reuse).
Now, you may be surprised to know that the main pulley and the crankshaft sprocket are not keyed. That's right, they are at best sliding fit items on the crankshaft! The only thing keeping this engine timed is the tension applied from the torque to yield crank bolt clamping down both the main pulley and the sprocket. This is important for issue #3.
Issue 3 : Pulley alignment tool
You need to remove the crank angle sensor to install a special tool to precisely place the crankshaft pulley.
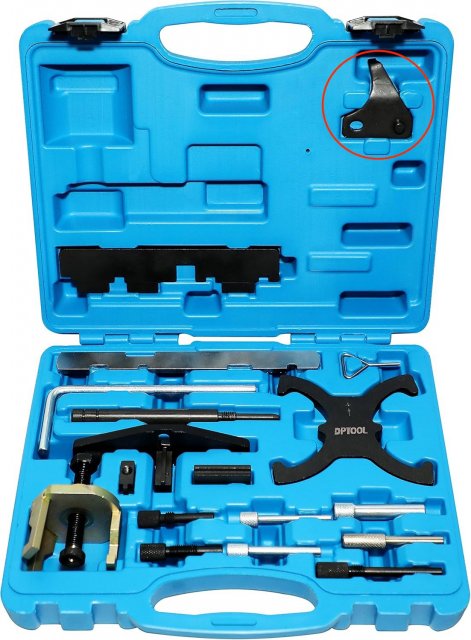
This tool needs to be inserted below.
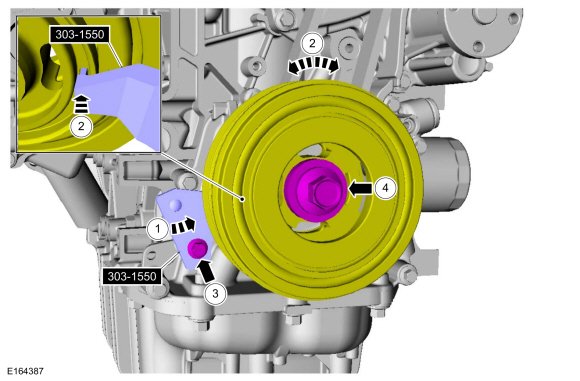
Once you have torqued the bolt in place, the manual simply tells you to unbolt the tool and slide it out. However, this is **not** possible. The tool is first inserted into a hole and then placed over a hollow cylinder where the sensor was located upon. Check the bellow image for reference.
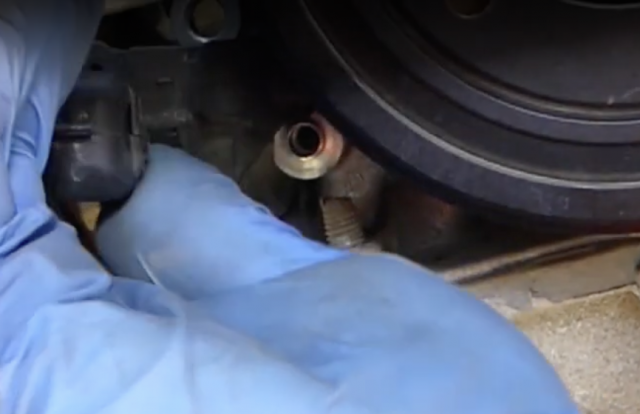
Even with the bolt removed, in this configuration, you can't even budge the tool. What I had to do was crush this small cylinder inwards with a flathead screwdriver to be able to rotate out and wiggle out the tool.
Once I had the tool removed, I deformed back this cylinder to be able to accept a screw, but it was still damaged by doing so. The crank angle sensor went in fine, and it did not affect anything else.
Issue 4 : Belt cover rubbing
Final issue was the only one I consider to be a user error. I completed the timing belt change and went in to start the engine, only to hear a distinct rubber on rubber rubbing sound. It went up with RPMs and really sounded like a belt was rubbing one something. There are only two belts, the serpentine and the timing belt. The serpentine belt looked great, so I had to partially disassemble the engine mount, the whole serpentine belt and tensioner plus the cover to get to the timing belt. Once I got to it, it was clear.

This portion was the culprit. (The yellow rubber portion of the timing belt cover). I had re-installed this part wrong, and it was pinched inwards and touching the timing belt. I suggest paying special attention to this part when re-installing the cover. There is a hook on the top, so unhook this rubber piece before installing. Only after fitting the other bolts, you should hook the rubber portion and triple check that it's placed correctly.
The thing I did differently than all the other guides : No alignment pin needed
In the service manual, you need to loosen the half-shaft bracket to get to the engine plug bolt. You then need to insert an alignment pin in there that hits the crankshaft counterweight at TDC and stops the crank from moving.
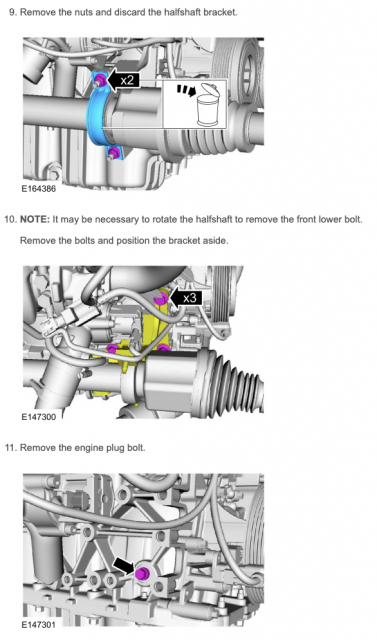
However, I found this procedure to be redundant because you don't need this pin to align the crank to TDC. Let me explain.
There is only **one** way to insert the cam phaser lock tool (pictured below), but it requires two or sometimes three revolutions of the engine to reach the alignment point where the tool slides in.
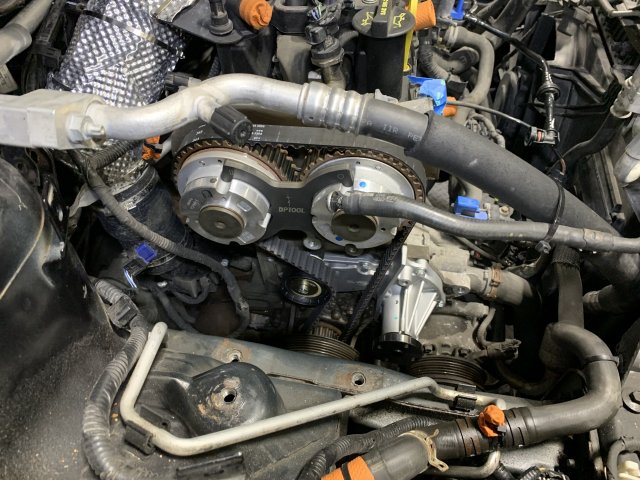
I followed the service manual to turn the crank until I reached the 11 o'clock position on the markers.
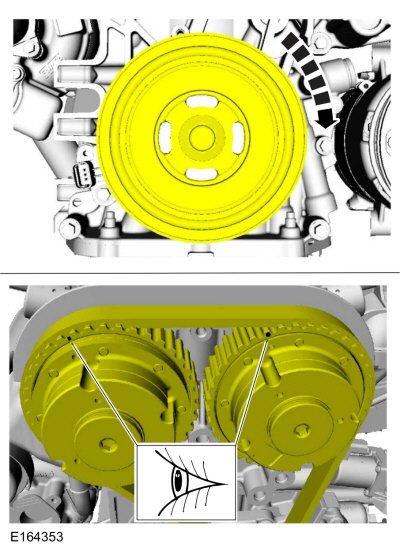
Then I slowly and methodically turned the crank clockwise to get to 12 o'clock while placing the tool in the slots. One some revolutions, the tool did not fit at all, and I had to crank over the engine to get back to 11o'clock and re-align the tool when hitting the 12 o'clock. When the cam phasers align, the tool slides in effortlessly, and it's at TDC. After this, you install the flywheel lock tool into the starter engine hole, making sure it's deeply into the teeth of the flywheel and voilà! The engine is at TDC and completely locked from turning.
I understand why they add this alignment pin because it takes the guesswork out of figuring the TDC, but in my case, TDC was easy to find. I have not seen any other members report this and none of the videos on youtube mention this either.
Bonus section :
While you're in there, I would highly suggest you walnut blast your intake valves, they are **right there**.
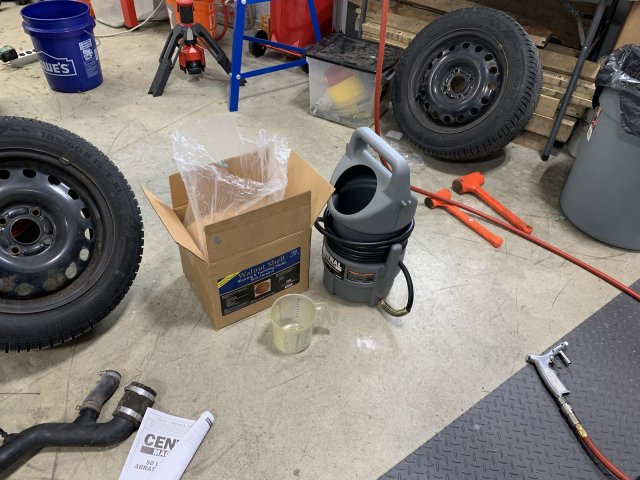
This is what I used, it's super cheap. You only need an air compressor and a shop vac.
Harbor Freight media blasting kit
Walnut shell media
The only downside, is that it's messy as all hell!
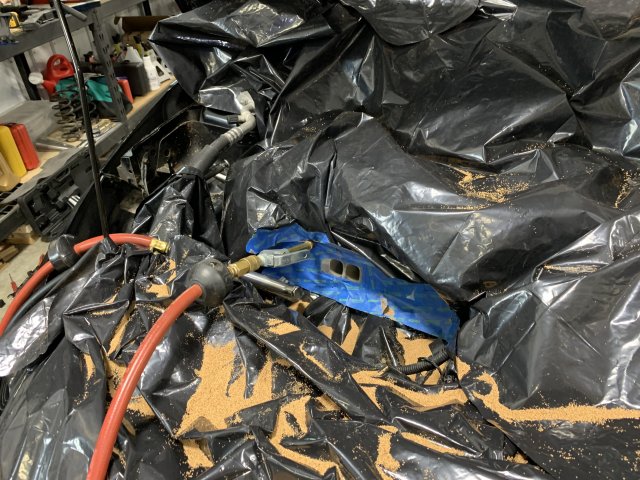
This was my configuration. I took great, great time to ensure that each cylinder I was blasting was at TDC before introducing the walnut media. One trick I used for this was spraying the
CRC GDI intake valve cleaner and letting it sit for 10-15 mins per cylinder before starting to blast the valves. If after 10-15 mins, the fluid was still in the valves, it meant that there the valves were fully closed and sealed, ready for blasting.
I had the blasting gun oriented upside down as shown in the picture in my left hand and I had a shop vac hose in my right hand. I positioned the gun first, aiming it at the sections that needed cleaning and positioned the shop vac hose over the hole and started to blast. Even if you have a shop vac positioned directly on the right spot, there is **so much** spillover of the walnut media, that I suggest wearing face protection, not eye protection, face protection. It took me longer than I thought to blast each valve. At least 4 minutes of continually blasting per valves to remove all the carbon build up. I ended up using about half the bag of 25lb media.
It made quite the difference. My car is a 2014MY with 148k km on it. 8k km oil changes with high-quality Quaker State Gold 0W20 oil for winter and 5W20 oil for summer. No oil catch can, nothing. Just raw 10 years of ownership on these valves.
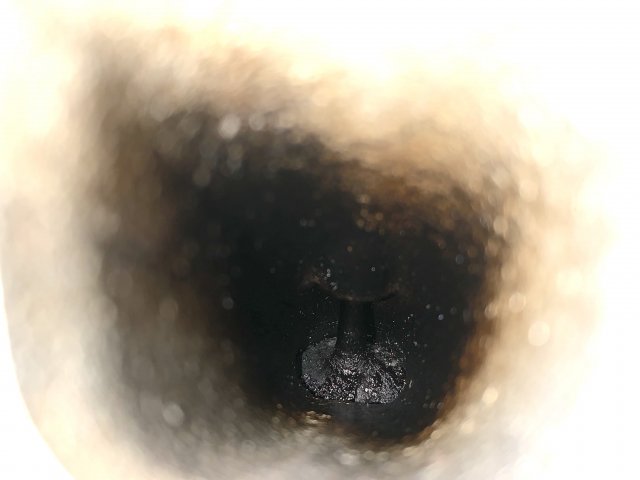
It was horrible.
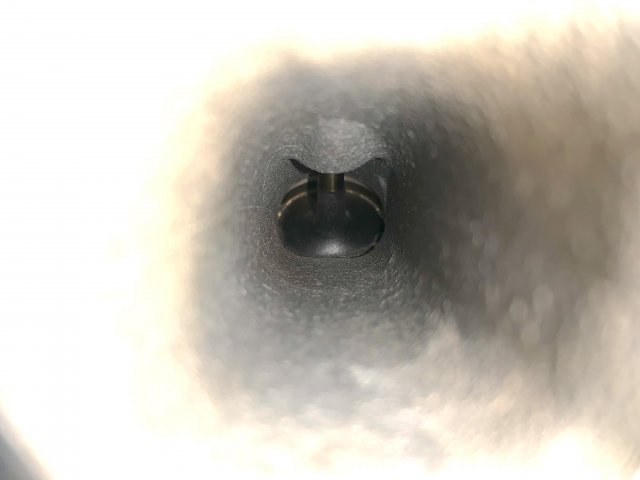
But not anymore!
Hope this helps others who might think of doing this on your own. It's definitely doable as a DIY. It took me around 20 hours, all said and done. I was working alone, taking my time and torquing every single bolt to spec. This time also takes into account the time I spent walnut blasting the valves and working through the four issues I had. I had access to a lift, a jack and pretty much every single power tool available on the market (my dad has a tool acquisition problem lol).
