Technique to separate key fob halves to replace battery

Capri to ST

1000 Post Club
Member ID
#3777
Messages
1,719
Likes
2,195
#1
I'm having trouble getting the two plastic halves of the fob to separate at the point shown in the picture below, after you have taken out the physical key, and when you first start pressing a screwdriver in to try to separate the plastic halves of the fob. The plastic seems very soft, and instead of separating, it just starts to disintegrate and I'm afraid I'm damaging it. I may be using too small a screwdriver, and that may be why it's not separating. I'm going to try a bigger screwdriver and see if that gets in there and pops them apart more effectively.
Unfortunately I am the opposite of mechanically gifted, and this seems to be in play here even in this seemingly simple task. If anyone has any advice or techniques that have worked for them, I would be grateful.
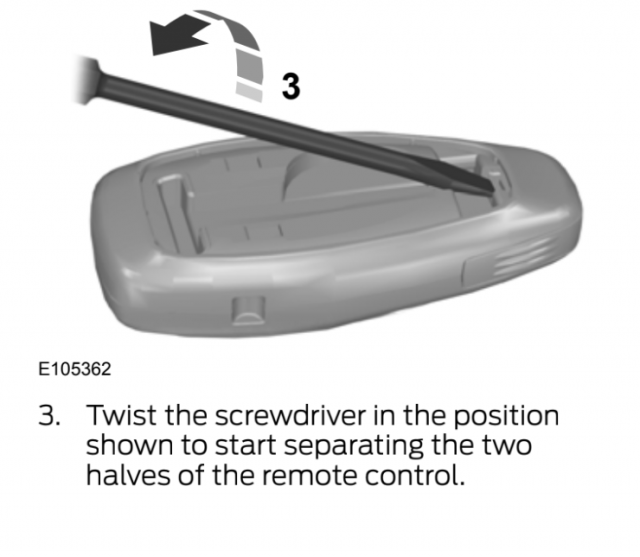
Screenshot 2023-08-04 11.38.18 AM.png


OP
Capri to ST

Capri to ST

1000 Post Club
Member ID
#3777
Messages
1,719
Likes
2,195
Thread Starter #4
I just fuck up the plastic
Well I just changed the batteries, and I sure did that too. Also broke off both thumbnails and bled behind one of them. It seems like a really cheaply made poorly designed key fob, the plastic just starts to deteriorate when you try to twist the screwdriver in it to get it open.


dhminer

2000 Post Club
Member ID
#12462
Messages
2,354
Likes
2,766
#5
Well I just changed the batteries, and I sure did that too. Also broke off both thumbnails and bled behind one of them. It seems like a really cheaply made poorly designed key fob, the plastic just starts to deteriorate when you try to twist the screwdriver in it to get it open.
Ouch. I just stick a flat head screwdriver in the little square notch on the side and turn it to pry the sides apart. It doesn’t mess it up too bad.


OP
Capri to ST

Capri to ST

1000 Post Club
Member ID
#3777
Messages
1,719
Likes
2,195
Thread Starter #6
Ouch. I just stick a flat head screwdriver in the little square notch on the side and turn it to pry the sides apart. It doesn’t mess it up too bad.
Thanks, I think that may have been part of my mistake, not starting there. I tried to follow the instructions and start separating it in that inside spot that's shown in the page of the manual that I posted above, but there's nowhere in there to get any leverage on. That's where the plastic just kind of crumbled away and deteriorated. Maybe next time I'll just start in that little square notch on the side as you suggested.


dhminer

2000 Post Club
Member ID
#12462
Messages
2,354
Likes
2,766
#7
Thanks, I think that may have been part of my mistake, not starting there. I tried to follow the instructions and start separating it in that inside spot that's shown in the page of the manual that I posted above, but there's nowhere in there to get any leverage on. That's where the plastic just kind of crumbled away and deteriorated. Maybe next time I'll just start in that little square notch on the side as you suggested.
I’ve never read that part of the manual so I had no idea that existed. I’ll have to look


haste

1000 Post Club
Member ID
#1646
Messages
1,222
Likes
1,266
#8
Good pocket screwdriver does the trick in the location mentioned by dhminer


Top