Hi Everyone,
The stock sound system just wasn't doing it for me, so I figured I'd make a guide for anyone else wanting to take on the task. It's super simple and it will make your stereo sound so much better! I'm using the Infinity Kappa 60.11CS component set. I'm going to run it through an amp at some point, but even with just the head unit powering them, they sound great! So much more low end. Unfortunately I didn't take any pictures of the tweeter and crossover install, but I'll show you the perfect place to put your crossover, how I put in the tweeter and how to get it all wired up.
1) Remove the connector to the speaker and the three torx screws holding the speaker in.
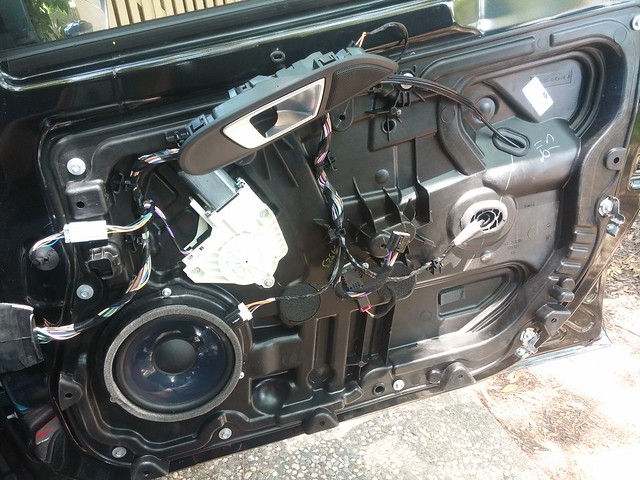
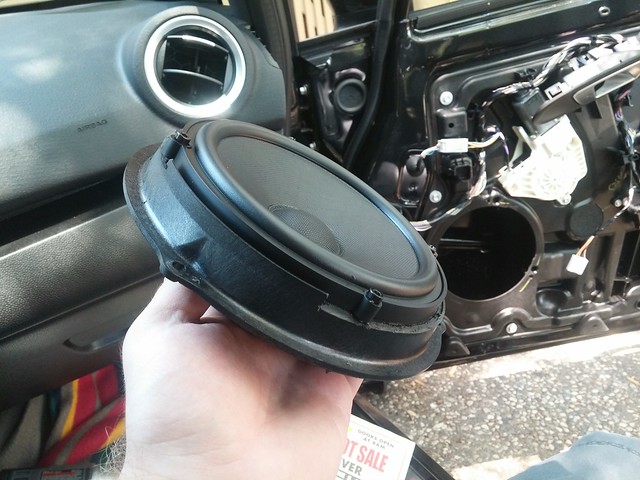
2) With the speaker free, use a set of pliers, diagonal cutter, or a cut-off tool to remove the basket to the mounting bracket.
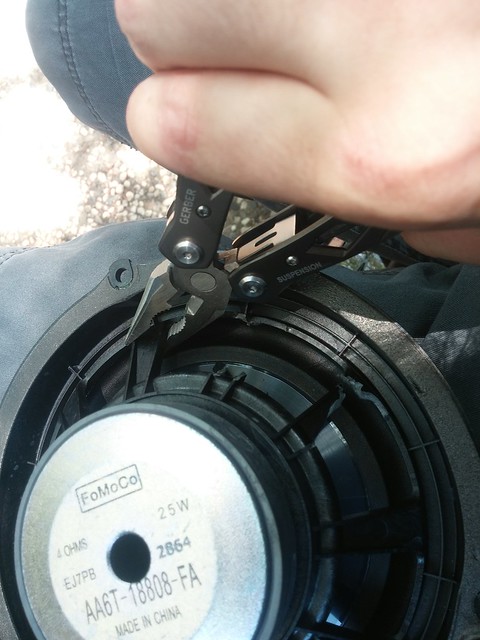
3) Remove the foam surrounding the speaker.
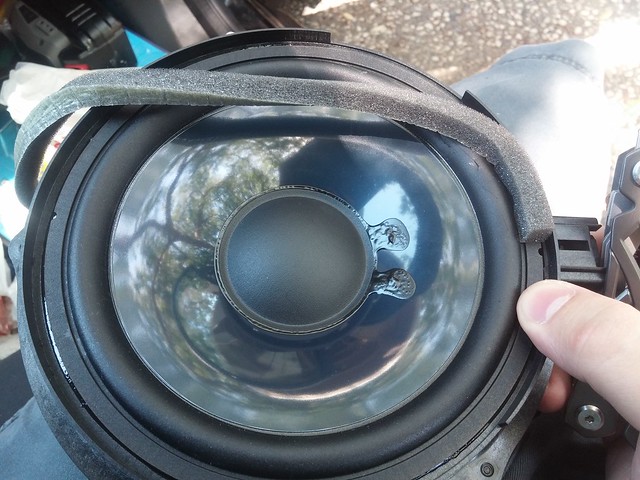
4) Cut the rubber surround and drop the speaker assembly out of the mounting bracket.
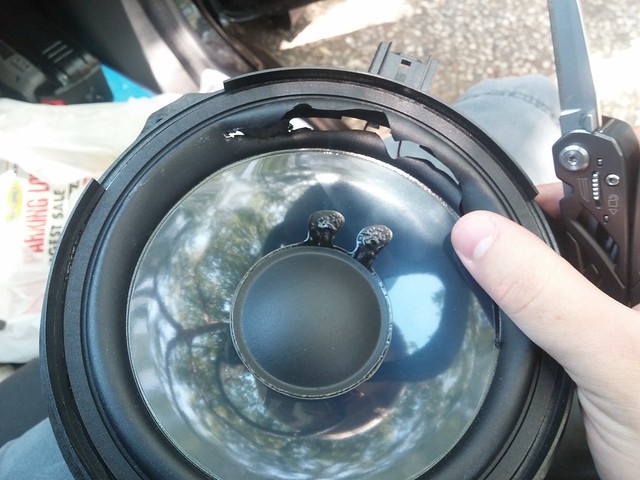
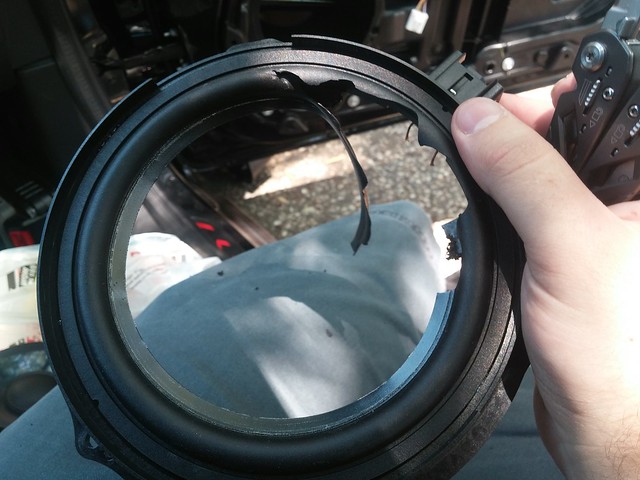
5) Do some cleanup if necessary to get rid of the excess bits of surround.

6) Again, using your tool of choice, remove the lip that come up where your speakers mounting tabs are. For some speakers, you may not have to do this as it will just slip right in. For others that are a little bigger, you may end up having to remove all of the plastic coming up.
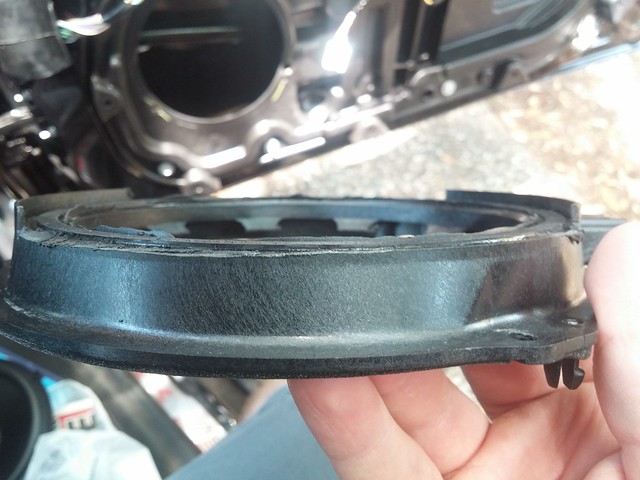
7) Test fit your speaker. Make sure that parts of the former speaker's basket aren't going to interfere with the operation of the new speaker.
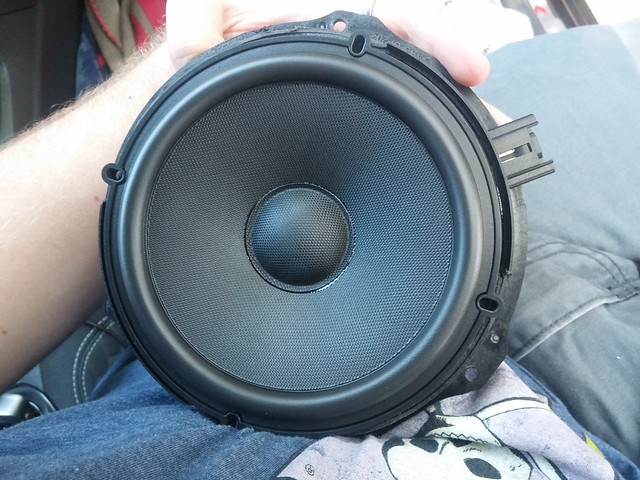
8) Mount the speaker. I highly recommend pre-drilling all of the holes where the screws go in. This will ensure that the plastic won't crack when you put screws in it. When pre-drilling, it might be useful to mark the spots where the holes are and drill while the speaker is out of the bracket so you don't end up putting a hole through your brand new speaker.
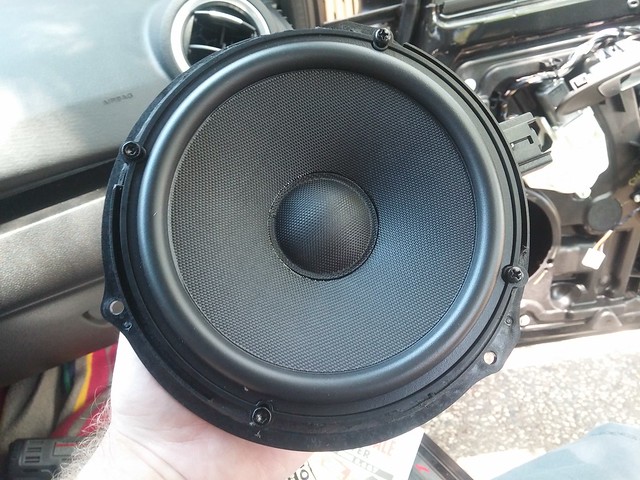
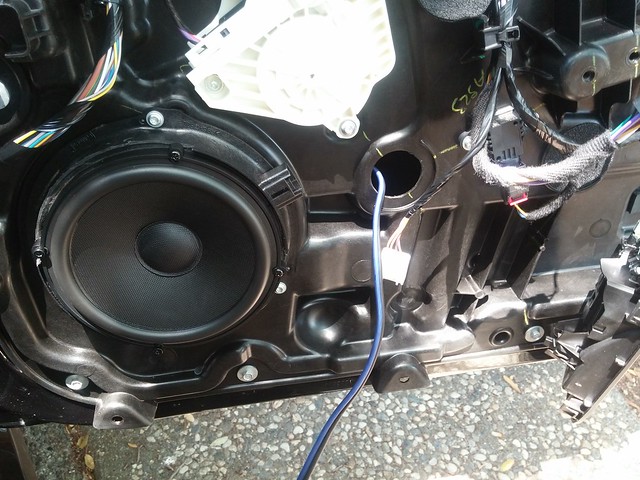
9) Once it is mounted in the bracket, thread cable through where it is going to go cross through the plastic in the door. I chose to remove the sticky-backed foam circle and run the cable in through there. Connect the wires to the speaker and use the torx screws to put the assembly back into the door. Make sure that the cable isn't going to interfere with the operation of the window. It might even be a good idea to zip tie the cable to the plastic of the door just to make sure it won't get in the way. Once this is in you can go ahead and run the speaker cable into your crossover.
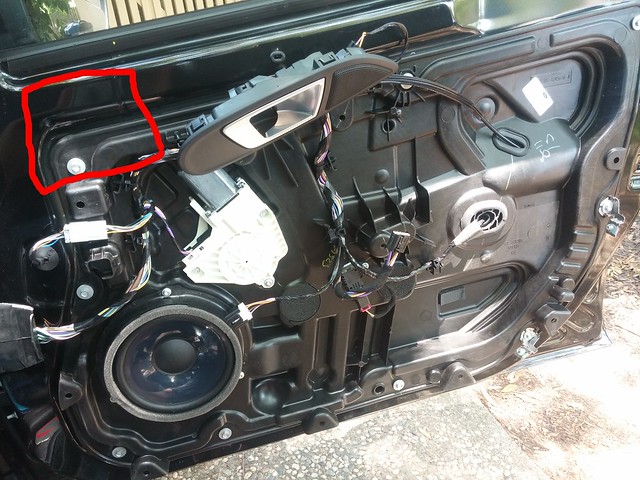
10) So the place I found that works pretty good as a pocket for a crossover is the spot at the top of the door frame, next to the window and mirror.
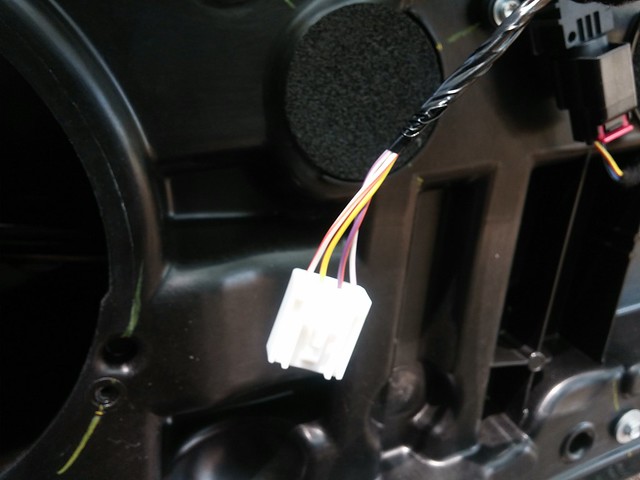
11) To get signal to the crossover, you will need to cut off the factory connector and use the two outer wires. There is another forum post that explains what wire colors are positive and negative. The inner ones are just paralleled to go to the tweeter. I chose to just run a new cable directly from the crossover for the tweeters, so I just taped this connection up. Using the small flat tweeter mount, this dropped right into the stock location! I used a little bit of glue to secure it, wired it to the crossover and it was good to go. I e-taped all my wires to the stock wiring to make sure that it is out of the way for any of the door mounting points.
The stock sound system just wasn't doing it for me, so I figured I'd make a guide for anyone else wanting to take on the task. It's super simple and it will make your stereo sound so much better! I'm using the Infinity Kappa 60.11CS component set. I'm going to run it through an amp at some point, but even with just the head unit powering them, they sound great! So much more low end. Unfortunately I didn't take any pictures of the tweeter and crossover install, but I'll show you the perfect place to put your crossover, how I put in the tweeter and how to get it all wired up.
1) Remove the connector to the speaker and the three torx screws holding the speaker in.

2) With the speaker free, use a set of pliers, diagonal cutter, or a cut-off tool to remove the basket to the mounting bracket.

3) Remove the foam surrounding the speaker.

4) Cut the rubber surround and drop the speaker assembly out of the mounting bracket.


5) Do some cleanup if necessary to get rid of the excess bits of surround.

6) Again, using your tool of choice, remove the lip that come up where your speakers mounting tabs are. For some speakers, you may not have to do this as it will just slip right in. For others that are a little bigger, you may end up having to remove all of the plastic coming up.

7) Test fit your speaker. Make sure that parts of the former speaker's basket aren't going to interfere with the operation of the new speaker.

8) Mount the speaker. I highly recommend pre-drilling all of the holes where the screws go in. This will ensure that the plastic won't crack when you put screws in it. When pre-drilling, it might be useful to mark the spots where the holes are and drill while the speaker is out of the bracket so you don't end up putting a hole through your brand new speaker.


9) Once it is mounted in the bracket, thread cable through where it is going to go cross through the plastic in the door. I chose to remove the sticky-backed foam circle and run the cable in through there. Connect the wires to the speaker and use the torx screws to put the assembly back into the door. Make sure that the cable isn't going to interfere with the operation of the window. It might even be a good idea to zip tie the cable to the plastic of the door just to make sure it won't get in the way. Once this is in you can go ahead and run the speaker cable into your crossover.

10) So the place I found that works pretty good as a pocket for a crossover is the spot at the top of the door frame, next to the window and mirror.

11) To get signal to the crossover, you will need to cut off the factory connector and use the two outer wires. There is another forum post that explains what wire colors are positive and negative. The inner ones are just paralleled to go to the tweeter. I chose to just run a new cable directly from the crossover for the tweeters, so I just taped this connection up. Using the small flat tweeter mount, this dropped right into the stock location! I used a little bit of glue to secure it, wired it to the crossover and it was good to go. I e-taped all my wires to the stock wiring to make sure that it is out of the way for any of the door mounting points.


