A few weeks ago I ordered the Redline Goods shift boot and padded armrest. I selected charcoal leather as it looked the closes to the seat colour, with orange thread. Did not go for any extra except for 6/8" padding as I wanted the extra cushion for my elbow. The order took about 2 weeks to get to me bonus it was free shipping. The first thing that struck me when I opened the package was the smell of leather. Similar to the old baseball glove I use. The padding is not attached to the leather. The stitching look strong and straight.
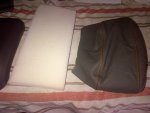
Test fitting the leather onto the armrest looked very good. Keep in mind this is fabric and can easily be shaped into the form you want, which means it can look off and not tight when doing the initial test fit.
As for the install it can be easy and difficult all at the same time. Easy to take the arm rest off as it only requires a T-15 to remove 3 screws, hard because upholstery work is a combination of skill and finest with a large dose of patience.
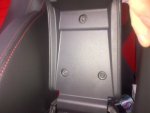
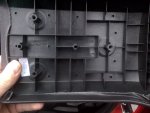
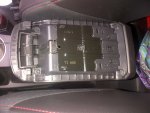
First I suggest to test fit the padding and trim the edges(remove the corners) that will be facing the leather. This will help make a nicer finish and avoid hard edges.
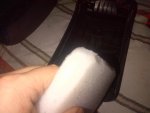
As I said before test fit the piece and start stretching the leather into the shape of the armrest. You leather does stretch, no a lot, but it should be stretched avoid it going baggy in the future. I started by adhering the from edge and the back edge of the padding to the armrest. Get it centered and only apply a little glue at each end(in this case less is more). This step will help tremendously to avoid fighting two moving objects (leather and padding)
I used an install adhesive call Loctite 454(http://www.amazon.com/Loctite-Prism-454-Cyanoacrylate-Adhesive/dp/B000NYC6FK/ref=sr_1_1?ie=UTF8&qid=1448159328&sr=8-1&keywords=loctite+454). You do not require much so get the 3g tube is more than adequate. This stuff is great for fabrics, leather and skin (be extremely careful). At first you may think the cover will not fit just keep pulling and stretching. Using a clamp in the rear (part the faces the back of the car) and using your hands to pull toward the front helps. Once ready place a small dab of glue on the back underside, let dry and pull at the front. Check for creases and line. If not start gluing the front edge. Them do the side. This can be tricky as too much stretch you will get wavy lines. You need even stretch. At this point you can hold the two edges with you hands and see ho to stretch.
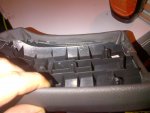
I suggest before installing to give the leather a good condition with leather an automotive leather conditioner or any non coloured leather conditioner, like mink oil.
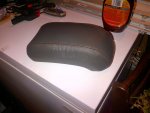
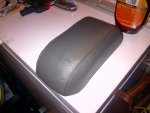
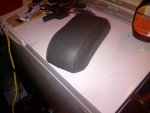
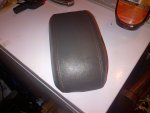
I am very happy how it turned out, rather simple upgrade to beautify your rid and protect your elbow.
The end result is a great fitment and great looking part. It is not a perfect match but very close. If you don't want to match black would have worked well
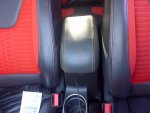

Test fitting the leather onto the armrest looked very good. Keep in mind this is fabric and can easily be shaped into the form you want, which means it can look off and not tight when doing the initial test fit.
As for the install it can be easy and difficult all at the same time. Easy to take the arm rest off as it only requires a T-15 to remove 3 screws, hard because upholstery work is a combination of skill and finest with a large dose of patience.


First I suggest to test fit the padding and trim the edges(remove the corners) that will be facing the leather. This will help make a nicer finish and avoid hard edges.

As I said before test fit the piece and start stretching the leather into the shape of the armrest. You leather does stretch, no a lot, but it should be stretched avoid it going baggy in the future. I started by adhering the from edge and the back edge of the padding to the armrest. Get it centered and only apply a little glue at each end(in this case less is more). This step will help tremendously to avoid fighting two moving objects (leather and padding)
I used an install adhesive call Loctite 454(http://www.amazon.com/Loctite-Prism-454-Cyanoacrylate-Adhesive/dp/B000NYC6FK/ref=sr_1_1?ie=UTF8&qid=1448159328&sr=8-1&keywords=loctite+454). You do not require much so get the 3g tube is more than adequate. This stuff is great for fabrics, leather and skin (be extremely careful). At first you may think the cover will not fit just keep pulling and stretching. Using a clamp in the rear (part the faces the back of the car) and using your hands to pull toward the front helps. Once ready place a small dab of glue on the back underside, let dry and pull at the front. Check for creases and line. If not start gluing the front edge. Them do the side. This can be tricky as too much stretch you will get wavy lines. You need even stretch. At this point you can hold the two edges with you hands and see ho to stretch.

I suggest before installing to give the leather a good condition with leather an automotive leather conditioner or any non coloured leather conditioner, like mink oil.


I am very happy how it turned out, rather simple upgrade to beautify your rid and protect your elbow.
The end result is a great fitment and great looking part. It is not a perfect match but very close. If you don't want to match black would have worked well


