• Sign Up! To view all forums and unlock additional cool features

    Welcome to the #1 Fiesta ST Forum and Fiesta ST community dedicated to Fiesta ST owners and enthusiasts. Register for an account, it's free and it's easy, so don't hesitate to join the Fiesta ST Forum today!


Paul's Track and Autocross Toy Build

Messages
181
Likes
100
Location
Baton Rouge
#41
I wrote this response about 5 different ways, but I always sound like I'm being a jerk. That's not my intent. I'm truly tyring to learn here and be as safe a possible. With that said, these harnesses were designed by Schroth to fit the Fiesta in those exact mounting locations. I don't know what else to say. Are you saying Schroth is wrong in the way they designed there product?
No worries. I almost didn't post because I didn't want to sound like a jerk either. It's real easy for tone to be lost over the typing.

The belts typically run over a harness bar or cross-bar on a roll bar so that then go back rather than down, and once over the bar they can mount to the floor.

But Schroth certainly knows better than I do.

https://www.youtube.com/watch?v=5pQ4B9_nQr4
https://www.youtube.com/watch?v=zGcN-JAMw3c
(not that I would necessarily trust MCM, but they do briefly mention about the angle of the belts coming through the seats)


Woods247

2000 Post Club
Messages
2,602
Likes
4,709
Location
Atl
#42
I wrote this response about 5 different ways, but I always sound like I'm being a jerk. That's not my intent. I'm truly tyring to learn here and be as safe a possible. With that said, these harnesses were designed by Schroth to fit the Fiesta in those exact mounting locations. I don't know what else to say. Are you saying Schroth is wrong in the way they designed there product?

I use the same harness with a HANS. You’re fine. I had concern and called Schroth for an explanation. If you’re concerned at all don’t hesitate to call them or read the explanation on their website. This design prevents the injury the other guy on the internet is talking about. Don’t take my word for it though haha! Every single internet Schroth post is exactly like this.

The other dude didn’t post a relative YouTube link. Here you go: https://youtu.be/5hbYwHUOipg


OP
P
Messages
82
Likes
25
Location
Norwich
Thread Starter #43
Cobb CAI Install Finished

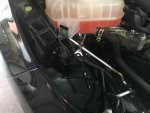
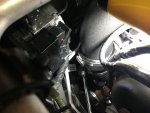
Got back out in the garage yesterday afternoon and go the COBB CAI installed and the rest of the car buttoned up. I did figure out a much better way to access the turbo clamps though. Using a long extension and a long wobble extension, I was able to get a socket on the worm clamp by going under the coolant reservoir.

turbo_clamp_ratchet.JPG
turbo_clamp_socket.JPG

I did have a few issues with the CAI install, mostly related to my hands and arms not fitting where I needed to access parts. The worst was the hard vent line coming off the intercooler that is replaced during the CAI install. I needed to pull the air box out to gain access. In hindsight, and my new found way to access the turbo clamps, I could have done the install without pulling the headlights and the upper/lower cowl.

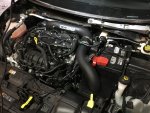
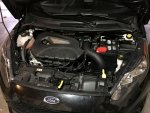
The CAI installed and all buttoned up.

cai_installed.JPG
after.JPG

Did a quick test drive to see if any CELs came on and to see how shifter feels. Shifter is definitely shorter than before and feels good. Maybe a slight bit notchier, but nothing to worry about. Up next will be the short throw shift arm inside the car.

I also did not install the COBB AP yet. I'm hoping to get some baseline timed 3rd gear pulls in before I upgrade to Stage 1. I also still need to install the Cobb RMM, but I'm waiting for my Quick Jacks to arrive before I try working under the car. My current jack is great for changing tires, but will not lift the car enough for me to work under it comfortably and I'm not sure my jack stands would be high enough either.


Last edited:
OP
P
Messages
82
Likes
25
Location
Norwich
Thread Starter #45
Boomba Ultimate Shift Package (Not so Ultimate)

I got my Boomba Ultimate Shift Package installed. The ultimate package consists of:
  • Short Throw Transmission Adapter
  • Transmission Cable Bracket Bushings
  • Short Throw Shift Lever
  • Shifter Base Bushings

Sorry, no pictures. There are lots of pictures out there on these installs, and I have nothing new to offer. For install instructions, Boomba provides PDFs, but I STRONGLY recommend watching the videos and not just follow the written instructions.

Short Throw Transmission Adapter
I installed this while I was also installing my CAI, so there was plenty of room to get in an get it mounted. I got a chance to drive with just this before I installed the short shift arm. Definitely provides a noticeable reduction in shifter throw and adds just a touch of notchiness, but nothing obnoxious. Overall Very please with the transmission adapter.

Transmission Cable Bracket Bushings
Also installed these when doing the CAI. Instructions call for puling out the battery box, which was pretty simple since I already had the airbox out. Installation was not too bad. Trickiest part is that the new solid bushings are a 2-piece design that does hold it self together like the rubber bushing/steel insert of the stock ones. I had good luck installing the rear bushing first, then was able to slip the other two forward bushings into place before tightening everything down. Can't say that I can notice any difference with these installed, but I did install at the same time as the transmission short throw adapter. I can say I don't feel any additional vibrations tough, so that's a good thing.

Shifter Base Bushings
These go between the shifter and the base bracket. Easy install, the hardest part is getting the trim and center console removed. Again, can't say I noticed any real difference, but there is no additional vibration.

Short Throw Shift Lever
This is the not so ultimate part. I have installed and driven with it and won't be keeping this part. Install was a bit of a pain, especially removing the clip that holds the shift lever pin in. This is where seeing the video, and which way to try and remove it, is helpful. First, the positive... Once installed the shift lever is solid and when set on the max reduction setting, and combined with the trans adapter, really does shorten the shifter throws. For me on max setting, I don't really care for it and if I was keeping the lever I would probably adjust back to the 0% setting and enjoy the slightly better lever angle over stock.

So why am I not keeping it? I can't get the reverse lockout to function correctly. There is nothing in the instructions about needing to grind away additional plastic from the lockout mechanism, even though Boomba did acknowledge the problem over a year ago in a forum thread here (see link below) and noted the instructions needed to be updated. The missing step is annoying, but not enough that I would get rid of the lever. The problem is, I've ground as much plastic away as I dare and the lockout ring still does not function correctly. The problem is that it does not spring back down into position after it is pulled up. This sort of negates the lockout function and I think it's a bit of a safety issue. This forum post provides some more details,
Lockout Issue. As I said, if the lockout was working I'd just set the shift lever at 0% reduction and move on, I do like the better angle of the shifter. Since I have already hacked up my lockout mechanism, and gouged some plastic getting the clip out when removing the stock shift arm, I am just going to replace my current modified gear selector assembly with a stock non-modified one.

For full disclosure, I have e-mailed Boomba and explained my issues, and offered what I think is an amicable solution. I'll hold off on posting any specific details until I hear back from them and have given them a chance to respond.

Short version:
All the parts are well made and machined. Installation was pretty straight forward, but do watch the videos, as the PDFs alone leave out some subtle details. I liked all the parts. The short shift lever had a nice angle to it and can be set to the factory shift geometry, provide a 0% reduction in shift movement. If the reverse lockout was working correctly, I'd be very happy to keep the whole bit of kit.


Last edited:
OP
P
Messages
82
Likes
25
Location
Norwich
Thread Starter #46
The build has come to an end. Due to my work situation, the FiST has to go, along with the parts I've already ordered. Luckily I only installed a few easy to remove parts.


Woods247

2000 Post Club
Messages
2,602
Likes
4,709
Location
Atl
#47
The build has come to an end. Due to my work situation, the FiST has to go, along with the parts I've already ordered. Luckily I only installed a few easy to remove parts.
Bummer man! You have a solid track build going. Best of luck to you.


OP
P
Messages
82
Likes
25
Location
Norwich
Thread Starter #49
The peanut, as my wife likes to call it, lives!!! Car never got sold, but almost all parts did. Have a new job and life situation that allows for plenty of car play time and time for getting out on track. Sucks that I'll be buying a lot of the parts again, but it does give me a second chance to consider where I want to go with the build.


Top