• Sign Up! To view all forums and unlock additional cool features

    Welcome to the #1 Fiesta ST Forum and Fiesta ST community dedicated to Fiesta ST owners and enthusiasts. Register for an account, it's free and it's easy, so don't hesitate to join the Fiesta ST Forum today!


Modding FAQ: A Beginners Guide to Modding the Fiesta ST

Messages
436
Likes
409
Location
Simi Valley, CA, USA
#41
well, we will have to disagree on the performance and durability for this particular application. Rubber is a stronger tougher material in general but those qualities are not utilized here. I had foam on my sentra spec v with a turbo sitting literally on top of the radiator (top mount treadstone turbo kit for sentra) you could boil water off my hood and the foam never distorted, peeled away, or even turned color...it was perfect and its better than rubber in this application because you can depress it easily to quickly adjust for varying heights, is more easy to shape and bend, and easier to apply, easier to locate product, inexpensive to aquire, and does the job as intended as well as any other material. ...as far as Looks better...if i didnt get black rtv on my hands when working the foam it would look nicer but I didnt care. When I pop the hood you dont notice unless I point right to it. and since the foam mod it hasnt overheated a single time. But hey to each their own.
I don't doubt your success on your previous car, but rubber is still better. Some foam is better than others but after only 8500 miles on my car the OEM foam is already drying out, and starting to flake a little as well as peeling away from where it originally was.

What we are doing here is creating a semi-airtight seal and rubber performs better than foam as foam is completely permeable. The D shape with the open / hollow center section allows the rubber I got to squish and be otherwise malleable as needed.

There are of course many different types of rubber and plenty that would not be up to the task of a hot environment, but this is the exact same type of rubber that the coolant hoses are made of, so radiant heat will not be a problem.

So, yes, I will continue to disagree with your assessment of using foam for this job.


danbfree

3000 Post Club
Messages
3,510
Likes
1,201
Location
Tigard, Oregon, USA
#42
I will say that D shape rubber does look much nicer, and if one feels that a little over 1/2" thick is enough then there are tons of really cheap options on Amazon, I personally think that might be the best balance betweenb= better looks, performance and price... THIS stuff is 0.65" tall, which is probably enough to really help and is only $21.50... @New_Daily - Do you think 0.65" would be enough to help or no? Seems like even with my stock setup for now that the gap can vary from narrow at top to wider at the bottom, I'm going to try to make the stock fan/shroud work with Mishi clone rad I need to drop in, so not sure how much of a gap there will be...

Also, *high density* neoprene would likely work well too, THIS stuff is 0.75" thick and about $22, so there are plenty of options around, but it's if you feel you need a full 1" thick is where the pricing shoots up...


Last edited:

danbfree

3000 Post Club
Messages
3,510
Likes
1,201
Location
Tigard, Oregon, USA
#46
check my picture. it filled it fine IMO
heh, quite true, I had just forgotten some of the previous posts as I only check up on here once every 5- days now... And as far as the material, you can get high density neoprene in a square shape too, so when you say "foam" I know what you mean, you can get cheap crap or high density stuff if you want, all at far less than $70... The material the other guy mentions is EPDM and can be found for a lot less like HERE too, as long a little over 0.5" tall is fine, and you show that it is.


Messages
436
Likes
409
Location
Simi Valley, CA, USA
#47
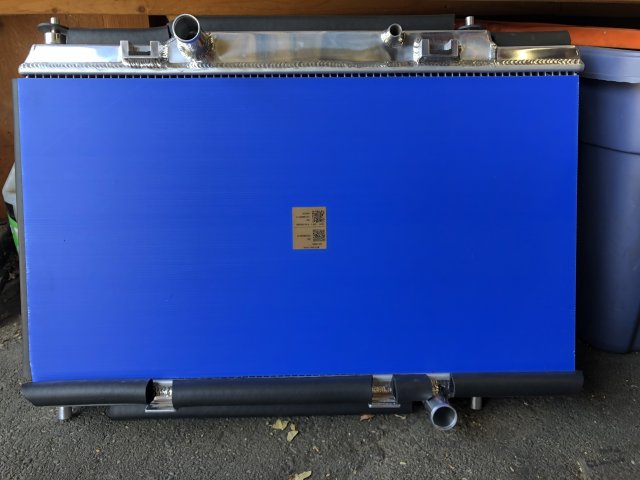
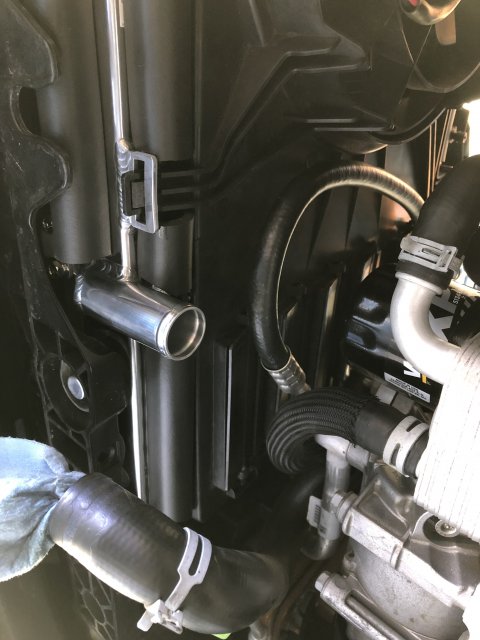
Ok update. I just finished the rad install. The rad portion is all done and buttoned up. I just haven’t refilled the coolant or put the charge pipes back on etc (I’m also putting on a Turbosmart BPV and that’s in process.

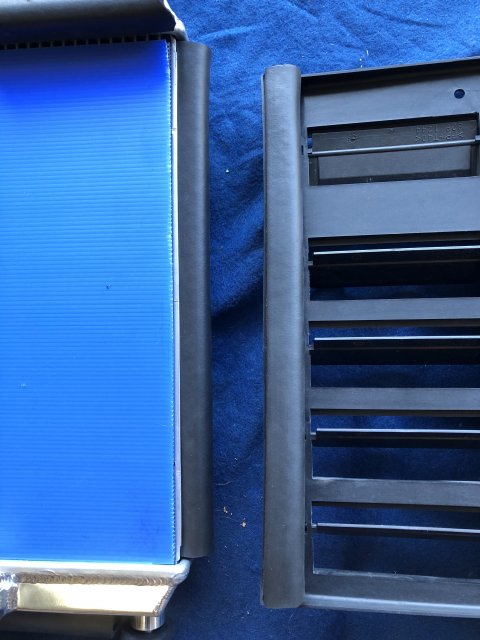
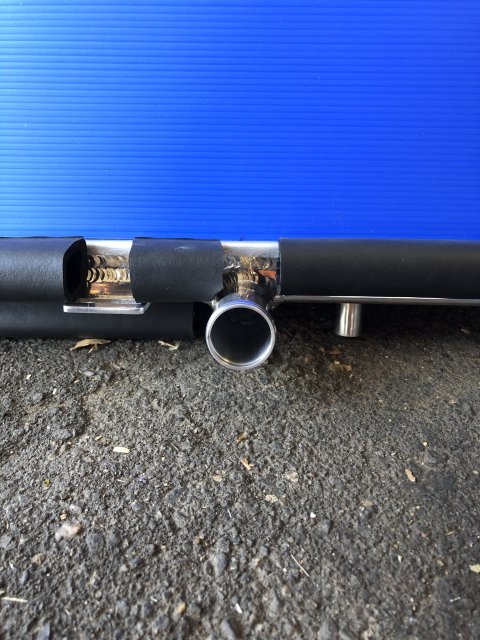
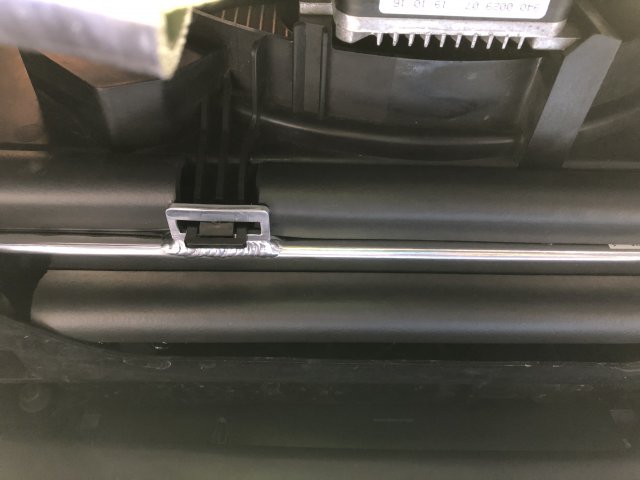
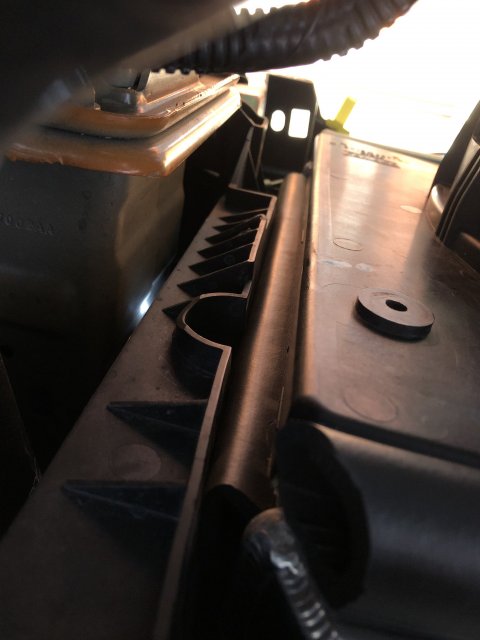
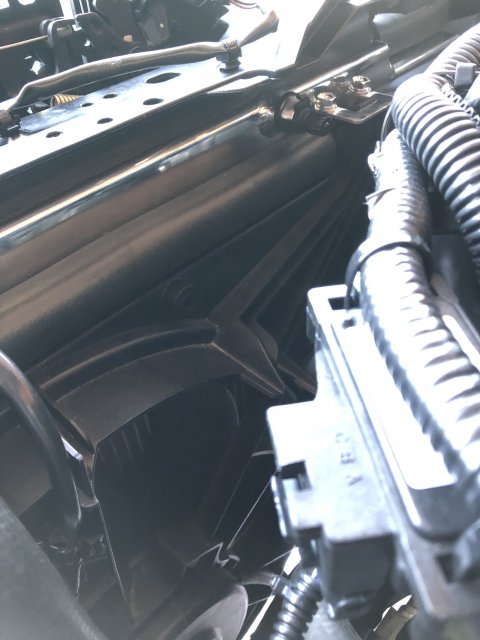
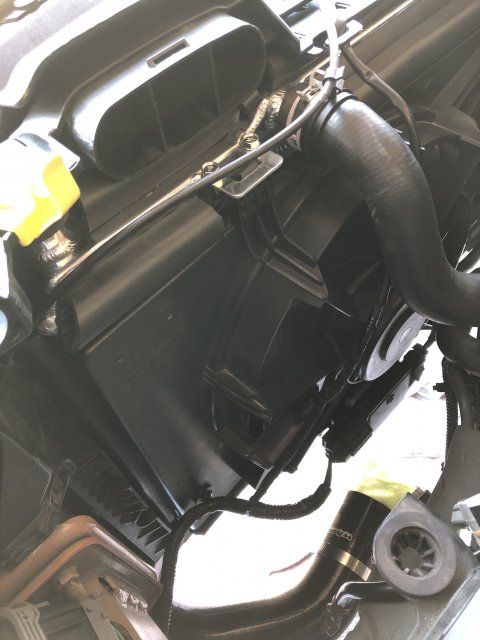
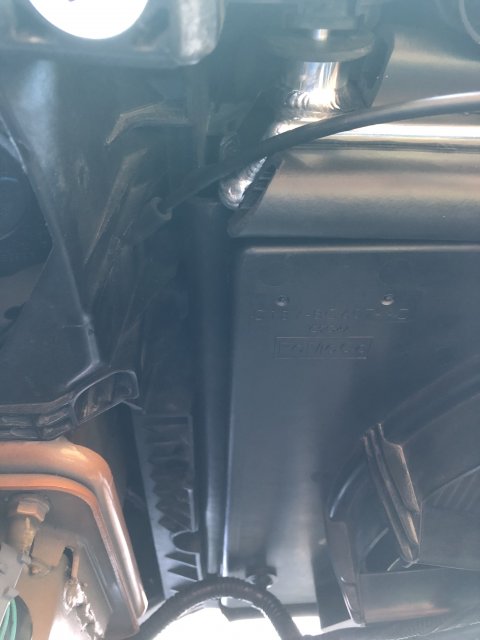
For prepping the rad, I started by putting the D seal in the same areas that there was factory foam around the OEM rad. Based on my install, having the 1” tall seal for the side of the core on the driver side was beneficial. Anything less might not have closed the gap on that side. Also, I placed a piece on the inside of the fan shroud. I also think having 1” there was beneficial but less so than the core side and I could be wrong.

The other areas you see in the pics I placed the seal were on the radiator, around the outside of the fan shroud, tucked right against it to seal it up. All these areas did not need 1” and would have been fine with smaller.

I had ordered the seal based on guesstimating from pics about needing 1”. So, having now done it, I don’t think I would order 1” again especially with how much it cost and the fact I could not find a smaller amount than 25’. But that being said, I am glad I have that larger size now that it’s done.

Now, as far as the rad goes, having not yet started the car or driven it, the only thing I don’t like is the claw looking attachments on the top of the rad that the AC condenser slides into, the condenser is a little loose and it jiggles a little. Had I know that would happen I would have put something over the sections of the condenser to prevent that. But I’m sure as hell not taking it back apart to do that.

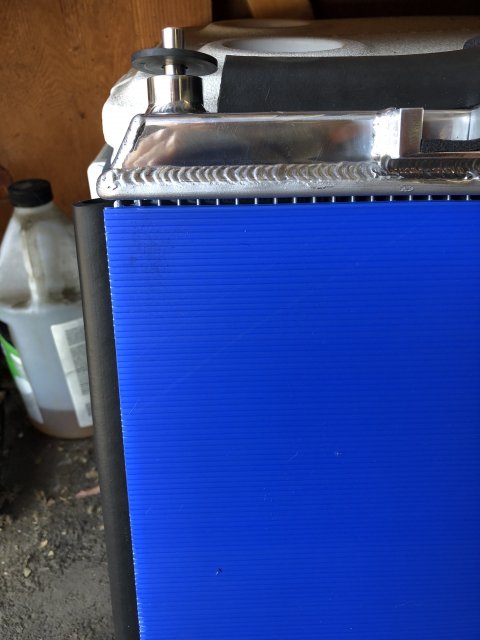
I started yesterday about 1 and worked till 4.30 or so but after dropping the stock rad I pulled the stock BPV and put the Turbosmart one in. That took about an hour at least. Putting the Mountune rad in, I cut the blue protectant piece into 2 pieces for both sides of the core and just held it In place while getting the rad in. Before bolting on the brackets for the lower AC condenser hold I slid the front piece out, then after clicking the fan shroud into place on the bottom I slid the inside piece out the top. Luckily my Neoghbor was at his garage when I did it as his extra hand helped me getting it into place safely.


Attachments

danbfree

3000 Post Club
Messages
3,510
Likes
1,201
Location
Tigard, Oregon, USA
#48
Ok update. I just finished the rad install. The rad portion is all done and buttoned up. I just haven’t refilled the coolant or put the charge pipes back on etc (I’m also putting on a Turbosmart BPV and that’s in process.

For prepping the rad, I started by putting the D seal in the same areas that there was factory foam around the OEM rad. Based on my install, having the 1” tall seal for the side of the core on the driver side was beneficial. Anything less might not have closed the gap on that side. Also, I placed a piece on the inside of the fan shroud. I also think having 1” there was beneficial but less so than the core side and I could be wrong.

The other areas you see in the pics I placed the seal were on the radiator, around the outside of the fan shroud, tucked right against it to seal it up. All these areas did not need 1” and would have been fine with smaller.

I had ordered the seal based on guesstimating from pics about needing 1”. So, having now done it, I don’t think I would order 1” again especially with how much it cost and the fact I could not find a smaller amount than 25’. But that being said, I am glad I have that larger size now that it’s done.

Now, as far as the rad goes, having not yet started the car or driven it, the only thing I don’t like is the claw looking attachments on the top of the rad that the AC condenser slides into, the condenser is a little loose and it jiggles a little. Had I know that would happen I would have put something over the sections of the condenser to prevent that. But I’m sure as hell not taking it back apart to do that.

I started yesterday about 1 and worked till 4.30 or so but after dropping the stock rad I pulled the stock BPV and put the Turbosmart one in. That took about an hour at least. Putting the Mountune rad in, I cut the blue protectant piece into 2 pieces for both sides of the core and just held it In place while getting the rad in. Before bolting on the brackets for the lower AC condenser hold I slid the front piece out, then after clicking the fan shroud into place on the bottom I slid the inside piece out the top. Luckily my Neoghbor was at his garage when I did it as his extra hand helped me getting it into place safely.
NICE! Great write-up and pics! I totally agree about using good EPDM material, so now that you did it and mention you prob wouldn't get 1" again, do you think 0.75" would cut it? If so, THIS stuff is only $38 at least, and nice and thick...


Messages
436
Likes
409
Location
Simi Valley, CA, USA
#50
NICE! Great write-up and pics! I totally agree about using good EPDM material, so now that you did it and mention you prob wouldn't get 1" again, do you think 0.75" would cut it? If so, THIS stuff is only $38 at least, and nice and thick...
Thanks!

Yeah for the money I think you’ll be fine with .75”. If you look closely at the portion on the driver side core side, you can see it’s not squished down or anything so I’d think that’s the only place you’ll be giving anything up. Pretty much everywhere else you’ll be perfectly fine.

I’m not sure how well or how long the adhesive will hold up so I am glad I have some extra but send me a couple bucks to cover shipping and I’ll send you a piece to cover that side along the core.


Messages
436
Likes
409
Location
Simi Valley, CA, USA
#51
that radiator install looks clean as heck. fantasic job! You def got your monies worth out of that sealant, plz let us know how the temps compare.
Thanks!

Ya know, I haven’t actually had my car out yet on one of our 95 deg days thus far but I did sit at the in n out drive thru for at least 20 min last week at 85 deg or so and my temp never went over 200 (according to the AP gauge). I see people who report highway driving and it’s sitting at 220. So it’s quite possible my temps won’t change much. But at least I should have head room for when it’s over 100 here. Although, I may continue working from home and not have to drive it in the heat 🤷‍♂️


danbfree

3000 Post Club
Messages
3,510
Likes
1,201
Location
Tigard, Oregon, USA
#52
Thanks!

Yeah for the money I think you’ll be fine with .75”. If you look closely at the portion on the driver side core side, you can see it’s not squished down or anything so I’d think that’s the only place you’ll be giving anything up. Pretty much everywhere else you’ll be perfectly fine.

I’m not sure how well or how long the adhesive will hold up so I am glad I have some extra but send me a couple bucks to cover shipping and I’ll send you a piece to cover that side along the core.
Thanks, that's a good idea! Other guy says half inch was fine but you show how one side, at least, could use the 1" tall... so I think I'll order some of the .562" tall for only $24 and can drop you a full $10 for your materials and shipping if that sounds good to you?


danbfree

3000 Post Club
Messages
3,510
Likes
1,201
Location
Tigard, Oregon, USA
#54
Would love to see a whole thread devoted to the radiator and foam upgrade if there's not one already!
LOL, was just thinking all this back and forth on this one topic should be made into a new thread! @New_Daily should maybe even take his post above and use it to start another thread so more people can catch it, it's definitely worth it!


Messages
436
Likes
409
Location
Simi Valley, CA, USA
#55
Thanks, that's a good idea! Other guy says half inch was fine but you show how one side, at least, could use the 1" tall... so I think I'll order some of the .562" tall for only $24 and can drop you a full $10 for your materials and shipping if that sounds good to you?
Totes ma-gotes. Just shoot me a DM with your address and stuff and I’ll send you my payment info. Have to ship out some bike parts I sold anyway. Gotta fund the car habit somehow!


Messages
29
Likes
30
Location
Pueblo, CO, USA
#56
I would have started this completely different - as a quick thought for the beginner that is just starting out
list the available options as a resource for new owners/modders

first mods should be:

Stage 1
1.) Tune
2.) Oil Catch Can
3.) Spark Plugs gapped correctly
4.) Drop in Air Filter
5.) Front Mount Intercooler upgrade
6.) Upgraded Rear Motor Mount

Stage 2
1.) downpipe
2.) exhaust
3.) intercooler charge pipe upgrade
4.) diverter valve upgrade or BOV
5.) intake kit

Stage 3
1.) hybrid turbo upgrade
2.) meth injection or Aux fuel for maximum benefit of the turbo upgrade
Honestly the intake and exhaust is later mods. The first (for power) Accessport, RMM, and FMIC. Pay for a tune (TunePlus is a good option). Panel filter will flow a little better, but the intake isn’t the bottleneck with this motor. Colder plugs gapped will get you a little timing. Most of the other mods are supporting mods for a hybrid turbo beyond this. My opinion.


Top