-
Sign Up! To view all forums and unlock additional cool features
Welcome to the #1 Fiesta ST Forum and Fiesta ST community dedicated to Fiesta ST owners and enthusiasts. Register for an account, it's free and it's easy, so don't hesitate to join the Fiesta ST Forum today!
Intercooler $329.95 Shipped
- Thread starter Depo Racing
- Start date
Trader history for Depo Racing (0)
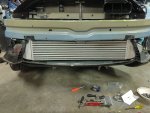
The stock one is much smaller and I'm pretty sure this one is 9 lbs more stock is 6 this one is 15 I didn't actually weigh mine but that's what I read on here and it felt about right to me by feeling them myself. This one is huge compared to stock
Thanks and I would've used t-bolt clamps but couldn't find anywhere local and I needed the car back together that night. I wish I did more research beforehand but it's been fine so far. 
Took just shy of 2 weeks to get delivered even though I ordered it the first day it became available (They created the label but never shipped it out until the following week).
The welds looked good. Weighs a bit more than stock, my guess is 6-7lbs at least. The stock intercooler by comparison feels like a toy.
Couple of things to note.
The inside of the cast end tanks had aluminum filings inside. I didn't want it circulating back into the engine. So I washed it out with dish soap and warm water. I let the whole thing fill up and empty out a couple of times. I shook out all the water and let it dry overnight at an angle. It seemed to get out most of the crud.
There are a pair of bolts and extended nuts that needs to be attached to the upper tabs to create the nubs that go inside the rubber grommets. There is a fair bit of play (mostly side to side, a little front to back) with it so you'll have to mate the stock intercooler next to it to get the proper width. The British variants have the nubs (posts) already welded on.
The bottom tab did not have to be removed. I loosened the 8mm bolt that holds the tab and drop it down as there was a millimeter or so of play. The fitment is ok but very tight. Looking at the British variants it looks like their tabs w/ nubs are welded up a tiny bit higher which makes the core sit down a little lower, I've read you have to trim off some of the bumper shroud and remove that middle tab on the car when installing theirs.
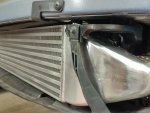
The top bolts that support the bumper shroud rubs against the intercooler's end tanks. I don't think it should be a problem but you might want to get shorter bolts or maybe stick something in between like an old bicycle tube.
While you're installing this it's a good time to tighten down the screws to all the clamps from turbo to intake. So when you're pushing 25PSI, these hoses don't loosen up and lose pressure.
I also installed the Velossatech Big Mouth air ram since that install also requires the bumper to be removed. See their R&D thread to read my notes on that.
My 2cents FWIW.


Last edited:
On the bumper shroud mount bracket thingy, I removed the screw clips and ziptied it together. That screw is touching the intercooler and the vibrations will eventually make it dig in.
It was a tight fit for me but everything went together smoothly. It took me just over 2hrs start to finish but nearly an hour of that was messing with my damn splitter. I had the bumper off in under 10 minutes. I can't believe how many extra steps people are adding to their DIY tutorials.
My stock hose clamps were barely past hand tight. It held 25psi just fine. I have them cranked down and they hold 26psi just fine. The key is to tighten then with a wrench, not a screwdriver.
Sent from my SM-G950U using Tapatalk
Took just shy of 2 weeks to get delivered even though I ordered it the first day it became available (They created the label but never shipped it out until the following week).
The welds looked good. Weighs a bit more than stock, my guess is 6-7lbs at least. The stock intercooler by comparison feels like a toy.
Couple of things to note.
The inside of the cast end tanks had aluminum filings inside. I didn't want it circulating back into the engine. So I washed it out with dish soap and warm water. I let the whole thing fill up and empty out a couple of times. I shook out all the water and let it dry overnight at an angle. It seemed to get out most of the crud.
There are a pair of bolts and extended nuts that needs to be attached to the upper tabs to create the nubs that go inside the rubber grommets. There is a fair bit of play (mostly side to side, a little front to back) with it so you'll have to mate the stock intercooler next to it to get the proper width. The British variants have the nubs (posts) already welded on.
The bottom tab did not have to be removed. I loosened the 8mm bolt that holds the tab and drop it down as there was a millimeter or so of play. The fitment is ok but very tight. Looking at the British variants it looks like their tabs w/ nubs are welded up a tiny bit higher which makes the core sit down a little lower, I've read you have to trim off some of the bumper shroud and remove that middle tab on the car when installing theirs.
The top bolts that support the bumper shroud rubs against the intercooler's end tanks. I don't think it should be a problem but you might want to get shorter bolts or maybe stick something in between like an old bicycle tube.
While you're installing this it's a good time to tighten down the screws to all the clamps from turbo to intake. So when you're pushing 25PSI, these hoses don't loosen up and lose pressure.
I also installed the Velossatech Big Mouth air ram since that install also requires the bumper to be removed. See their R&D thread to read my notes on that.
My 2cents FWIW.
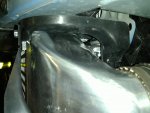
View attachment 15308 View attachment 15307 View attachment 15306
With rubber couplers you can get by with worm clamps, not a chance with silicone couplers. Once the screw mechanism in them pops they are done. For a few bucks each, I would just use tbolts.
Similar threads
-
-
WTB Need stock or aftermarket intercooler and piping ASAP
- Started by FiestaaaST
- Replies: 4
-
Wagner intercooler and TB performance crashbar
- Started by Ganjie
- Replies: 0
-
WTB Looking for new or used intake, exhaust and intercooler.
- Started by fredrodregus
- Replies: 3
-
My v dyno results whoosh v3 intercooler vs stock intercooler
- Started by Stkid93
- Replies: 0
-
-
-
-
Possible to log temperature after intercooler
- Started by ledzz1
- Replies: 0


