• Sign Up! To view all forums and unlock additional cool features

    Welcome to the #1 Fiesta ST Forum and Fiesta ST community dedicated to Fiesta ST owners and enthusiasts. Register for an account, it's free and it's easy, so don't hesitate to join the Fiesta ST Forum today!


How-To: Stock Height Rally Performance Springs for OEM/B6 style suspension

Dialcaliper

Senior Member
Messages
879
Likes
1,448
Location
San Francisco Bay Area
#1
This all started with the thought that “I wish I could have the Swift Spec-R spring rates, but not lower the car”

Sharing the result in case anyone else was interested in my little experiment.

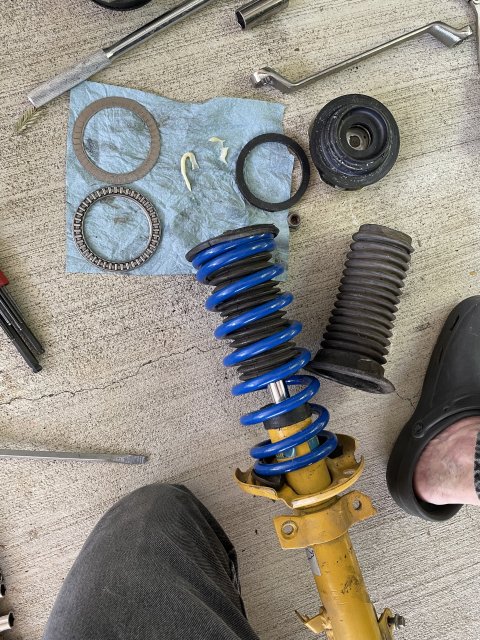
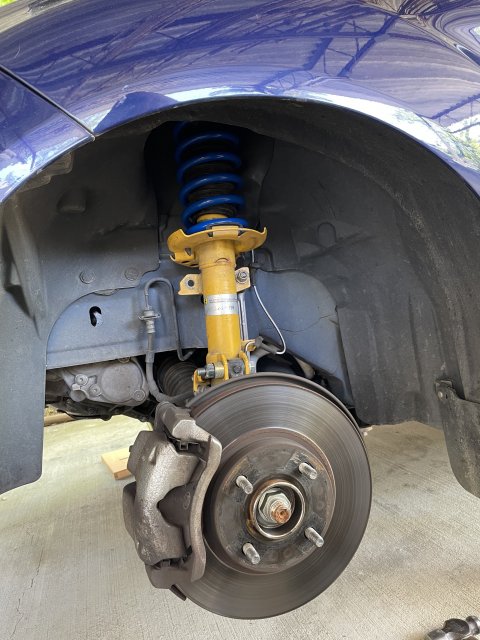
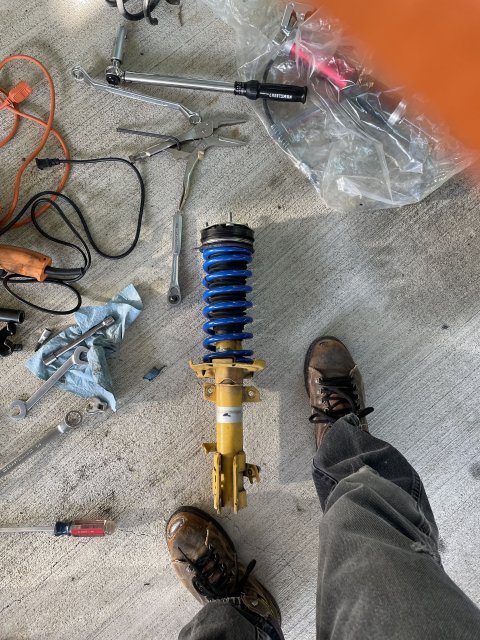
Long story short, as part of preparing for a backpacking excursion, I have come up with a way to get stiffer springs with stock ride height, using stock struts, or hopefully any stock-height replacement struts (I have put them on Bilstein B6 Struts in the front - car was currently still rocking stock rears at the time). Here's a picture post-dirt bath:
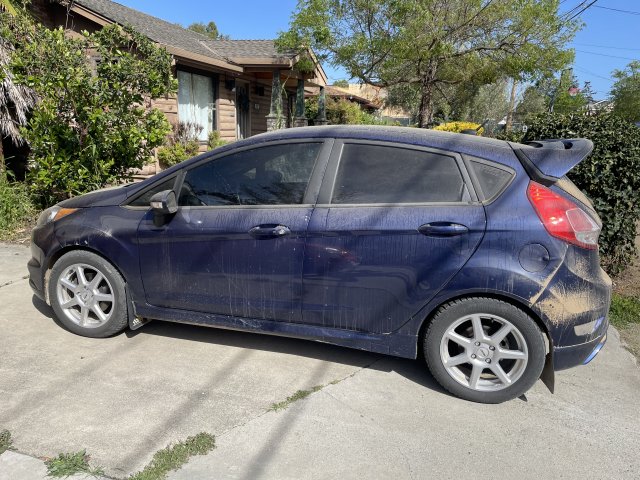

IMG_8604.JPG

If you want to read the long version with all the nitty gritty details on the assembly, its in my build post here if you scroll to page 2

https://www.fiestastforum.com/threads/feisty-the-family-car.30825/

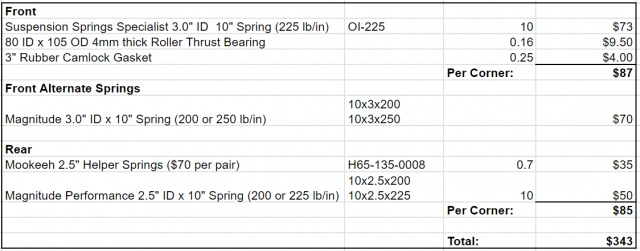
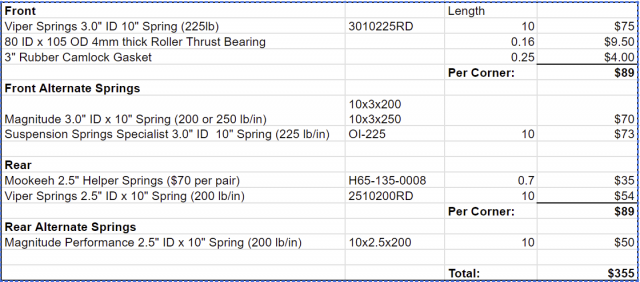
Essentially, I have come up with a way to make a budget ~$350 performance spring setup (before shipping) using 225F/200R rates that turned out to sit pretty close to stock ride height. The spring rates are a fairly close match to the popular Swift Spec-R lowering springs (212F/212R), but without the ~1.0” drop in ride height.

I was initially shooting for 0.25-0.5" of lift, but ended up with no lift at all. You get what you get! The setup uses standard 2.5” ID Coilover springs in the rear, and standard 3.0” ID coilover springs in the rear - a less ubiquitous size, but reasonably common in large body offroad truck shocks, ala Fox.

The end result was definitely an improvement over stock, and if I hadn’t had larger ambitions, I might have been really happy with this setup for street driving, and even track days or autocross.

Parts List! (Edited with more options and links)

Here is a "budget" parts list I put together if you want to buy everything brand new as but as cheaply as possible. Note, the 225lb front springs I used were on clearance, so if you can’t find them cheaply, there are also some options in 200 and 250lb that can be had more affordably from Landrum (who mostly makes stuff for OEMs) and other companies. I also stumbled across Magnitude performance, which looks remarkably affordable, and is apparently made in Texas. I also updated the parts list, as "Viper Springs" has some very affordable options including the correct 225 lb/in option (No idea where they are made). Seemingly all decent alternatives to cheap questionable ebay stuff.
1696453045335.png
Links:

Springs: (need to select correct rate and choice of color for the two different ID springs)
Viper 3.0x10 225lb front (Need 2x): https://f-o-a.com/shop/viper-3-0-inch-id-spring-10-inch-length/
Viper 2.5x10 200lb rear (Need 2x): https://f-o-a.com/shop/viper-2-5-inch-id-spring-10-inch-length/

Front Bits:
3" Camlock Rubber Gaskets (Spacer need 1x 5-pack): https://www.amazon.com/gp/product/B0B3W8BXYD/
Thrust Bearing 80x105x4mm (Spacer, need 2x): https://a.co/d/j6ja8SX

Mookeh 2.5" Helper Springs (1x sold as a pair - get the shorter 3" tall ones): https://www.ebay.com/sch/i.html?_from=R40&_trksid=p2334524.m570.l1313&_nkw=mookeeh+2.5"+helper+spring

(Pretty much any zero rate 2.5” ID helper will work, these are just the cheapest I’ve found)

Note, because this is sort of an experimental setup for me while I'm working on a more long term solution, I did it on the super cheap. I used SSS front springs and parts listed in the front (off Ebay and Amazon because I was in a hurry), but in the rear I scored a set of pair of off-brand 200lb coilover springs off ebay for $50 shipped. So who knows how well they are matched and how long they will last before sagging. I used a set of helpers I had already instead the "Mookeeh" ones (which are a brand I've never heard of off ebay)

Obviously, you can substitute higher quality components, but expect to pay significantly more for them. But for a set of "Rally Springs", the cheap ones are fine for now. One caveat with this setup is that the rubber camlock gaskets I used are 3" ID 1/4x1/4 rubber rings with a slight stretch (technically 10% is okay for rubber orings). They may be cheap, but they seem to be holding up

I could make a custom spacer ring easily, but that kind of defeats the point of the "anyone can do this" I was going for. A Poly spring isolator would be nice, but I haven't found one exactly the right size yet in the universal ones, and its hard to find details on the car model-specific ones out there. They’ll probably work fine with the other upper rings available

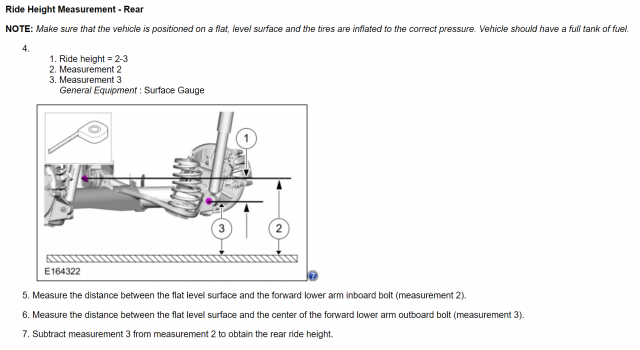
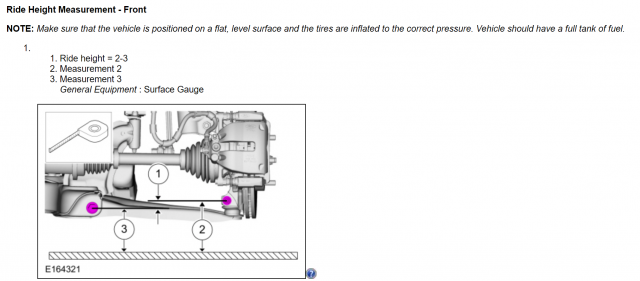
I measured ride height by the service manual between control arm bolt heights, After walking out and measuring, I’m at 13mm/19mm (only measured the driver’s side in a hurry - logic says passenger side might be ever so slightly higher). My measurements are probably +/- 6mm or so

Stock ST is listed as 12mm/15mm and Base Fiesta is 16.5mm/40mm. Keep in mind the service manual also says +/- 14mm so there’s plenty of room to go even higher!

1683160476701.png
1683160533077.png 1683160577143.png

On that note, you can adjust the ride height up or down slightly (approx +/-8mm) by choosing a slightly stiffer or softer spring (I recommend staying between rates of 200-250 front and 175-225 rear). I would also not recommend going above 225/200 on the stock shocks. Bilstein B6’s might be good for 225/225 or 250/225. 250 may be a bit too much on stiffer street tires (you can run slightly stiffer springs with softer sidewall snow tires) but YMMV

Last caveat is this is a DIY setup especially the workarounds I did in the front, so anyone trying it should do so at their own risk!

Edit: I’ve now tested the springs for 11,000 miles over a year and a half, and they’ve held up great!


Attachments

Last edited:
OP
Dialcaliper

Dialcaliper

Senior Member
Messages
879
Likes
1,448
Location
San Francisco Bay Area
Thread Starter #2
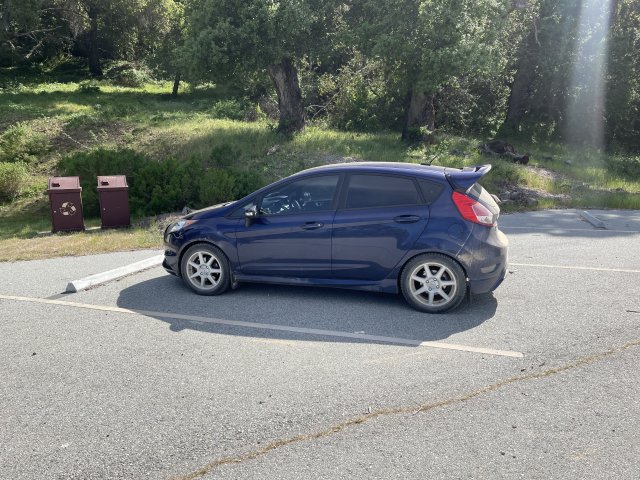
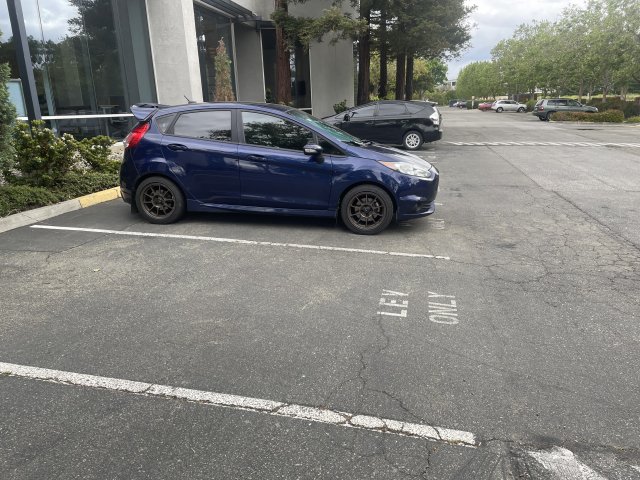
A little update - back to summer tires. Ride height looks stock. I expect it might settle a little bit over time.

The car feels nicely planted and settles faster going over bumps, and either I’m just imagining it or the ride quality has actually improved. It’s certainly firm but it feels less “harsh”.


Attachments

M-Sport fan

9000 Post Club
Messages
14,435
Likes
6,991
Location
Princeton, N.J.
#3
That is what I desire, i.e.; close to, or at, factory ride height, along with ~40-50 in. lb. more linear spring rate.

I was hoping that the Spec Rs, paired with B6es would yield almost no lowering at all, given the 'Bilstein static ride height raising effect', but this seems to be random/hit-or-miss given how some on here have experienced lowering, and some do not, with that setup. [dunno]

Add to that the point that some on here make that those springs should be (must be?) paired with the shorter B8s, due to the reduced loaded height of the Swifts requiring the lesser damper travel.

It's a shame since that same company you used for the front springs (Suspension Spring Specialists) made a standard production off the shelf, set of higher linear rate/factory ride height springs in a standard strut/spring mount 5.5" I.D. size for my '89 Mk2 GTI, and they were perfect.


OP
Dialcaliper

Dialcaliper

Senior Member
Messages
879
Likes
1,448
Location
San Francisco Bay Area
Thread Starter #4
That is what I desire, i.e.; close to, or at, factory ride height, along with ~40-50 in. lb. more linear spring rate.

I was hoping that the Spec Rs, paired with B6es would yield almost no lowering at all, given the 'Bilstein static ride height raising effect', but this seems to be random/hit-or-miss given how some on here have experienced lowering, and some do not, with that setup. [dunno]

Add to that the point that some on here make that those springs should be (must be?) paired with the shorter B8s, due to the reduced loaded height of the Swifts requiring the lesser damper travel.

It's a shame since that same company you used for the front springs (Suspension Spring Specialists) made a standard production off the shelf, set of higher linear rate/factory ride height springs in a standard strut/spring mount 5.5" I.D. size for my '89 Mk2 GTI, and they were perfect.
I'll post updates as I test them out - its been raining so I haven't had a chance to take them out for a serious drive, but they seem solid on the various on and off ramps I've had the clear chance to let it rip. The bounce frequency is definitely higher, but there's no underdamping/wobble present at the moment, so that's a plus - 250lb springs in the front paired with the B6 might not be out of the question (as long as you don't mind the 0.25-0.3" lift over stock), But I suspect the 225lb would be about the limit for the stock front struts. Unfortunately I don't have the rear B6's.

The rubber camlock gaskets I used as spacers have not just immediately split from overloading, so that's also a good sign that they'll last at least a short while until I find a more robust alternative. They're only being loaded to about 200 psi under the full weight of the car (maybe twice that over bumps), which isn't too much for Buna-N rubber as long as its not completely garbage quality stuff.

In any case, for the price of ~$350 which is similar to a new set of Swifts, this may turn out to be a pretty interesting option.


OP
Dialcaliper

Dialcaliper

Senior Member
Messages
879
Likes
1,448
Location
San Francisco Bay Area
Thread Starter #5
So I ended up taking a “spirited” drive tonight up in the hills to blow off some steam (complicated), and wow, is this a lot better than the stock setup. Definitely settles quicker over bumps, and actually rides better as well as it’s not contacting the bumpstops all the time - the car didn’t bottom out even on some of the rough road dips it (and Miata we have) usually “slam” going into.

Unfortunately I haven’t experienced a Swift spring setup to compare it to, but it’s better than both the previous “stock-ish” setup, and the Mountune springs that were on the car when I bought it. No sign of understeer at the limit that plagued both previous setups. I came into one corner a little hot and actually broke the tail loose ever so slightly before canceling it with some throttle. I still have yet to install the rear camber plates.

What I can say is that I certainly don’t feel like the car misses out on any handling improvements due to not being at a lower ride height, and is at least one data point that agrees with my measurements showing that the front suspension geometry is already pretty close to the ideal height and actually gets slightly worse when significantly lowered from stock height.

Definitely a step up and I just really hope the more complicated suspension setup I’ve been working on is actually another noticable improvement over this setup.


Last edited:
Messages
80
Likes
63
Location
Vienna
#6
cool setup! I feel the b6 should be able to handle the spring rate and you dont lower the car, very good and cheap solution if you want some ground clearance and suspension travel.


OP
Dialcaliper

Dialcaliper

Senior Member
Messages
879
Likes
1,448
Location
San Francisco Bay Area
Thread Starter #7
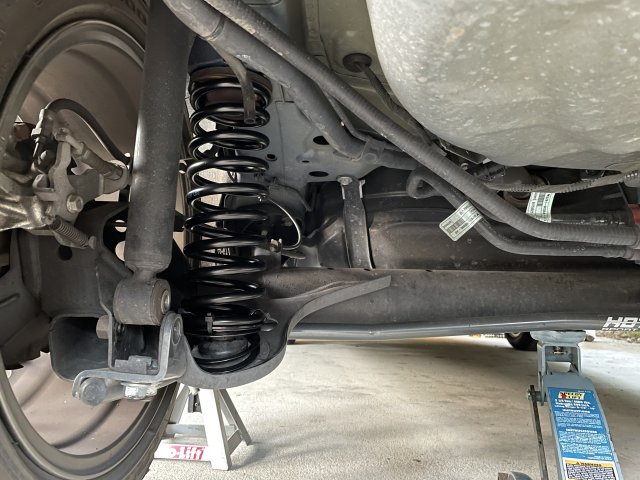
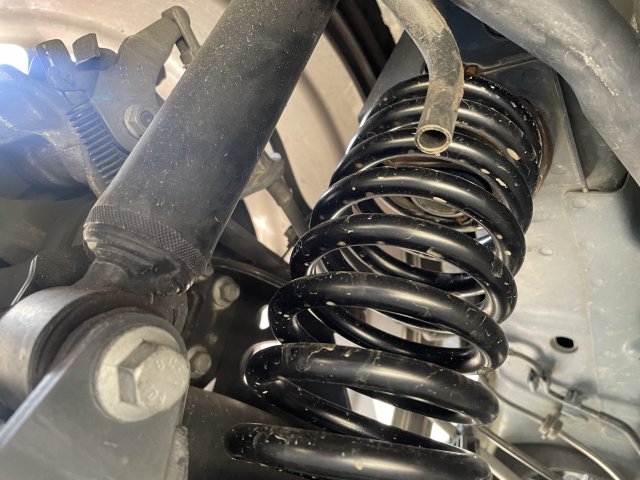
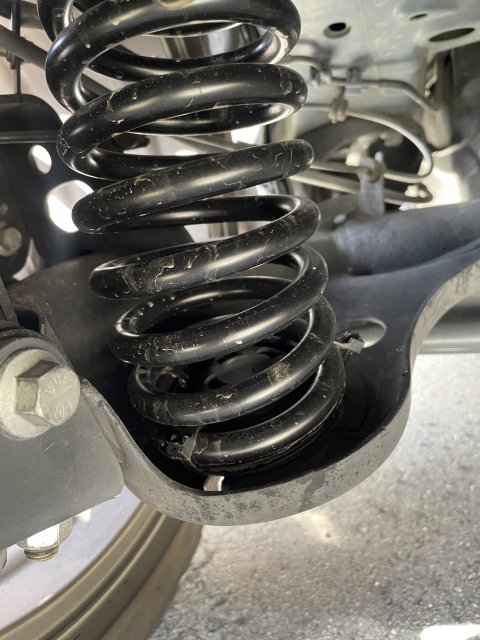
So I just poked my nose under to see how the rear springs are settling in - on the old stock rubber isolators, the springs sit a bit towards the rear of the upper spring perch. It doesn’t seem to really be a problem as it’s still fully on the perch, but I wonder if using a different isolator would make it sit more centered, as it may cause the stock isolator to get chewed up faster.

Either a whoosh/Powerflex polyurethane, or maybe just a universal poly isolator that doesn’t have a notch for the end of the coil (since the coilover springs contact almost all the way around, vs stock springs that only really contact in a part circle

Alternately, a 60mm ID spring might be a better fit, but that may limit your rate options to 3k or 4k stiffnesses (168 or 224 lb/in), unless you can find a 3.5k (196lb/in) spring which is a an oddball size and hard to find - only Eibach makes 2.36” springs in “standard” 25lb increments and those aren’t cheap.

it might even work with a 2.25” ID spring but it might be tight

The bottom spring cup seems more or less fine, but could also accept a smaller spring


Attachments

Last edited:
OP
Dialcaliper

Dialcaliper

Senior Member
Messages
879
Likes
1,448
Location
San Francisco Bay Area
Thread Starter #9
Very cool, thanks for sharing this!

What made you use the helper springs in the rear, just extra spacing?
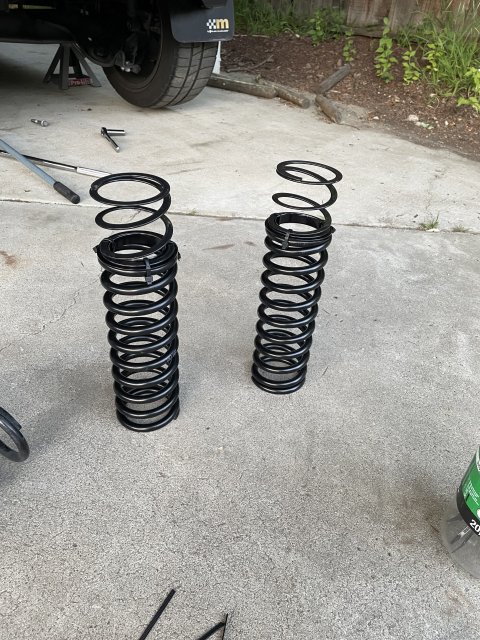
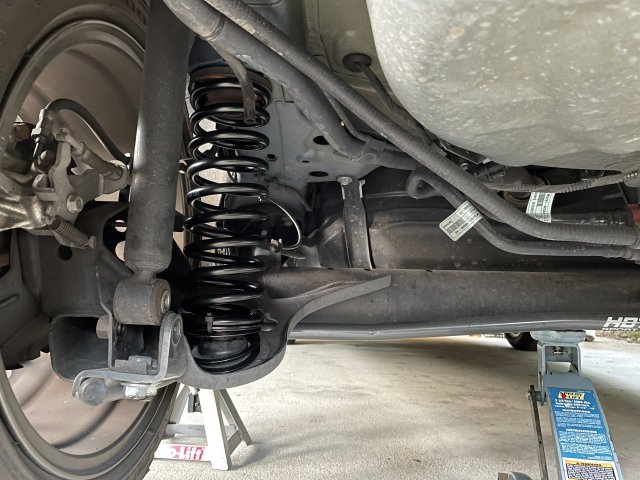
At droop, the rear main spring would be barely touching, so it’s partly the extra spacing to keep the rear springs preloaded and there’s also significant angle mismatch between the body and torsion beam perches that would cause the main spring to go banana shaped - the softer helper spring accommodates the angle and lets the stiffer coil spring sit more straight and vertical, less likely to pop out.

At ride height, the helper is fully compressed, but at droop you can see the helper is open at the back. Image below for reference is also in the first post.


Attachments

kevinatfms

Senior Member
Messages
889
Likes
940
Location
Germantown
#10
Do you think the 3" ID would fit over the stock top hat bearing? I see you used a fabricobbled setup with the roller bearing and rubber isolator but the stock top hat already has the bearing within it along with the rubber boot.

It could be a nice little setup to go with the 3" springs in an 8" length at 250/225 rates on the B6/B8 damper. A bit more spring rate to help eliminate roll without requiring adjustable coilovers.


OP
Dialcaliper

Dialcaliper

Senior Member
Messages
879
Likes
1,448
Location
San Francisco Bay Area
Thread Starter #11
Do you think the 3" ID would fit over the stock top hat bearing? I see you used a fabricobbled setup with the roller bearing and rubber isolator but the stock top hat already has the bearing within it along with the rubber boot.

It could be a nice little setup to go with the 3" springs in an 8" length at 250/225 rates on the B6/B8 damper. A bit more spring rate to help eliminate roll without requiring adjustable coilovers.
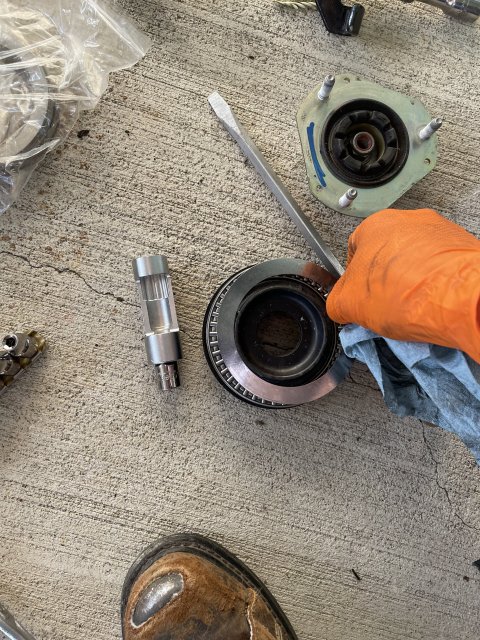
As I mentioned, the roller bearing and rubber ring are only being used as spacers instead of a helper spring which would have been too tall They just happened to be what fit well with the diameter of the stock plastic bearing.

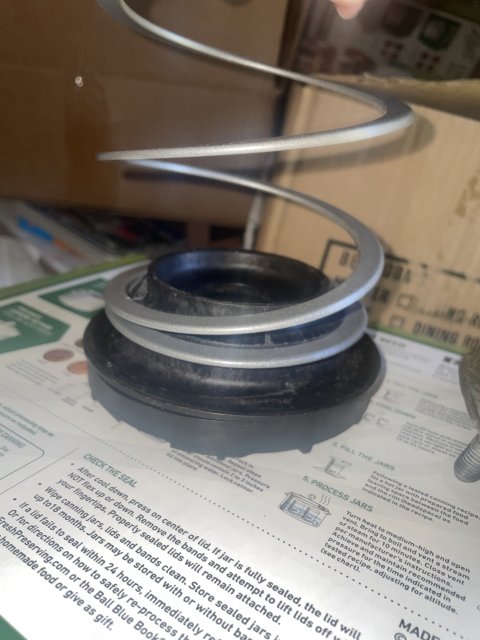
The 3” spring is about 1/8” too small for the top hat because of the taper on the stock plastic bearing so it won’t sit all the way “up” on the flat. Ideal diameter for the spacer is about 3.25”

An 8” spring could be doable, but would require some additional spacer and a helper spring. It took me a while to wrap my head around it, but a 2” shorter spring of the same rate would result in a 2” drop, which is too much because the winding is different to get the same spring rate.

What I’d do is swap to a 9” spring in the rear (like the ones JEGS sells), and then keep the funky bushing setup in the front and add a 3” helper in the front, on an 8” spring in the front, but *keep* the rubber ring and roller bearing (or some other convenient spacer) in the front.

250/225 rate would add about 0.3” F/R height, so I’d estimate you’d sit about 3/4” below stock. I’d definitely recommend a stiffer shock like the B6, as the 200 I have in the rear on stock rear shocks (@60k miles) rides fine, but is on the bouncy side on the freeway.

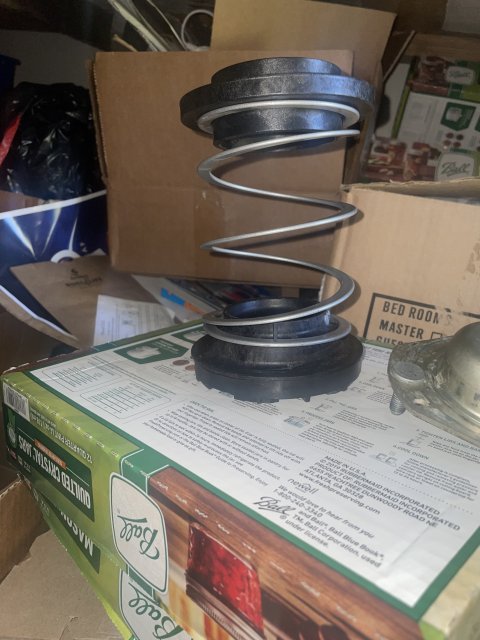
I did find a reasonable affordable 3” Accutune helper spring - together with its coupler/slider (meant for off-road shocks), it adds about an inch of height. You can see how it doesn’t quite sit down on the bearing - the 3” main spring is similar.

The other option as I mentioned for a “rally” lift is B6 shocks with 250/225 in 10” length, which will lift the car just over 0.25” above stock ST height (closer to base model Fiesta, at least in front)


Attachments

Last edited:
OP
Dialcaliper

Dialcaliper

Senior Member
Messages
879
Likes
1,448
Location
San Francisco Bay Area
Thread Starter #12
And just to clarify, the bearings are not being used for steering or thrust release, they could just as easily be solid spacers. The reason I used them was that they are off the shelf, cheap parts that are the right diameter and height. I could have easily made a custom spacer, but I wanted to avoid that and see if I could build this up as a DIY option with off the shelf parts anyone could buy without requiring custom pieces.


OP
Dialcaliper

Dialcaliper

Senior Member
Messages
879
Likes
1,448
Location
San Francisco Bay Area
Thread Starter #13
Just a little progress report. Roughly 3000 miles later and the spacer bearing+rubber ring is still holding up nicely. The spring setup is still working great. The front is great with the B6 struts, but since I’ve still got 60k mile stock rear shocks, there’s a wee bit of bounciness back there. Rear B6’s are still on backorder, but I’ve been keeping an eye out for used ones. I think I might be sad when I swap out this setup for the bigger and better custom suspension I’m working on 😢

One thing I realized after talking to someone with a Swift setup - the 3.0” ID spring I’m using is smaller in diameter than the stock style lowering springs, so there’s more clearance if you try to use camber plates up top (Compbrake/DNA), as normally the spring can contact the tower if you shift it in too far.

I'm genuinely curious how this actually stacks up to a the Swift Spec-R in terms of ride quality and handling. Sadly I haven't had a chance to ride in a car so equipped (only the stock and Mountune).


Attachments

Last edited:

Fusion Works

Active member
Premium Account
Messages
723
Likes
959
Location
Huntsville, AL, USA
#14
The stock spring is offset wound to not put a bending load into the damper? How did you correct the difference in the upper and lower spring seats not being in line?


OP
Dialcaliper

Dialcaliper

Senior Member
Messages
879
Likes
1,448
Location
San Francisco Bay Area
Thread Starter #15
The stock spring is offset wound to not put a bending load into the damper? How did you correct the difference in the upper and lower spring seats not being in line?
From what I can tell of our front springs and dampers, they are not actually offset like a lot of struts that usually have a “stepped” lower seat - the stock style springs are more or less coaxial with the damper shaft. You’ll notice our front struts don’t even use the totally redundant lower shelf on the (pretty standard) strut body, and we also don’t have an offset “angle” on the upper spring seat. I think this is because Ford managed to get the strut reasonably well aligned “close enough” to the angle from the strut tower to
the contact patch, and so the offset isn’t really needed - the stock front spring is basically a 3.0” ID “barrel” spring - which is why this crazy scheme works in the first place.

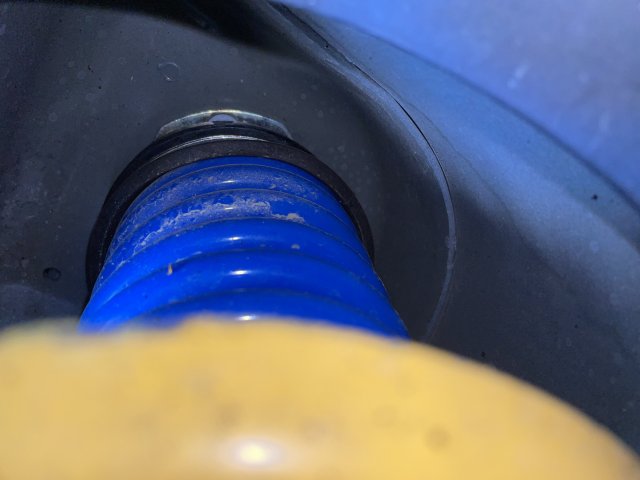
For any remaining side load, they just seem to just rely on the pigtails being 180 degrees apart on the wind. The ground end of the blue spring only touches down on the lower rubber isolator with the strut extended, and like most springs, it is wound with the ground tips also 180 off, or at least pretty close.

Note - most struts have an offset spring so that the *spring* sees axial loading and doesn’t bow under compression - the strut more or less doesn’t care as it’s already taking substantial side loads, and it’s a standard strut body that sees use on much heavier vehicles than this one.


Last edited:
OP
Dialcaliper

Dialcaliper

Senior Member
Messages
879
Likes
1,448
Location
San Francisco Bay Area
Thread Starter #16
I came across some other options by "Viper Springs" that look reasonable including in the correct 225lb/in front option, and updated the original post with a new parts list, and more importantly, links so you don't have to hunt down individual pieces on your own. The cost comes out actually pretty similar to a set of new Swift Spec-R springs ($350+shipping) though the shipping on all the individual pieces may end up being a bit more expensive. If anyone does end up trying this out, I'd love to hear how it went, especially in comparison with other stock or aftermarket lowering springs, especially the much loved Swift setup.


Last edited:
OP
Dialcaliper

Dialcaliper

Senior Member
Messages
879
Likes
1,448
Location
San Francisco Bay Area
Thread Starter #17
Just a minor update. I've now put 7500 miles on this setup and so far everything is holding up just fine, including the rubber spacer rings I was worried about! It still handles and rides much better than stock, no clearance issues so far (especially since switching to the Swave front subframe brace). The one thing I've noticed is that since I'm still using stock shocks in the rear with almost 70k miles on them, the rear is a little bouncier than I'd like. The used B6's in front are perfect. I think for these rates, a B6 shock is perfect, and a fresh OEM valve shock would probably be fine, but if you're shocks are getting long in the tooth, the damping might not be up to the task of the stiffer springs


OP
Dialcaliper

Dialcaliper

Senior Member
Messages
879
Likes
1,448
Location
San Francisco Bay Area
Thread Starter #18
It’s time to give these springs a final report card, and I think they deserve an A+

The car has been handling and surprisingly,
riding slightly better than stock on the stiffer springs - probably because they don’t bottom on the bumpstops nearly as often

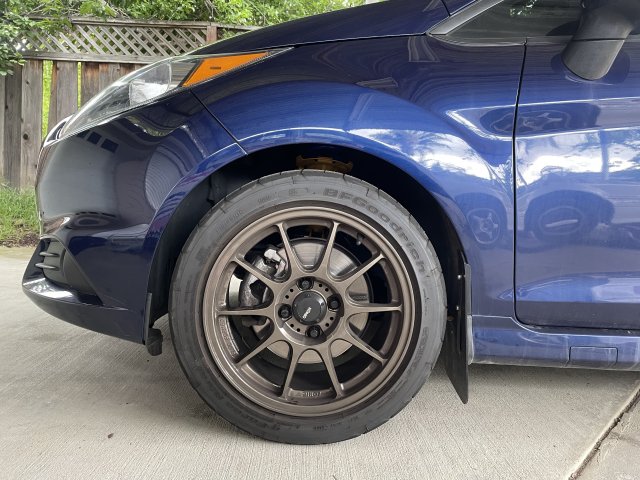
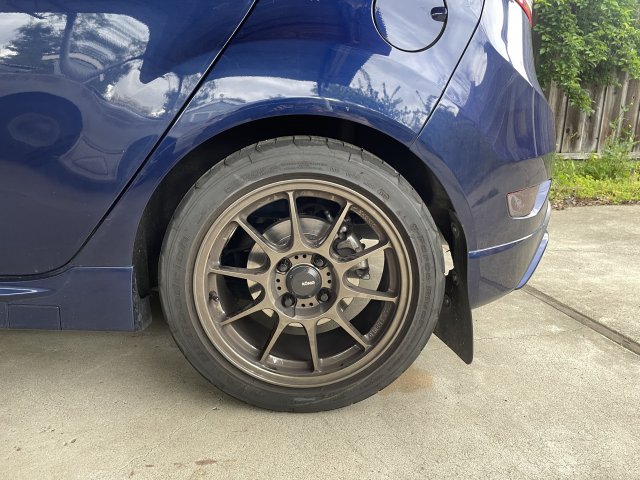
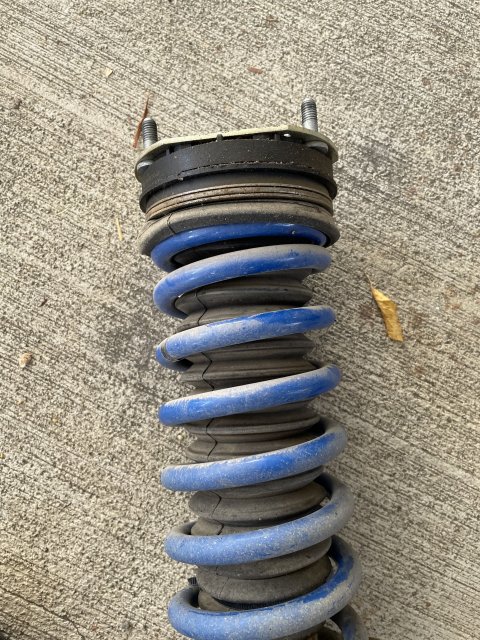
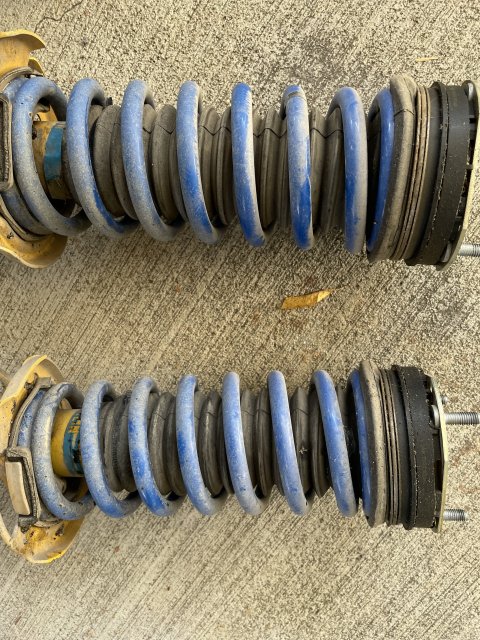
I’ve run them on the car for a year and a half, and a bit over 11,000 miles, and they’ve held up well. The rubber gasket rings I added as spacers still look almost new even though I was worried about them.

Then springs didn’t really settle that much, but if anything they look even closer to stock than before. Aside from being a bit dusty from driving on dry dirt roads, they held up really well

I’m finally moving onto my fancier customized Bilstein suspension now that it’s finally ready, so these are being retired. Not sure whether I’ll keep them as spares or just find a new home for them.

IMG_9632.jpeg IMG_9633.jpeg 1728198332351.jpeg


Last edited:
OP
Dialcaliper
Messages
879
Likes
1,448
Location
San Francisco Bay Area
Thread Starter #19
Since some other people have expressed interest in trying this, I though I’d add a couple of tips on assembly of the front:

For the Front:

1) It was easier to insert the stock rubber accordion inside the spring before trying to put the spring on the strut perch.
2) Set the bottom of the spring into the rubber slot on the strut perch
3) Then, insert the bumpstop into the top of the boot and onto the shock shaft, pointy end down towards the strut. Don’t worry about stuffing it all the way down, it will settle into the right position once everything is together
4) Stack the added roller thrust bearing on top of the rubber boot, followed by the cam lock gasket and the OEM plastic bearing. You can also set the three together (cam lock gasket in between), then drop them onto the shock shaft
5) Drop the hat (OEM or aftermarket) onto the shaft and seat it into the bearing
6) You should then be able to stand the strut up, shove down on the shock hat with your hand and insert the hat onto the shock shaft just enough to get the topnut started. No spring compressor required!
7) Tighten and torque the nut to the shaft and the strut is then ready to install!

I used one of these handy dandy strut nut sockets that makes things easier to install by fitting an Allen key in the open side.

https://www.pelicanparts.com/More_Info/PEL003046SCH01A01.htm?pn=PEL-003046SCH01A-01

For the Rear:

1) The helper spring goes on the bottom towards the torsion beam - this helps the main spring stay more vertical aligned with the car body instead of bending around
2) add 2-3 Zip ties between the main and helper spring around the spring adapter. Not necessary once installed, but it makes it way easier to install the spring without having to hold 3 things in place
3) Optional, if you have poly top mounts, you can trim the little anti rotation flange tab for the OEM spring to let the coilover spring sit more centered on the perch. Obviously this means it won’t be there if you try to reinstall the OEM spring
4) Jack the car up on jackstands and put the jack under the torsion beam. Loosen the lower shock bolts and lower the beam using the jack which makes install a piece of cake.
5) Swapping the rear springs (or shocks) does not affect alignment (which is entirely controlled by the torsion beam), so you can do the rear anytime without needing to get the car realigned. There’s no rear adjustment anyway!


Similar threads


Top