• Sign Up! To view all forums and unlock additional cool features

    Welcome to the #1 Fiesta ST Forum and Fiesta ST community dedicated to Fiesta ST owners and enthusiasts. Register for an account, it's free and it's easy, so don't hesitate to join the Fiesta ST Forum today!


How to Ruin a Perfectly Good Fiesta in 3 Years

Fusion Works

Active member
Premium Account
Messages
720
Likes
957
Location
Huntsville, AL, USA
#21
I can make some in theory. Wonder if I have the pattern I used.

I don't deal with snow either, but damned if that one event in March of last year didn't result in a massive snow storm hitting just North of Nashville when I went through on the way to NCM. It was a freak storm. I have now take 200 treadwear tires places they should never go.


Messages
492
Likes
550
Location
Camden, NJ, USA
#22
Didn't realize he was talking about your welder. Oops

The driver side seemed to hold up OK, the passenger side that has to go under the engine wasn't as fortunate. Also when driving in a snow storm those brake ducts will pack full of ice and snow. HAHA It takes more than one session at NCM to actually melt the ice out.


I was referring to the welds in my pictures. HAHA. I didn't realize how bad they look. I made all of the pieces for my brake ducts. The flanges are .062 aluminum sheet I formed to weld to the aluminum tube. They should work better than the under ducts. I melted a set of BP20 pads at Barber and NCM with the under mount ducts. You get better packaging through the bumper and fog light holes. You will lose the washer bottle though.
Yep, was confusing your work for @razr_m3

Thought you were helping him out @Fusion Works and that his original brake ducting sat too low and went with the setup you show in the thread. And also, yes, thought *your* weld work was *his* weld work.

we're all on the same page now.


OP
razr_m3
Messages
94
Likes
162
Location
Durham, NC, USA
Thread Starter #24
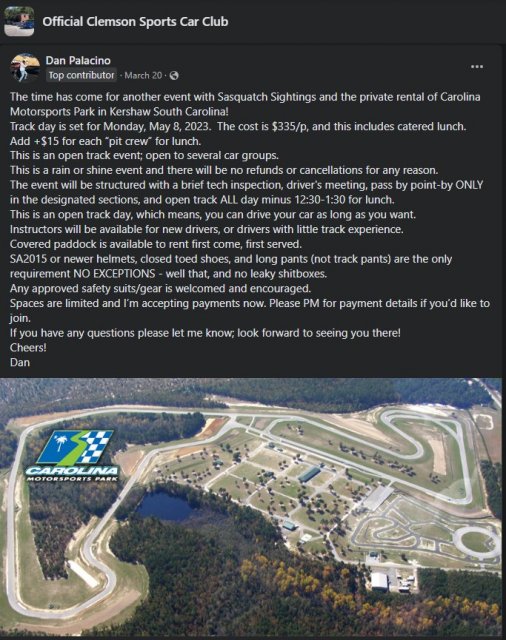
The event I was supposed to go to tomorrow got cancelled, so I need to work on scheduling a different event. I think I'm going to do an event at CMP on 5/8, but I haven't sorted everything out yet.


Fusion Works

Active member
Premium Account
Messages
720
Likes
957
Location
Huntsville, AL, USA
#25
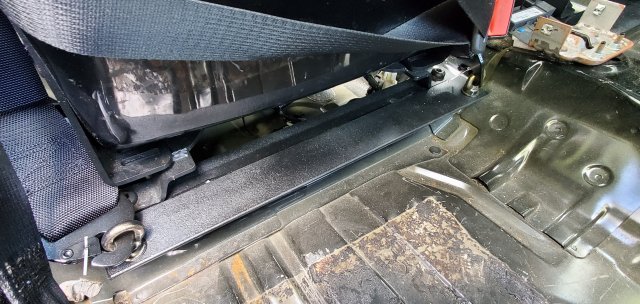
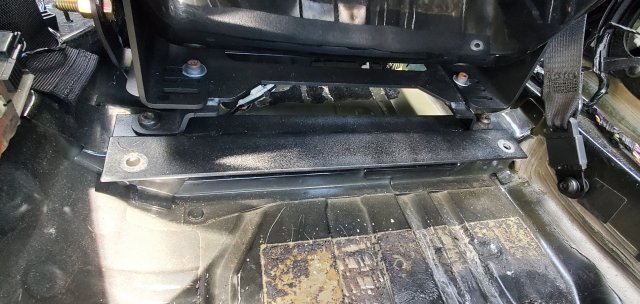
Are those belts attached to the seat rails or the chassis? If they are attached to the seat rails, move them to the floor. This way if the seat gets loose you aren't strapped to the missile. Most organizations want the belts attached to the floor and roll bar.


OP
razr_m3
Messages
94
Likes
162
Location
Durham, NC, USA
Thread Starter #26
Are those belts attached to the seat rails or the chassis? If they are attached to the seat rails, move them to the floor. This way if the seat gets loose you aren't strapped to the missile. Most organizations want the belts attached to the floor and roll bar.
The lap belt bracket is through bolted using the seat bolts currently. The plan is to permanently anchor the bracket I made to the frame underneath the seat. Was going to weld it, but will likely bolt is so it's removable and not permanently in the way.


rallytaff

1000 Post Club
Premium Account
Messages
1,274
Likes
878
Location
Los Angeles
#27
My Corolla rally car had them bolted to the floor and the transmission tunnel. Easy to get at.


Fusion Works

Active member
Premium Account
Messages
720
Likes
957
Location
Huntsville, AL, USA
#28
The lap belt bracket is through bolted using the seat bolts currently. The plan is to permanently anchor the bracket I made to the frame underneath the seat. Was going to weld it, but will likely bolt is so it's removable and not permanently in the way.
Look at moving the lap belts to the original holes in the inner rocker panel. Then attach the inner through the tunnel with a large .125in steel backer, or you could weld a weld nut to a plate and then weld that into the tunnel. I have used both designs. Then attach your 6pt belts to the floor under your seat with some beefy backer plates. You want to design your harness mounts to take a 40+g hit.

Also the retarded belt manufactures haven't worked with the seat manufactures to design seats that properly work with 6pt belts. Most of the 1999 FIA seats are designed for five point harnesses. If you want to mod your seat for the proper 6pt belts I can offer some tips on that, but that really is only an option on a decent composite shell seat.


Messages
30
Likes
30
Location
Virginia
#29
Figured it would be fun to document the process of how I ruined a perfectly good Recaro-equiped Fiesta.

I have a bunch of my incredibly amateur driving events on YouTube if you like watching FiSTs race: https://youtube.com/@djchameli9165

When I bought this car, I made a promise to myself that any mods I did to it I would install myself (unless it involved opening up the engine or transmission). I wanted to keep it from turning into a money pit like my 335i. To my credit, I've stuck to that, with the exception of the LSD, clutch, and alignment/corner balancing.

4/4/20 - I bought the car used with 33k miles for $14.5k. I traded in a 2008 Honda Fit (hence the transferred "Jazz" license plate) because, although it was fun, the lack of a highway gear and Android Auto was a pain when driving 5hrs roundtrip for work

5/10/20 - I picked up some 16x8 Konig Dekagrams and some crappy Federal tires

6/8/20 - cp-e intercooler purchased and installed along with the Mountune short shifter and a Cobb RMM

At this point, I was planning on doing minimal mods to the car and to keep it relatively stock as it was my daily driver. I stuck with it for a surprising amount of time in retrospect. But, as it always does, the upgrade bug got me. I decided it's much cheaper and MUCH less stressful to race and beat on a Fiesta than it is my garage queen GT350. Upgrades started getting more frequent and severe after this.

6/1/21 - Turbo Tech Racing motor and trans mounts. Ran these for about a month, but the NVH was pretty rough especially while still driving a ton for my commute. Ended up swapping to new OEM mounts with the Powerflex inserts. TTR mounts were re-installed about a year later

6/5/21 - Full brake job with pads, rotors, and stainless lines

8/27/21 - Powerflex spring perches for the rear springs were ordered and installed. The OEM ones were practically non-existent at this point. Stock suspension was getting pretty work out so I replaces shocks and struts with Bilstein B6s all around

9/23/21 - Picked up a roof rack and basket because AESTHETIC

11/24/21 - I had been running a custom side exit exhaust for a little while now and figured I should get a proper exhaust to swap in for when the drone got to be too much. I went with the Milltek non-resonated exhaust. I loved the side exit too much and only recently switched to the Milltek within the last 2-3 months

4/14/22 - Picked up a sandwich plate and ProSport oil pressure and temp gauges

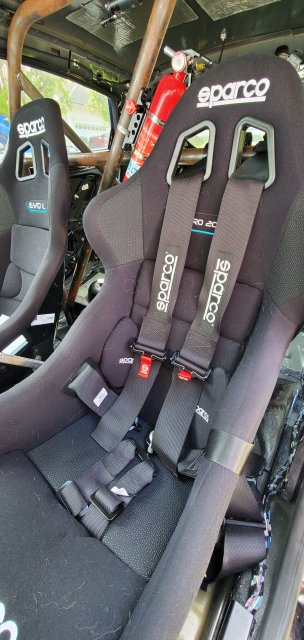
4/20/22 - Big life changes in the form of a new company which brought the benefit of a company vehicle. As the Fiesta was no longer needed as a daily, I got to fulfill my dream of turning it into a track focused car. Sparco bucket seat and all associated hardware ordered. This was huge and let me drop my seating position by several inches. I'm 6' 1" and with a helmet and the seat at it's lowest position, my head would hit the roof

4/27/22 - The gutting begins. I took out a little over 280lbs out of the car from what I had measured. This doesn't factor in the sunroof so the actual number is a hair over 300

5/11/22 - Got HHR Super Sport springs. These were the lowest drop springs I could find and I desperately needed them after gutting the car. The rear looked like I had a lift kit on it, and even with the HHR springs, it still sat a bit above stock ride height. I only installed them on the rear, still ran the stock springs up front

5/17/22 - First big, big upgrade in the form of an MFactory LSD and also some new tires, 225/45R15 Hankook R-S4s, to replace the absolutely trashed RE-71Rs. You may be saying "But those will not fit on your 16" Dekagrams" to which I say "Correct!" Dekagrams were sold to dhminer replaced with some Rota Slipstreams in 15x8. I also installed brake ducting up front to help the stock brakes out a little bit

5/31/22 - Installed DPro's camber plates to help with shoulder wear on the rear tires

6/7/22 - The big day. It finally arrived, my S280 turbo upgrade. This would sit in the bag in a box for 3 months. Hey, I had a baby, cut me some slack. Oh and I was busy cutting, fabricating, and welding in my Autopower roll bar.

7/11/22 - Passenger Sparco seat ordered and installed

7 through 8/2022 - Worked on the cage when I had the time, it was very slow progress and took me more time than I care to admit. It's done. Fully installed, painted, the whole 9. Never again...

9/25/22 - Vinyl letters and the like installed because race car

10/4/22 - Original clutch slipped during a pull so I ordered a replacement. I went with the RTS Performance Twin Friction clutch kit. I love it, a little lighter than stock and hold the power very well

2/something/23 - Sparco 6 point harnesses ordered and installed. Had to get a little creative with the mounting as there isn't a whole lot out there for where people mounted their stuff. Shoulder belts to roll bar obviously. For the lap belts, I fabbed up my own version of this: https://shop.watsonracing.com/HARNESS-LAP-BELT-MOUNT-p/wr-harnessmnt.htm. Mine was just two 19" sections of 2" x 3/16" steel with a 3/4" lap stitch welded on both sides and then eye bolts mounted at the corners for the lap belt quick connects. Anti-submarine belts were attached to the Sparco seat bracket.

3/16/23 - ISC Suspension N1 STREET SPORT coilover kit with the track spring rate ordered to replace the Bilstein setup. Car is just finishing up at the shop for an alignment and corner balancing. Very excited to take it out for my first event of the year in 4 days
I just ordered B6s. What springs did you get and how's the ride?


OP
razr_m3
Messages
94
Likes
162
Location
Durham, NC, USA
Thread Starter #30
I just ordered B6s. What springs did you get and how's the ride?
I used stock springs. Ride felt smoother/softer than stock, but not in a bad way. Car still handled well on the track, and still felt as predictable as it did with stock springs and shocks/struts. I ended up swapping the rears to HHR springs, but only because the rear ride height raised a bit after gutting my car.


Messages
30
Likes
30
Location
Virginia
#31
I used stock springs. Ride felt smoother/softer than stock, but not in a bad way. Car still handled well on the track, and still felt as predictable as it did with stock springs and shocks/struts. I ended up swapping the rears to HHR springs, but only because the rear ride height raised a bit after gutting my car.
Perfect, glad to know it still handles well on the track
I used stock springs. Ride felt smoother/softer than stock, but not in a bad way. Car still handled well on the track, and still felt as predictable as it did with stock springs and shocks/struts. I ended up swapping the rears to HHR springs, but only because the rear ride height raised a bit after gutting my car.
Perfect, glad to know it still handles well on the track! I couldn't find any aftermarket non-lowering springs that could offer a better ride. Sounds like the B6 with stock springs, at least for me, is the way to go. Bought the car (2016) new and now has 75k miles so this'll be nice to have. Thanks!


OP
razr_m3
Messages
94
Likes
162
Location
Durham, NC, USA
Thread Starter #32
New event scheduled at Carolina Motorsports Park on 5/8. A bit more expensive, but for an all day event it's hard to complain about the drive time per dollar. It will definitely be plenty of time to shake down the car and learn how it drives. If any of you are close and interested, as of Monday he still had openings.

CMP.jpg


OP
razr_m3
Messages
94
Likes
162
Location
Durham, NC, USA
Thread Starter #33
Had a wild time at CMP. I'm so impressed with how the car handled what was basically the shakedown of an entirely different car. I ended up driving for about 2 hours in total and really pushed and learned the car's limits. Only issue I had was the bottom radiator hose popped off, but fortunately I was able to source a new hose clamp and 2 gal of distilled water. A BBK is definitely on my radar now, been eyeing the Whoosh one for a while now. I want/need more confidence in my brakes when diving into a corner's braking zone at 115. The stocks are sufficient and my ducting is working incredibly well with only a little fade, but I know a bigger kit would let me be braver into the corners. Only concern is whether the 15" kit will fit under the Slipstreams, not really anyone running them to learn from for spacers and the like.

Ambient temps peaked at ~85°. I kept an eye on my coolant and oil temps throughout the day. During the cooler morning session, coolant peaked at 203° F and oil peaked at 225° F. The afternoon heat brought coolant up to 211° max and oil all the way up to 240°, but both of those were after about 10-15 minutes of back to back to back hot laps. Upgraded radiator is handling the southern heat incredibly well and it seems sufficient enough at pulling heat out of the oil through the factory heat exchanger block.

I managed a best of 1:52.5 with some traffic (and subsequently a short shift) at the end. With a passenger, I was able to squeak out a 1:52.9, so a 1:51.X was definitely possible. There's still so much to learn about the car though.

View: https://youtu.be/wtrCm3B7r7Y


Last edited:
OP
razr_m3
Messages
94
Likes
162
Location
Durham, NC, USA
Thread Starter #34
Hey! I also bought the ISC Suspension N1 STREET SPORT coilover with the track spring rates on advice from Ron from Whoosh. They will be going on next month. Would love a report on your experience/opinion of them after your first track day with them. Cool build, thanks for sharing!
Coilovers were great. Handled the one off track I had very well haha. But really, they were impressive. The car handled bumps and the kink on CMP's main straight very well. Running over the kink's concrete curb at 120 and feeling the car unsettle was nerve-wracking, but I felt like I was maintaining control the entire time. It'd land, slide, and settle very quickly.

I ended up settling on 10/32 for the fronts and 25/32 for the rears for just me in the car. I found those settings worked well. I may try a bit stiffer in the fronts, not sure yet. With my current right height, I was rubbing with a passenger. Stiffer front should help with that, but I don't run with a passenger a ton.


Messages
45
Likes
46
Location
Custer, WA, USA
#37
Coilovers were great. Handled the one off track I had very well haha. But really, they were impressive. The car handled bumps and the kink on CMP's main straight very well. Running over the kink's concrete curb at 120 and feeling the car unsettle was nerve-wracking, but I felt like I was maintaining control the entire time. It'd land, slide, and settle very quickly.

I ended up settling on 10/32 for the fronts and 25/32 for the rears for just me in the car. I found those settings worked well. I may try a bit stiffer in the fronts, not sure yet. With my current right height, I was rubbing with a passenger. Stiffer front should help with that, but I don't run with a passenger a ton.
Thanks! I have my suspension on now with Falken Azenis RT660's and an alignment and I can confirm that it's a very planted ride. I am also rubbing in the front on heavy short corners and large bumps, I had to raise it twice since I had the coils installed and it still rubs! It's a very uncomfortable ride with small bumps in the road, where it bounces the rear like a pogo stick and my subwoofer almost hits the roof of the hatch. If 1 is the hardest setting and 32 is the softest, then I am on 24/32 front and rear right now. I will try your set up and see how I like it. I hadn't even considered using different firmness settings for the front and rear, but that's because I really don't know what I'm doing :ROFLMAO:


OP
razr_m3
Messages
94
Likes
162
Location
Durham, NC, USA
Thread Starter #38
Thanks! I have my suspension on now with Falken Azenis RT660's and an alignment and I can confirm that it's a very planted ride. I am also rubbing in the front on heavy short corners and large bumps, I had to raise it twice since I had the coils installed and it still rubs! It's a very uncomfortable ride with small bumps in the road, where it bounces the rear like a pogo stick and my subwoofer almost hits the roof of the hatch. If 1 is the hardest setting and 32 is the softest, then I am on 24/32 front and rear right now. I will try your set up and see how I like it. I hadn't even considered using different firmness settings for the front and rear, but that's because I really don't know what I'm doing :ROFLMAO:
For mine, I'm going based off 1 being softest and 32 being hardest, # of clicks clockwise from maxed out counterclockwise. I have the rears fairly stiff and the fronts fairly soft right now, but I also have next to no weight on the rear wheels for my car. I started at 16/32, the midpoint, for my settings and wanted a bit stiffer for the rears and softer for the fronts. I ended up going too soft with the fronts at first with 7/32 and that's when it would rub. I have no idea what I'm doing either to be completely honest.

So, you! Yeah, you, random forum member reading this thinking "this guy is completely wrong with what he's doing for his setup...". Lemme know. I want to learn.


Capri to ST

1000 Post Club
Messages
1,718
Likes
2,193
Location
CHAPEL HILL, NC, USA
#39
Reading these last two posts makes me think of the saying
"It's a wise man who knows what he doesn't know."
I think it's a great attitude to admit you don't know something and to be open to getting help from people who may know more.


OP
razr_m3
Messages
94
Likes
162
Location
Durham, NC, USA
Thread Starter #40
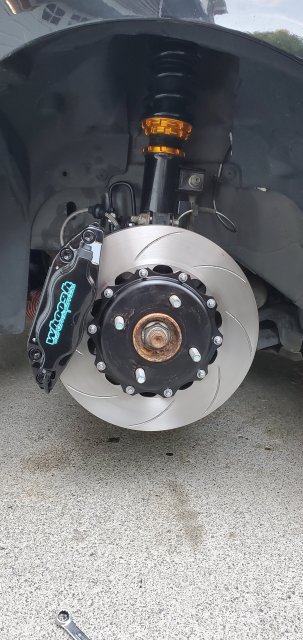
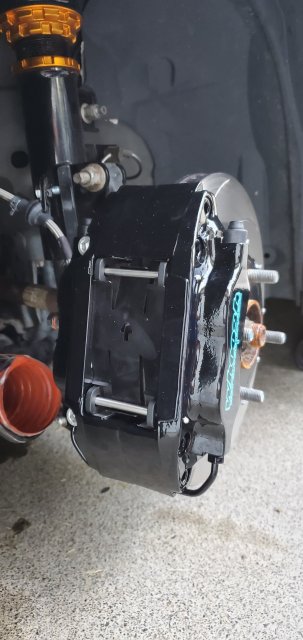
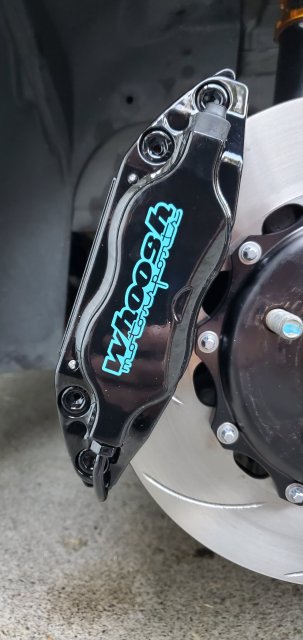
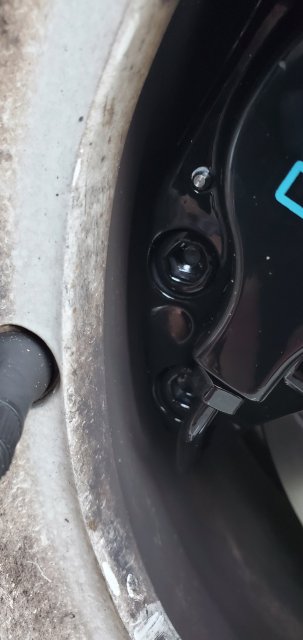
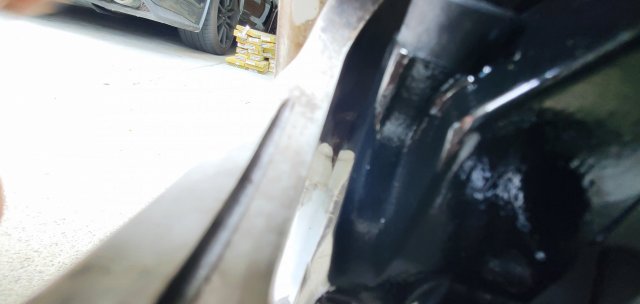
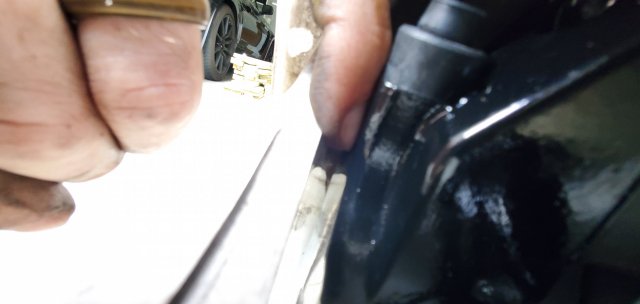
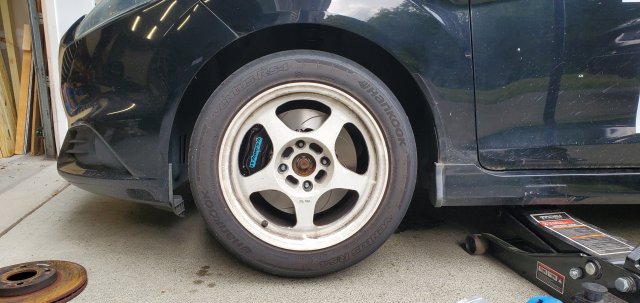
Whoosh 285mm big brake kit arrived and was installed yesterday afternoon. Re-bled them this morning and went out to bed the brakes. I have plenty of clearance on all sides without a spacer with the Rota Slipstreams 15" x 8" ET30, so to you, random person 3 years from now running the 15 inch Slipstreams and considering the Whoosh BBK: yes, it will fit perfectly without a spacer. In the picture they look much closer to the cyan I was hoping for, but in person it's a bit more of a baby blue. Though I don't really care too much since a) I only gave a color name (or at least my closes guess) with no reference picture and b) you'll never see my front crash bar and the brake calipers at the same time to compare haha. First thoughts, they're big, which duh it's one of the "B"s, but still... Build quality looks great, I checked everything over as I was installing them. There are two bleeder nipples per caliper, so be sure to bleed them both. No instructions in the box, but the kit is pretty basic plug n' play. Torque specs would have been nice though since I just have them torqued to "gudentite". To bed them, I did several 50, 60 and 80 MPH to 20 MPH harder stops. Haven't been able to push the brakes super hard since it's on the street/curvy back roads and I just finished bedding them in, but they bit hard and instilled a lot more confidence at higher speeds compared to the stock kit. I have the ducting which I think helped a bit I only smelled pad when I did immediate back to back hard braking. The braking was a little soft at first when bedding them, but grab hard now as the pads got worn in. It isn't like "hard" hard, but more of a consistent, hard braking. I'm excited to see how the handle when I take it out for a drive next.

TLDR: kit seems solid for the money; quality looks good and they have consistent, hard braking; provide a reference color swatch or picture
20230709_065204.jpg
20230709_065210.jpg
20230709_065221.jpg
20230709_065358.jpg
20230708_164837.jpg
20230708_164842.jpg
20230708_154347.jpg

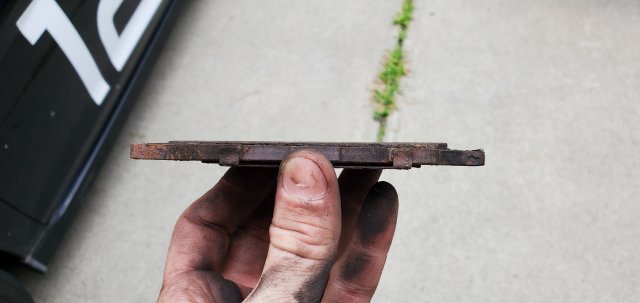
Also, haven't driven the car much since CMP because the old pads were done and I wasn't about to buy new pads just to take them off when the new kit arrived. I paid for the whole pad, I'm gonna use the whole pad.
20230708_164733.jpg


Similar threads


Top