• Sign Up! To view all forums and unlock additional cool features

    Welcome to the #1 Fiesta ST Forum and Fiesta ST community dedicated to Fiesta ST owners and enthusiasts. Register for an account, it's free and it's easy, so don't hesitate to join the Fiesta ST Forum today!


Fiesta ST FMIC Install Guide Video Now Online! (COBB FMIC Install How-To)

BlueBomber

1000 Post Club
Messages
1,086
Likes
119
Location
Anaheim
#1
[video=youtube;dnClbWm8les]https://www.youtube.com/watch?v=dnClbWm8les&feature=youtu.be[/video]

Check it out - the FMIC on the Fiesta is CAKE. The COBB FMIC and most of the direct bolt on FMIC's will connect right to your OEM factory chargepipes.

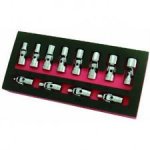
PROTIP: GET A LOT OF FLEX EXTENSIONS FOR YOUR RATCHET OR PREFERRABLY, A FLEXIBLE BIT DRIVER (screwdriver thing with flexible shaft with a 1/4in socket receiver on the end) - these will save about an HOUR of time removing the 3x 8mm bolts securing the bumper to the fender.

enjoy


CanadianGuy

4000 Post Club
Messages
4,097
Likes
944
Location
Southern Ontario
#3
Great vid but I had a chuckle at end they simply stuck on the beginning in reverse(rewind). Ran out of daylight.

This is exactly the same install for the Mountune FMIC.

Few other PRO TIPS:
1- Use anti-seize on all bolts and non plastic screws when re-installing. Especially if you plan to undo the work later to return to stock
2- Use some tacky grease in the sockets to "hold" the bolts when in tricky spots or place a powerful magnet on your socket
3- Place similar screws and bolts in small containers to not mix them up.
4- While you are there take a minute to check all hose clamps and maybe a little quick clean
5- Place a sock or panty hose on the end of your Mountune air hose.... :) A little extra filter won't hurt
6- For a little less swearing take the tires off. The 5 minutes saves you aggravation when working in the wheel well.


Messages
245
Likes
50
Location
NorCal
#5
Great vid but I had a chuckle at end they simply stuck on the beginning in reverse(rewind). Ran out of daylight.

This is exactly the same install for the Mountune FMIC.

Few other PRO TIPS:
1- Use anti-seize on all bolts and non plastic screws when re-installing. Especially if you plan to undo the work later to return to stock
2- Use some tacky grease in the sockets to "hold" the bolts when in tricky spots or place a powerful magnet on your socket
3- Place similar screws and bolts in small containers to not mix them up.
4- While you are there take a minute to check all hose clamps and maybe a little quick clean
5- Place a sock or panty hose on the end of your Mountune air hose.... :) A little extra filter won't hurt
6- For a little less swearing take the tires off. The 5 minutes saves you aggravation when working in the wheel well.
Good tips except #5. It's good in theory but how are you going to service/replace/clean that panty hose when it gets dirty?


CanadianGuy

4000 Post Club
Messages
4,097
Likes
944
Location
Southern Ontario
#6
Good tips except #5. It's good in theory but how are you going to service/replace/clean that panty hose when it gets dirty?
Don't you? LOL would be easy(ish) to do during the oil change.

Prefer to keep big stuff going into the pipe myself. Even a piece of window screen. Mind you I run on some gravel road and have found pebbles in some places I have never though possible. As well it would keep the local chipmunks and squirrel from using it as a place to store their nuts. Trust me I had this happen in another vehicle's airbox.


Messages
245
Likes
50
Location
NorCal
#7
Don't you? LOL would be easy(ish) to do during the oil change.

Prefer to keep big stuff going into the pipe myself. Even a piece of window screen. Mind you I run on some gravel road and have found pebbles in some places I have never though possible. As well it would keep the local chipmunks and squirrel from using it as a place to store their nuts. Trust me I had this happen in another vehicle's airbox.
Since you mentioned the airbox (as in the intake), now it makes sense lol. I thought you were talking about adding a filter element to the boost hose since we were talking about mounting FMIC's.


OP
BlueBomber

BlueBomber

1000 Post Club
Messages
1,086
Likes
119
Location
Anaheim
Thread Starter #9
Why does your intercooler look all beat up?? Lol
Because the ORIGINAL shoot I did with the FMIC got corrupted and so I had to reshoot THE WHOLE THING.

FYI - I shot that in 1.5hrs including removing the bumper, reinstalling the stock FMIC and then reinstalling the COBB FMIC on tape. But it really is easy and straightforward, the reassembly part is mostly there to remind you to put all of it back together, I always hate it when install videos stop once the part's in and don't include reassembly.

I reused the removal in reverse because though the video of reassembly DID come out, I didn't like the lighting so I reused that.


Similar threads


Top