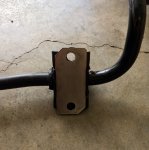
Installed the front and rear Eibach sway bars over the weekend, and figured I'd share a few things for the next person who does this. The notes are mainly for the front install since the rear is pretty straightforward.
Eibach bars:
Obligatory comparison shot:
1. The install is doable on jack stands. Just get the car up as high as possible. Make sure to secure the back wheels so the car doesn't roll backward and kill you.
2. Mark the subframe so that when you reassemble you can get it back to the original location. There is some wiggle room.
3. Take your time. There are a lot of bolts and some are difficult to reach, but each step itself isn't that difficult.
4. The Eibach mounts do have grease fittings. I know there was some question of whether they do or not.
5. Apply the supplied grease liberally inside the bushing. You don't want your car sounding like a 20-year-old clunker.
6. The OEM bushings have what I'll call reinforcement plates on the underside.

7. The OEM reinforcement plates are not removable. Fearing that the subframe could crack over time since I once read it online (and therefore it must be true, right?) I made some similar plates for the Eibach mounts. No shots of these. They look just like the OEM ones, except I painted them black. Not sure if they'll help prevent cracking or not, but my non-engineer brain figures that spreading the load may help.
8. Take your time to line up everything. Don't rush. You don't want any stripped bolts or threads since many of the bolts thread into the subframe.
9. Double-check the clearance after install. I found that the clearance between the bar and the subframe was about 0.5 inches in some places, and that got me worried. But, no clearance issues so far.
10. Get the alignment checked afterward. I was super careful, but my steering wheel is still now off very slightly. Time for an alignment.
Have fun!![Wrenchin [wrenchin] [wrenchin]](/images/smilies/icon_smile_wrenchin.gif)
Eibach bars:

Obligatory comparison shot:

1. The install is doable on jack stands. Just get the car up as high as possible. Make sure to secure the back wheels so the car doesn't roll backward and kill you.
2. Mark the subframe so that when you reassemble you can get it back to the original location. There is some wiggle room.
3. Take your time. There are a lot of bolts and some are difficult to reach, but each step itself isn't that difficult.
4. The Eibach mounts do have grease fittings. I know there was some question of whether they do or not.
5. Apply the supplied grease liberally inside the bushing. You don't want your car sounding like a 20-year-old clunker.
6. The OEM bushings have what I'll call reinforcement plates on the underside.

7. The OEM reinforcement plates are not removable. Fearing that the subframe could crack over time since I once read it online (and therefore it must be true, right?) I made some similar plates for the Eibach mounts. No shots of these. They look just like the OEM ones, except I painted them black. Not sure if they'll help prevent cracking or not, but my non-engineer brain figures that spreading the load may help.
8. Take your time to line up everything. Don't rush. You don't want any stripped bolts or threads since many of the bolts thread into the subframe.
9. Double-check the clearance after install. I found that the clearance between the bar and the subframe was about 0.5 inches in some places, and that got me worried. But, no clearance issues so far.
10. Get the alignment checked afterward. I was super careful, but my steering wheel is still now off very slightly. Time for an alignment.
Have fun!
