• Sign Up! To view all forums and unlock additional cool features

    Welcome to the #1 Fiesta ST Forum and Fiesta ST community dedicated to Fiesta ST owners and enthusiasts. Register for an account, it's free and it's easy, so don't hesitate to join the Fiesta ST Forum today!


Clutch bleeding Procedure

Messages
43
Likes
37
Location
Minnesota
#81
Turns out I did receive the extra gasket from Motive a long time ago, I just absent-mindedly stashed the envelope away and forgot about it. Unfortunately it looks like the gasket they sent me (0708A-MTV) is smaller in diameter than either of the two gaskets that came with my 0108 kit. The new gasket is also thinner than either of the included gaskets. So I'm not sure what's going on here.

I don't have to deal with a brake/clutch fluid flush for a while, so I may just shelve this project until I need to deal with it again. I'll let Motive know and see what they say, but I don't want to make a huge deal out of a $2 part. I will say that I'm a little disappointed that this product didn't end up being as straight forward to use as I had hoped it would be.


Messages
94
Likes
48
Location
Houston, TX
#82
The thick gasket that came with the kit worked fine for me. I bled everything easy peasy. So glad I bought this! I've always done the two person method in my past vehicles now I feel stupid lol. Is it normal for 6 months old fluid to look this dark? I had my master cylinder changed 6 months ago at Ford and still have my pedal randomly get soft once a week so I flushed it and found lots and lots of bubbles.


Attachments

Messages
206
Likes
879
Location
Prescott, AZ, USA
#84
I purchased the Motive Power Bleeder w/ the 0108 GM Kit mentioned earlier in this thread last October and I'm finally just now getting around to flushing the clutch and brake fluid. Like others, I played hell trying to get the cap to seal on the fluid reservoir, even using the thick rubber washer AND adding an intricate network of zip ties to hold the cap down onto the reservoir, it still wouldn't hold pressure. [?|]

So, I hit the local junk yard earlier today and found the last cap in the entire yard on a 2013 Fiesta Sedan! [thumb]
IMG_6967.JPG


I hit Lowe's for 3/8in x 1/2in barbed nylon fitting:
IMG_6976.JPG

I used my grinder with a flappy sanding disc to smooth out all of the yellow raised lettering on the top of the OEM junkyard cap to make sure I've got a rough enough surface for the epoxy to seal to:
IMG_6982.JPG


I drilled a large enough hole in the junkyard Fiesta cap to accommodate the nylon barbed fitting. You can see where I also ground down the threads on the 1/2in nylon side of the fitting so it would fit down into the cap hole tighter:
IMG_6985.JPG
IMG_6990.JPG


I finished off the hole with a circular grinding stone on my drill:
IMG_6991.JPG


Then cut a tight hole in the OEM cap seal that would accommodate the nylon fitting and left the 3 little tabs that prop up the OEM seal in place on the inside of the cap:
IMG_6998.JPG


This is the epoxy that I used to seal the nylon fitting to the OEM cap mostly on the outside with a little bit on the inside keeping it tidy as to not disturb the OEM seal:
IMG_6995.JPG


I'm currently waiting on the epoxy to dry overnight before I can test pressurize the system tomorrow, but here's what it looks like now:
IMG_7002.JPG


Basically all I did was remove the GM fitting from the end of the bleeder and I'm replacing it with an OEM cap that will fit on the end of the bleeder hose. This should make future brake/clutch fluid flushes a breeze if it works correctly!
IMG_6994.JPG

As soon as the epoxy is dried and I can put this to the test tomorrow, I will update this thread with the results! [twothumb]


Last edited:
Messages
206
Likes
879
Location
Prescott, AZ, USA
#85
So here's the update and my personal recommendation:

DO NOT buy the Motive Power Bleeder. Read on and I'll explain why....

So as you could see in my previous post, I modified an OEM junkyard brake reservoir cap to accept the tube from the Motive Power Bleeder. Once the epoxy had dried on the OEM cap, I used the OEM seal that I had cut a hole in to accept the Nylon Barbed fitting that I picked up from Lowe's and did another dry pressure test using the seal on the left of the following picture:
IMG_7010.JPG


Needless to say, the OEM seal didn't hold pressure on the mouth of the reservoir, so I decided to press on and make some more modifications to the system. Next, I cut the thinner rubber washer that came with the Motive GM 0108 Kit to fit the exact inside and outside diameter of the OEM rubber washer, taking my time to ensure a tight fit by tracing it with a pencil and slowly cutting it with a brand new razor blade:
IMG_7011.JPG


I tried test pressurizing the system once again with the thicker rubber washer both dry and wet(a little bit of brake fluid on the surface) with no luck. I was still losing about 1psi per minute. [?|]

As you can see in this pic, the inside of the OEM cap has channels top and bottom as well as a couple of small holes at 11 o'clock and 3 o'clock:
IMG_7017.JPG


I decided to use some RTV to fill these channels to ensure no leaks were happening between the top of the washer and the OEM cap, giving the RTV plenty of time to dry:
IMG_7018.JPG

Continuing on in the next post.....


Messages
206
Likes
879
Location
Prescott, AZ, USA
#86
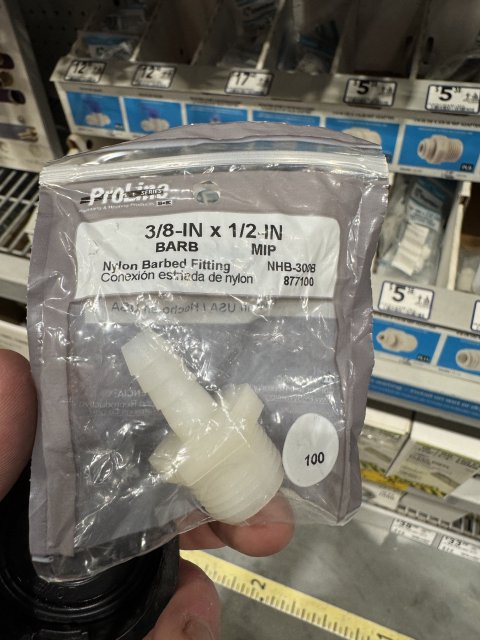
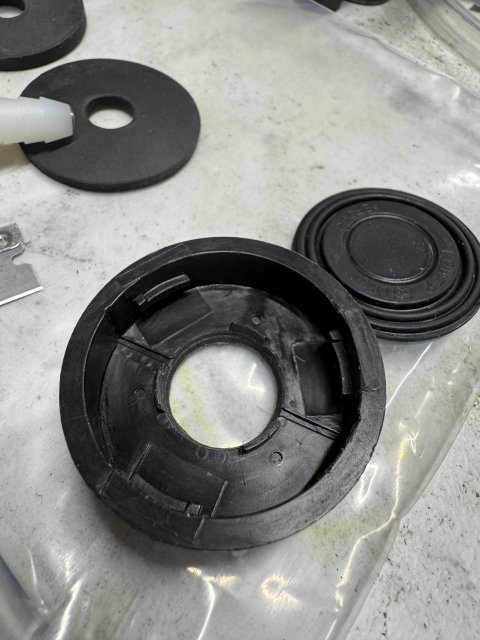
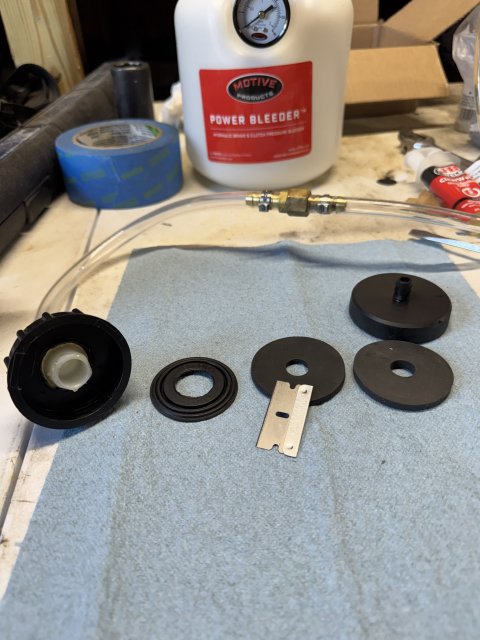
I ALSO decided to remove the 3 hose unions between the pressure bottle and the OEM cap to ensure that I wasn't losing pressure there either. Now, my OEM cap is DIRECTLY connected to the pressure bottle. Fewer hose unions = less potential for leaks.

Fewer unions was the FIRST reason for removing the gold fittings that were inline of the system. I've got a SECOND reason that has my blood boiling, so read on and I'll explain! [?|][?|][?|]
View attachment IMG_7021.JPG


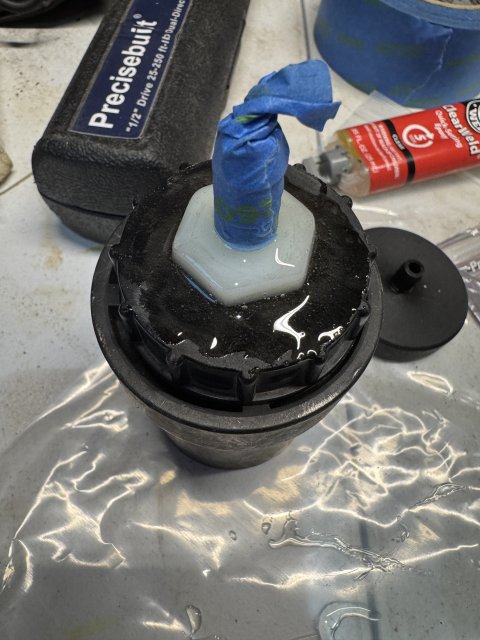
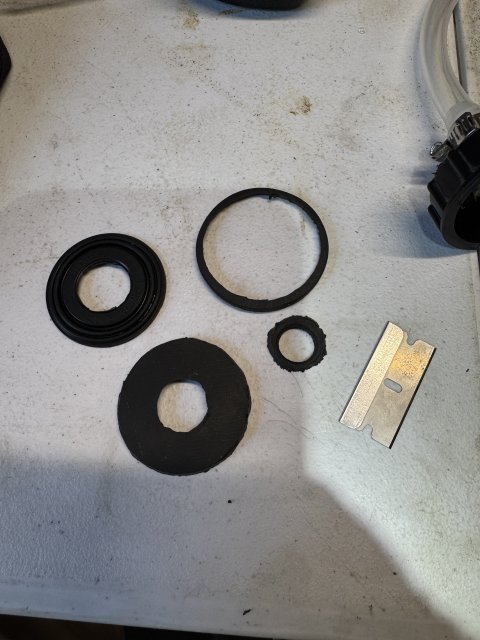
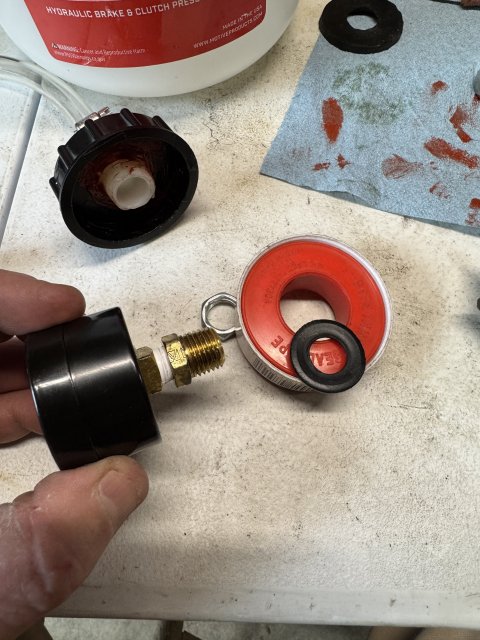
To be ABSOLUTELY certain that I cover all of my bases on this, I removed the pressure gauge from the bottle. While it did have teflon tape between the gauge and the fitting adapter, I put new teflon tape on it(ensuring the that teflon tape was wrapping the threads in the correct direction), used a little bit of RTV between the rubber/metal washer that sandwiches between the bottle and adapter fitting, as well as some extra teflon tape on those threads to make sure everything is completely sealed:
View attachment IMG_7027.JPG
IMG_7030.JPG


Now that all of that was out of the way and everything was back together, I did yet another dry pressure test and continued to lose about 1psi of pressure per minute.

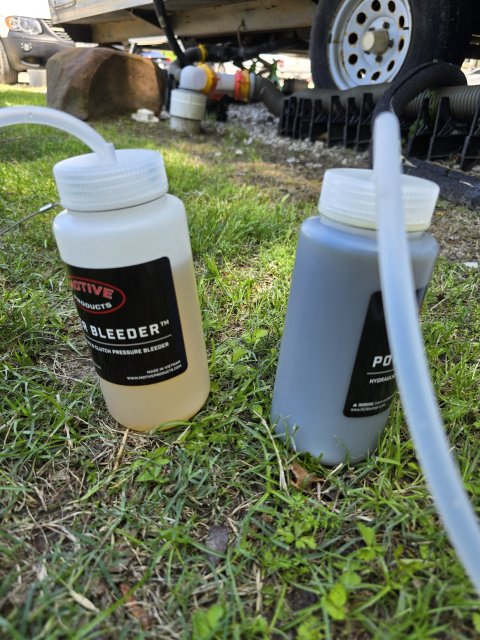
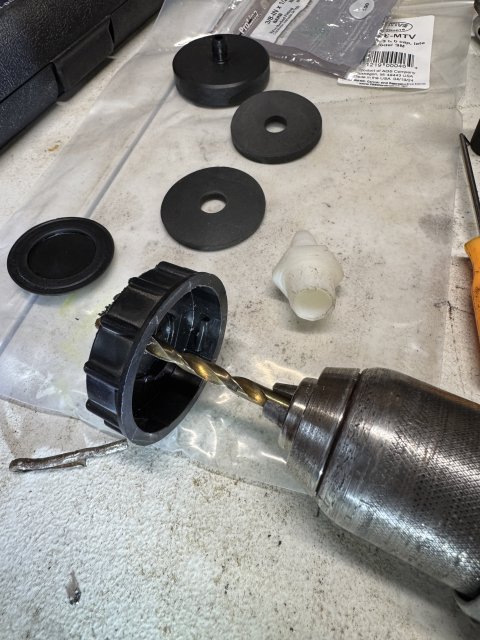
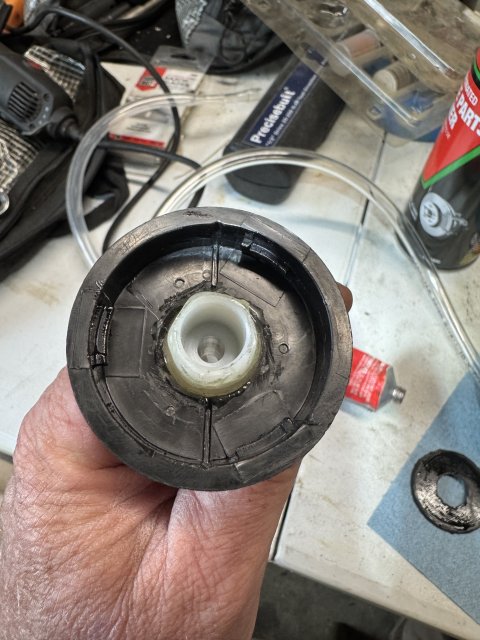
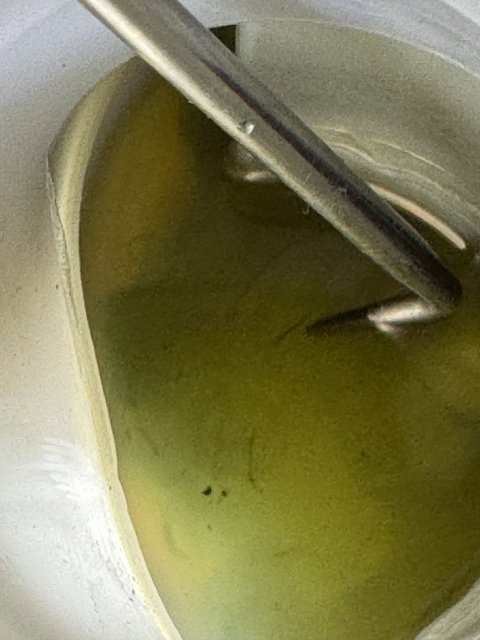
Let me explain the SECOND reason for removing the gold barbed fittings in addition to having fewer unions in the system. While inspecting the fluid that I have in the reservoir, I found MULTIPLE small gold slivers sitting at the bottom of the reservoir. I KNOW that they were not there when I started this project, so the only place the could've come from is inside of the pressure bottle. Needless to say, if I had not caught this, the bleeder NO DOUBT would have pushed these gold slivers into the hydraulic system, likely taking out O-rings, thus I would've had to likely replace the clutch master, slave cylinder and/or brake calipers since they all contain O-rings. :mad::mad::mad:

My pick tool in this picture is pointing to one of the gold slivers, which is a little difficult to see since they're so small:
IMG_7031.JPG


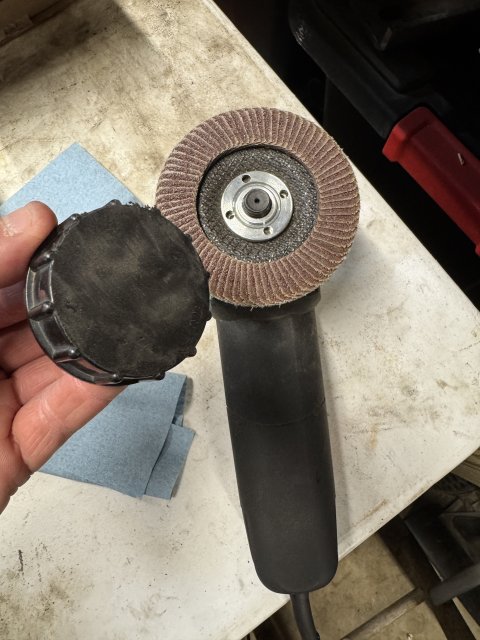
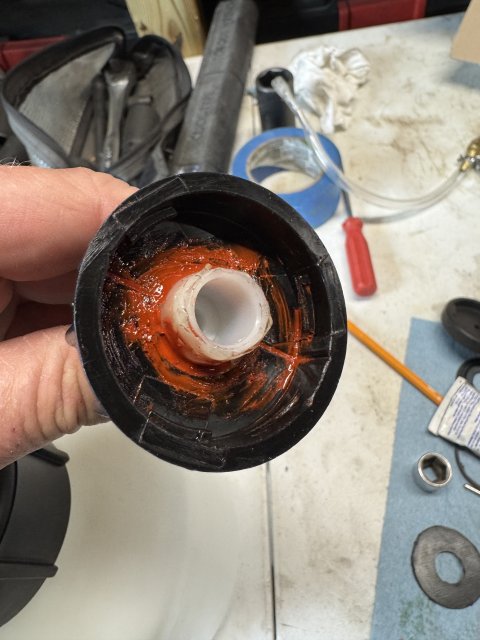
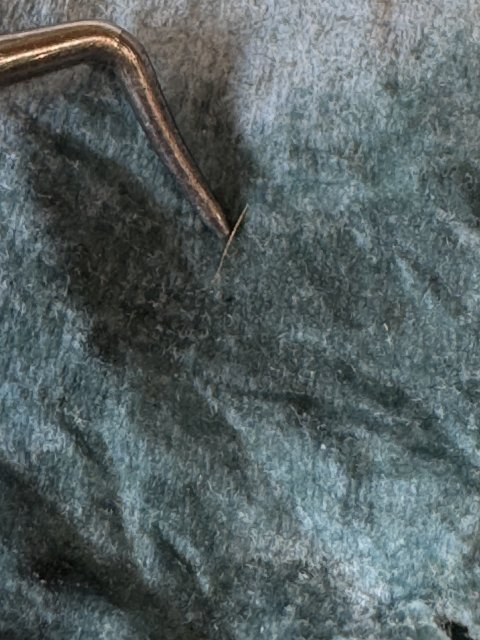
Here's one of about 4 of them sitting on a blue shop towel once I fished them out of the reservoir:
IMG_7034.JPG


Needless to say, I have gone ABOVE AND BEYOND to try to make this piece of shit Motive Pressure Bleeder work and I suspect that it is actually leaking from the pump handle itself. Yes, the top is screwed on tight and yes, I did lubricate the pump shaft with a very light oil.

I guess the first indication of trouble should've been when I originally took the bottle out of it's box and unscrewed the top to make sure the inside was clean, a small piece of plastic fell out of the bottle. :mad:

Lastly, this product says "Made in the USA" on the sticker and while I'm not sure if that's the truth, my guess would be that it was "Assembled" in the USA with parts from outside of the country, but who the hell knows. [dunno] These guys couldn't even stick the label to the bottle so it wasn't crooked:
View attachment IMG_7025.JPG

In closing, the only good that has come out of this has been the fact that I now have an OEM cap that I can use to bleed my system once I purchase a QUALITY pressure bleeding bottle.

Hope this info helps others in the future avoid all of the BS I just experienced! [thumb]


Attachments

Last edited:


Top