• Sign Up! To view all forums and unlock additional cool features

    Welcome to the #1 Fiesta ST Forum and Fiesta ST community dedicated to Fiesta ST owners and enthusiasts. Register for an account, it's free and it's easy, so don't hesitate to join the Fiesta ST Forum today!


Bull's street "go-kart" build

M-Sport fan

9000 Post Club
Messages
14,431
Likes
6,987
Location
Princeton, N.J.
#41
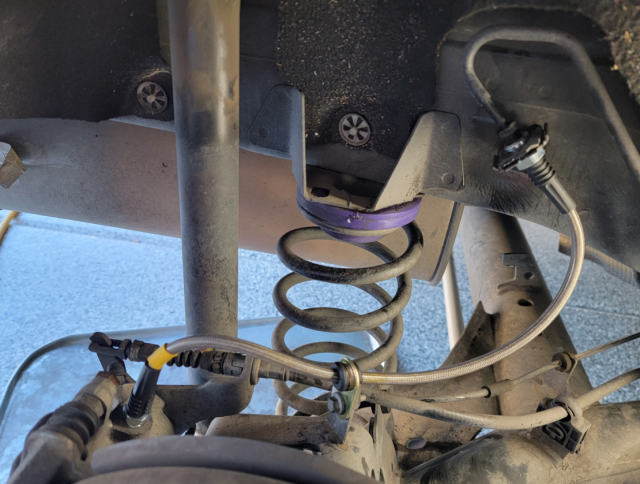
Awesome write up! My only complaint about rear spring pads is they add some ride height.


Sent from my iPhone using Tapatalk
I was just about to ask Bull Run about that, given how I could use them to gain back at least some of the ride height lost by using the Swift Spec R springs, by using those Powerflex pads (for the back at least, the fronts would need some top mount spacers to get back that lost height [:(] ).

Does anyone know if the 'race' Powerflex spring pads raise the rear ride height up even a bit more than the 'street' versions do?


Messages
238
Likes
124
Location
Santa Rosa
#42
I was just about to ask Bull Run about that, given how I could use them to gain back at least some of the ride height lost by using the Swift Spec R springs, by using those Powerflex pads (for the back at least, the fronts would need some top mount spacers to get back that lost height [:(] ).

Does anyone know if the 'race' Powerflex spring pads raise the rear ride height up even a bit more than the 'street' versions do?
I think the only difference between race and street is the hardness of the material not the dimensions.


Sent from my iPhone using Tapatalk


OP
Bull Run

Bull Run

Member
U.S. Army Veteran
Messages
246
Likes
404
Location
Chandler, AZ, USA
Thread Starter #43
I was just about to ask Bull Run about that, given how I could use them to gain back at least some of the ride height lost by using the Swift Spec R springs, by using those Powerflex pads (for the back at least, the fronts would need some top mount spacers to get back that lost height [:(] ).

Does anyone know if the 'race' Powerflex spring pads raise the rear ride height up even a bit more than the 'street' versions do?
I can see how it can affect the height considering how soft the stock pads are, but I didn't really notice it. As HAHAFiST mentioned, I believe the only difference is the material but haven't had a chance to compare.


OP
Bull Run

Bull Run

Member
U.S. Army Veteran
Messages
246
Likes
404
Location
Chandler, AZ, USA
Thread Starter #44
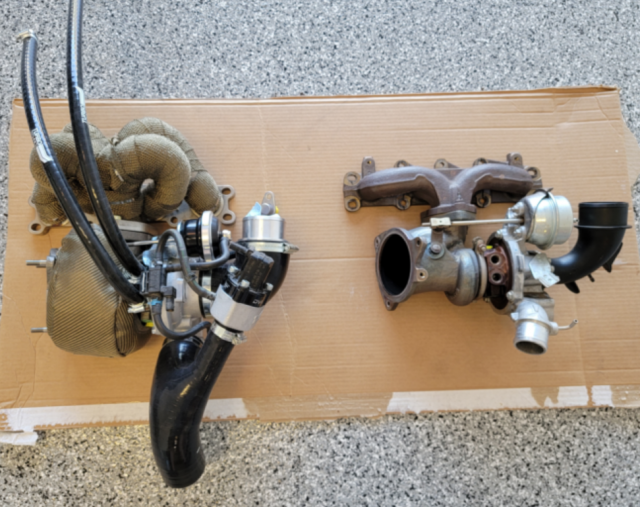
I followed up with Ron after waiting for about 11 weeks on the Whoosh hybrid turbo and ported manifold. Looks like there were additional delays due to a backlog, so Ron made me an offer I couldn't refuse. I paid the difference in a discounted pricing for a S280 turbo and Airtec tubular manifold and they arrived last week. I proceeded with installing them and also the Mountune radiator and TB Performance crash bar that arrived weeks ago.

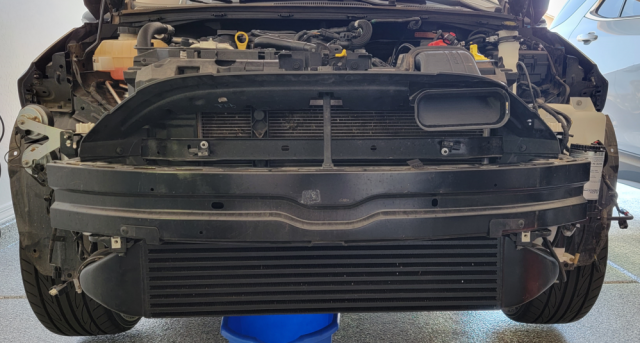
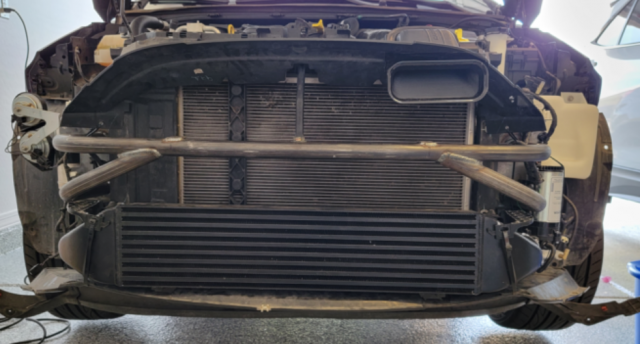
Crash bar before and after:
1649863281917.png 1649863362930.png

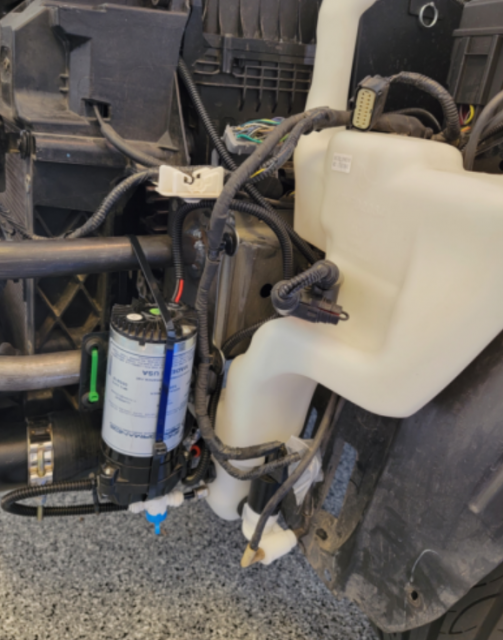
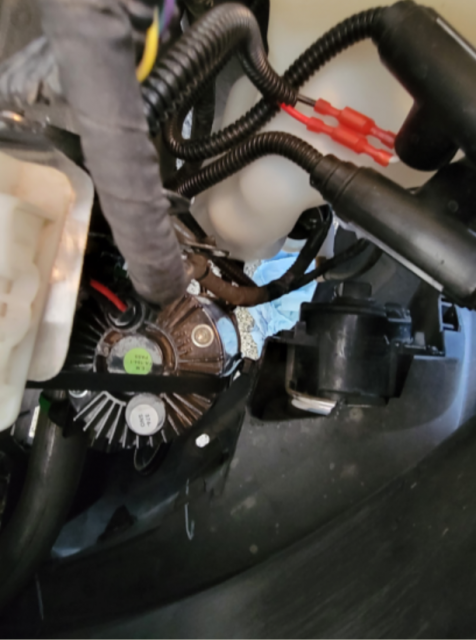
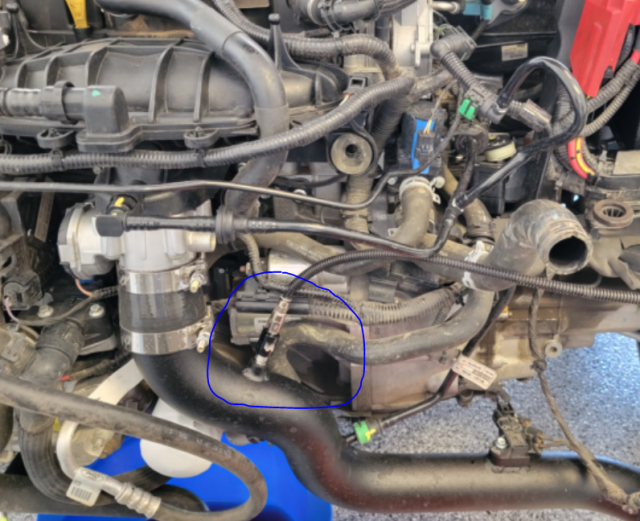
TB Performance crash bar felt nice and solid with excellent welds. Aside from a small weight savings, the best part is the amount of space freed up. In addition to the room for a much bigger IC, I can now mount the WMI pump lower and also put the fog light back. Used zip ties for now, will look into mounting plates if this location works out.
1649863502659.png 1649866475559.png
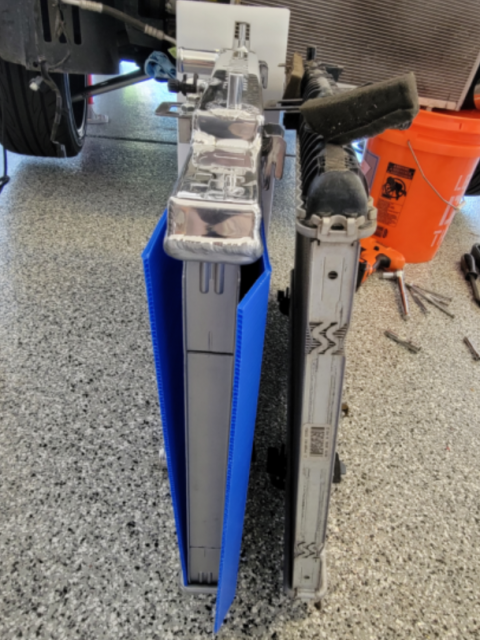
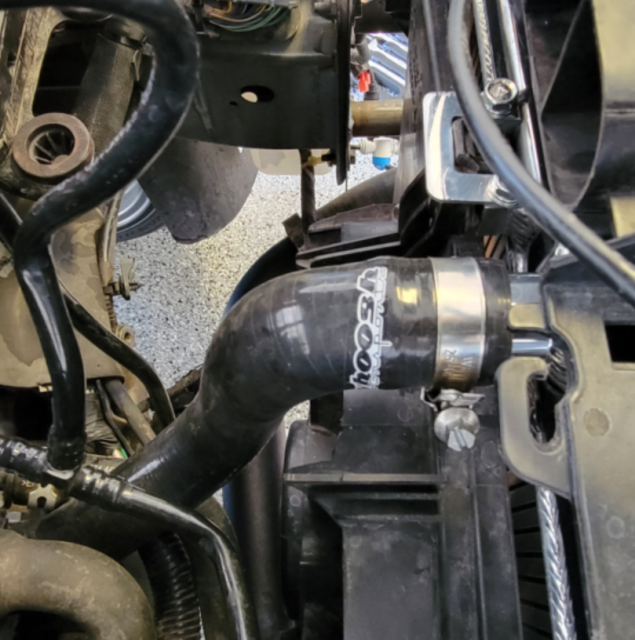
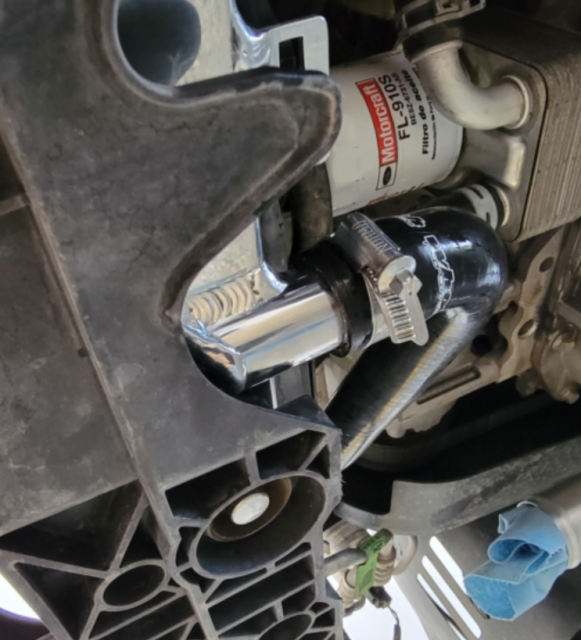
Mountune Radiator is about 5mm thicker than the stock unit. Also swapped stock hoses with Whoosh ones at the same time.
1649866618043.png 1649866721711.png 1649866690038.png
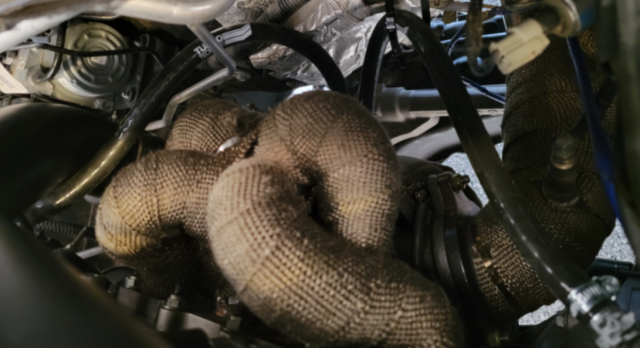
Wrapped the manifold and installed a turbo blanket since the stock heatshield can't be used with the Airtec manifold.
1649866949534.png

Airtech manifold is much bigger than the stock one, so installing it along with the turbo was a pain. I was able to make them fit after removing the rubber intake and hot-side hoses. Reinstalling them after mounting the turbo wasn't as bad as I thought.
1649867018093.png

Data logs of the base map with 0% WGDC setting showed a peak boost of ~16.5 PSI, which is almost right in the middle of 14 to 20 PSI that Adam said I should see with the base map.


Last edited:
OP
Bull Run

Bull Run

Member
U.S. Army Veteran
Messages
246
Likes
404
Location
Chandler, AZ, USA
Thread Starter #46
Where are you going to inject the Meth @? in the coldside pipe?
Yes, sir. I installed the Whoosh cold-side pipe to get rid of the symposer and have a bung for the nozzle. I'll request the WMI tune once 91 OCT tune's completed.

1649953750871.png


OP
Bull Run

Bull Run

Member
U.S. Army Veteran
Messages
246
Likes
404
Location
Chandler, AZ, USA
Thread Starter #47
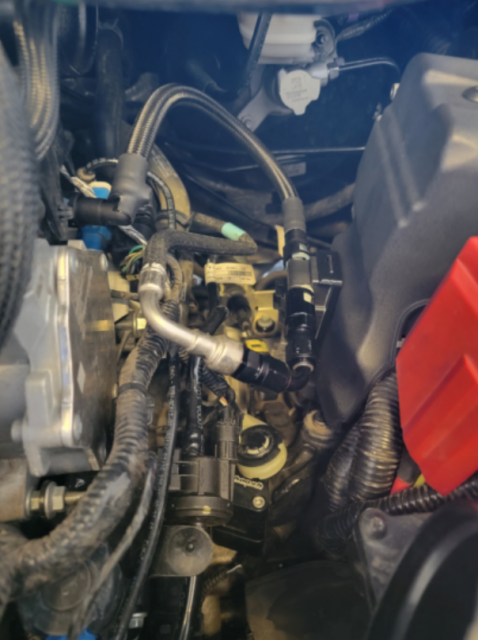
Installed the Dizzy Ethanol Content Gauge Kit this week. Since the Mele battery box is shorter than stock, I routed the inlet fuel hose over the top rather than coming up from the bottom per the instruction to avoid hitting the shift linkage. No issues so far routing this way as fittings rotates freely.
1650125974422.png
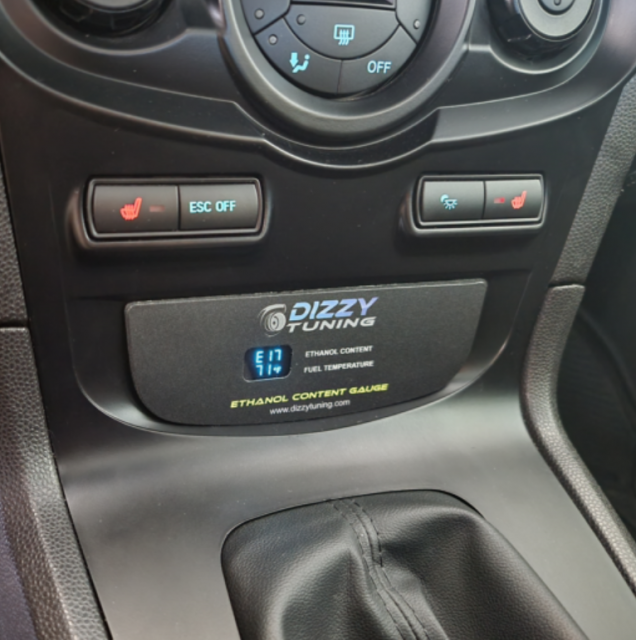
The reading seems to be on point as we have gas with ~10% ethanol around here, and I've been trying to use up a cache of E85+ from another project by adding a gallon of it per fill-up. It's also interesting to see the fuel temperature fluctuate as it climbs up while warming up and sitting in idle, and goes down as the car gets moving.
1650126109606.png


OP
Bull Run

Bull Run

Member
U.S. Army Veteran
Messages
246
Likes
404
Location
Chandler, AZ, USA
Thread Starter #48
Starting to run out of the things to do, so I spent some time cleaning up and labeling the wiring for added accessories. I used a relay previously to connect the added fuse box directly to the battery, which was an overkill as I don't plan to add high current draw devices like a subwoofer and amp. I relocated the fuse box to the space behind the glovebox and used add-a-fuse on F17 (headed seats) to power the fuse box. This simples things and got rid of a point of failure.
1650126656813.png
I also tested the Mountune radiator by letting the car idle for over 10 minutes after a drive with the A/C on during a warm day. The upgraded radiator did a good job by keeping the temperature around 190 degrees as it would've been around 210 degrees with the stock radiator.
1650127555085.png


OP
Bull Run

Bull Run

Member
U.S. Army Veteran
Messages
246
Likes
404
Location
Chandler, AZ, USA
Thread Starter #49
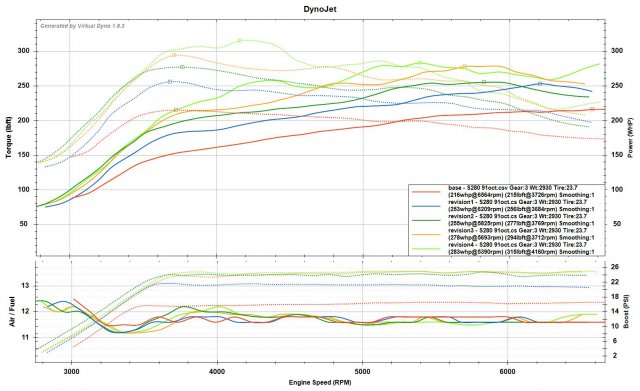
Finished the tuning process on 91 oct. This is my first time using the vdyno so take the numbers below with a grain of salt, but they appear to be within the ballpark of others with similar mods. It's amazing how much power increase the S280 provides on pump gas, resulting in a car that can turn AND have decent acceleration.

Currently doing the tuning process for 91 oct + WMI. It already crossed the 300WHP mart on the first revision, will post the results after completion.

S280 91 oct vdyno.jpg


OP
Bull Run

Bull Run

Member
U.S. Army Veteran
Messages
246
Likes
404
Location
Chandler, AZ, USA
Thread Starter #50
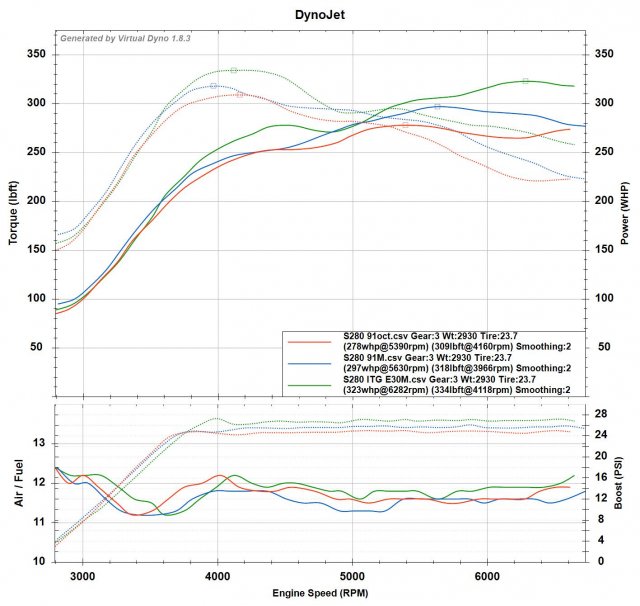
This is the final follow up on the tuning process on my Fiesta. The short answer is that there is definitely a nice gain going from 91 oct + WMI to E30 + WMI.

91 oct and 91 oct + WMI runs were with FBO (w/ Cobb catted DP) + S280 turbo, except for stock cat-back exhaust and airbox with a drop in Cobb filter. Tuning process completed during late April.
E30 + WMI run was the same as above except with an ITG intake. Tuning process completed during late June. All runs were conducted on the same road.

Fuel type, initial charge temp, max WHP, and max WTQ
91 oct: 78.4, 278, 309
91 oct + WMI, 82.2, 297, 318
E30 + WMI, 104, 323, 334

There is a two-month gap between 91 oct and E30 runs because I initially didn’t plan to run E30, and I also went on a vacation. I live in Phoenix metro area so there was a large increase in ambient temperature within the last two months, but still managed to make decent gains over 91 oct.

Adam definitely knows how to tune these cars, as getting on it even when it’s near 110 degrees outside doesn’t impact the OAR (stays at -1) and I haven’t seen any negative ignition corrections so far. He believes there’s about 5-10 HP left on the table but didn’t think it was worth the extra stress on the engine. I agreed since it feels like I’m hitting the limits of traction in 3rd gear on street tires as is.


Tunes.jpg


OP
Bull Run

Bull Run

Member
U.S. Army Veteran
Messages
246
Likes
404
Location
Chandler, AZ, USA
Thread Starter #51
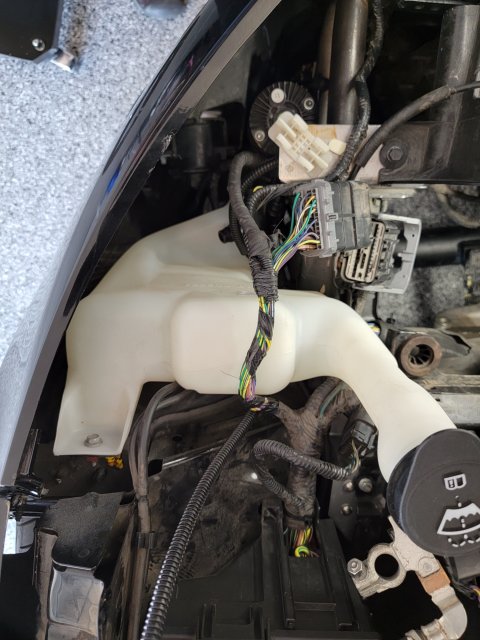
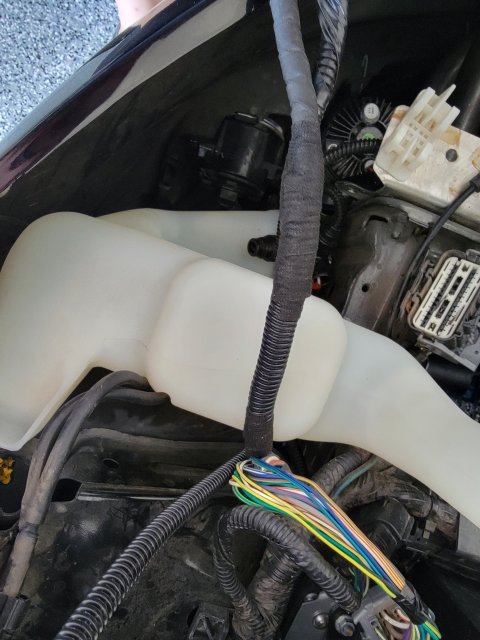
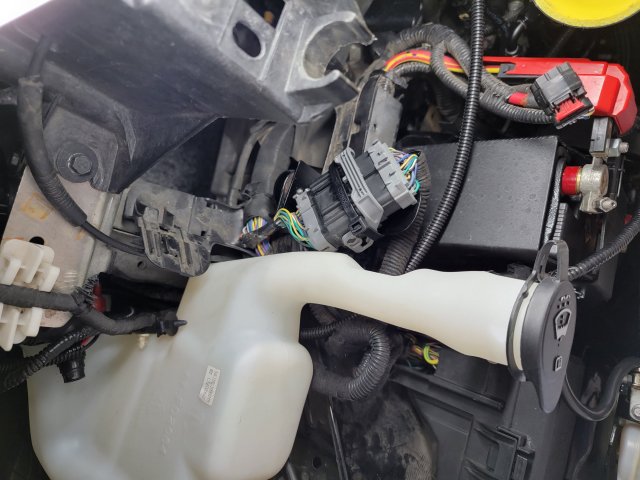
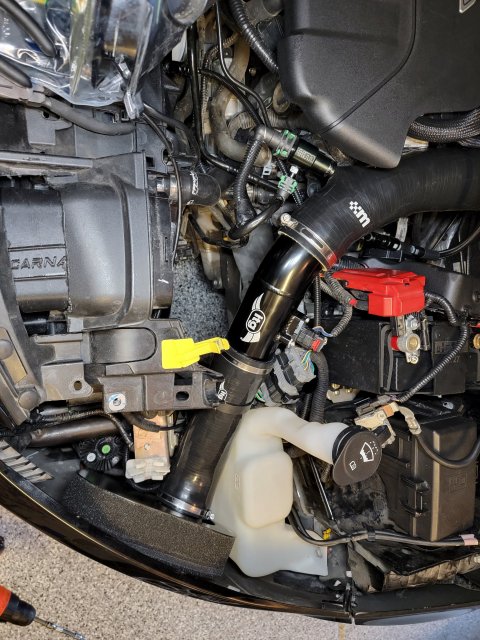
Here are some pictures of the ITG intake install. I saw instruction videos for UK version of Fiesta, but USDM version required undoing some wiring wraps and splitting/re-routing them.

20220511_153633.jpg
20220511_154828.jpg
20220511_164338.jpg
20220511_190233.jpg


OP
Bull Run

Bull Run

Member
U.S. Army Veteran
Messages
246
Likes
404
Location
Chandler, AZ, USA
Thread Starter #52
I’m back from the hiatus. Aside from it being not fun to work on cars during summers here, I was taking a course for the Army to be eligible for the next rank. Being a Reservist/Guardsman means that I got to take the distance learning version of the course during evenings and weekends, which ended up being a huge time sink.

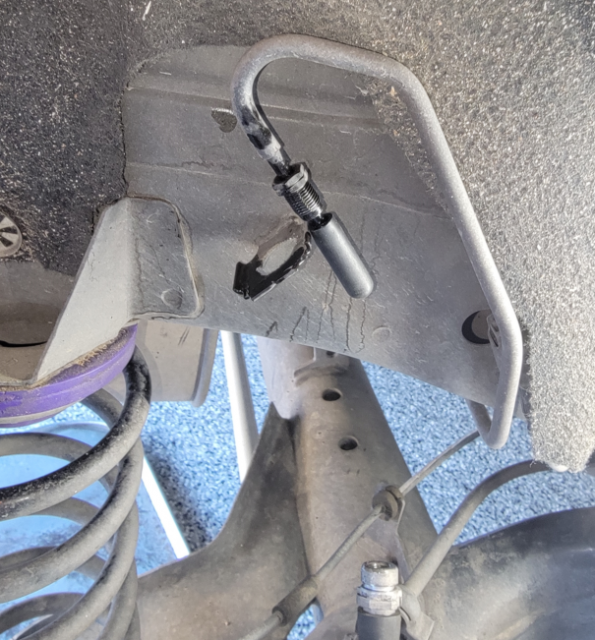
I finished the course and the weather’s much cooler now, so I am resuming the project starting with rear brakes. I already swapped front hoses with stainless steel braided lines via Wilwood BBK kit, so I replaced the rear ones with StopTech hoses. As expected, the brake pedal feels firmer and requires less effort to stop after the swap.

If you like to take your time while swapping lines, you can cap the hardline with a ¼” vacuum cap to stop the brake fluid from dripping and making a mess.

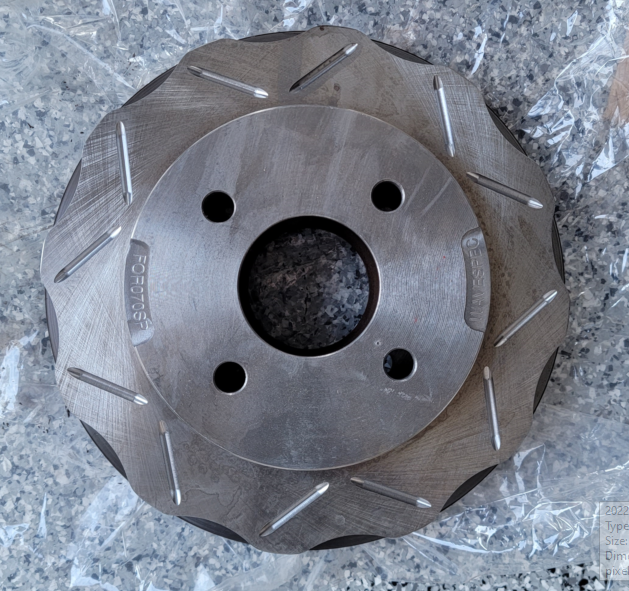
Rear pads are looking on the thin side, so I ordered a set of EBC Redstuff rear pads. I couldn’t find any lightweight two-piece rotors for the rear, so I ordered a set of WaveSpec Sport Line rotors to compare their weight vs. the OEM ones.

1671083677675.png
1671083710377.png


Messages
492
Likes
550
Location
Camden, NJ, USA
#53
I’m back from the hiatus. Aside from it being not fun to work on cars during summers here, I was taking a course for the Army to be eligible for the next rank. Being a Reservist/Guardsman means that I got to take the distance learning version of the course during evenings and weekends, which ended up being a huge time sink.

I finished the course and the weather’s much cooler now, so I am resuming the project starting with rear brakes. I already swapped front hoses with stainless steel braided lines via Wilwood BBK kit, so I replaced the rear ones with StopTech hoses. As expected, the brake pedal feels firmer and requires less effort to stop after the swap.

If you like to take your time while swapping lines, you can cap the hardline with a ¼” vacuum cap to stop the brake fluid from dripping and making a mess.

Rear pads are looking on the thin side, so I ordered a set of EBC Redstuff rear pads. I couldn’t find any lightweight two-piece rotors for the rear, so I ordered a set of WaveSpec Sport Line rotors to compare their weight vs. the OEM ones.

View attachment 53004
View attachment 53005
do you commute through the salt flats or did you spray your wheel wells with some kind of protectant?


OP
Bull Run

Bull Run

Member
U.S. Army Veteran
Messages
246
Likes
404
Location
Chandler, AZ, USA
Thread Starter #55
Installed rear WaveSpec rotors and EBC Redstuff pads a couple of days ago.

WaveSpec rotor laid on top of the OEM rotor. Unfortunately, I didn't weight the WaveSpec rotor properly and thus can't tell you the weight difference.
1671296019074.png
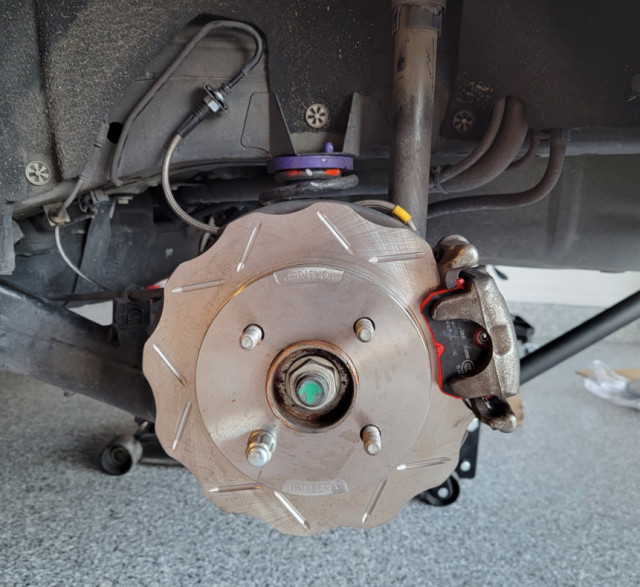
Rotors and pads installed.
1671296073119.png
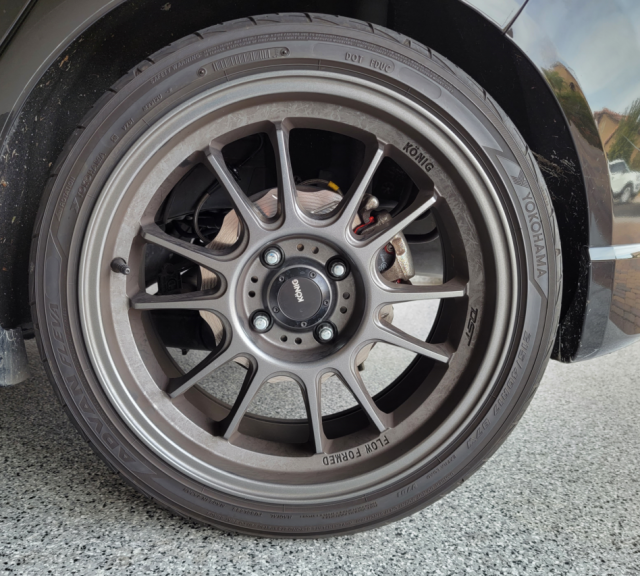
With the wheel back on. I'll need to clean the calipers and wheels once the pads are broken in and weather's a little warmer.
1671296117935.png
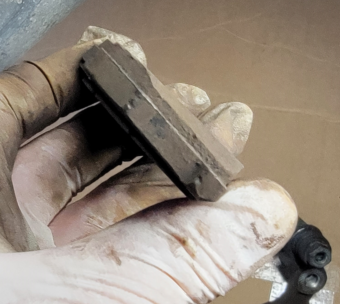
PSA for those replacing rear brake pads. Noticed that while outer pads had an even wear, inner pads wore an angle with the bottom portion having more wear.
1671296359884.png
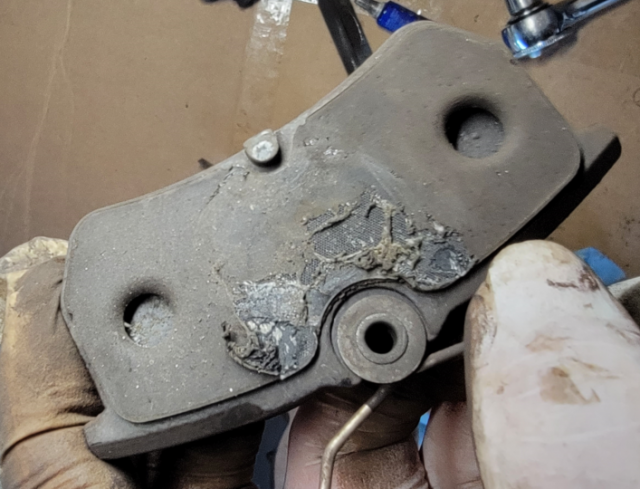
The backing showed signs of the of the “bump” being pressed by the piston rather than sitting in the groove, thus leading to uneven pressure applied to the inner pads leading to an uneven wear.
1671296382736.png
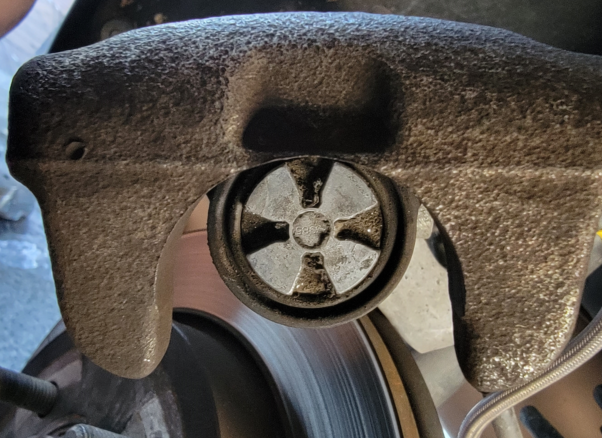
The piston should be clocked in a way to have the knob sit in the groove before reinstalling the calipers.
1671296401205.png


OP
Bull Run

Bull Run

Member
U.S. Army Veteran
Messages
246
Likes
404
Location
Chandler, AZ, USA
Thread Starter #56
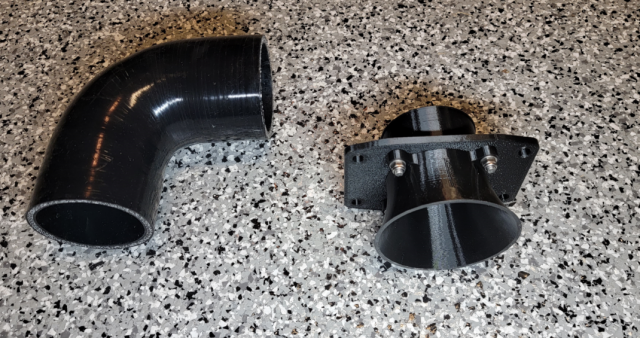
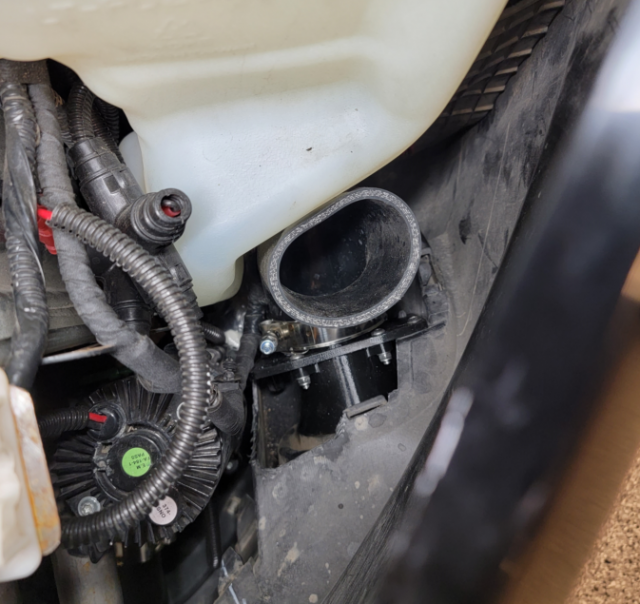
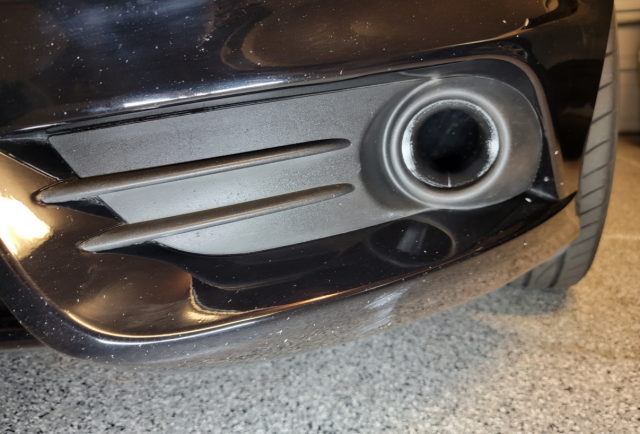
I noticed that Whoosh started selling the fog light delete/cold air duct again, thus grabbed one to create something similar to the Big Mouth snorkel for the ITG intake.

The air duct's outlet is 2.5" OD, so I purchased a 2.5" hose off of Amazon to go with it.
1671859511522.png
I trimmed the inlet side of the hose at an angle to clear the windshield washer reservoir and to have the outlet pointed to bottom side of the ITG filter.
1671859548412.png
How it looks from the front.
1671859721722.png


OP
Bull Run

Bull Run

Member
U.S. Army Veteran
Messages
246
Likes
404
Location
Chandler, AZ, USA
Thread Starter #57
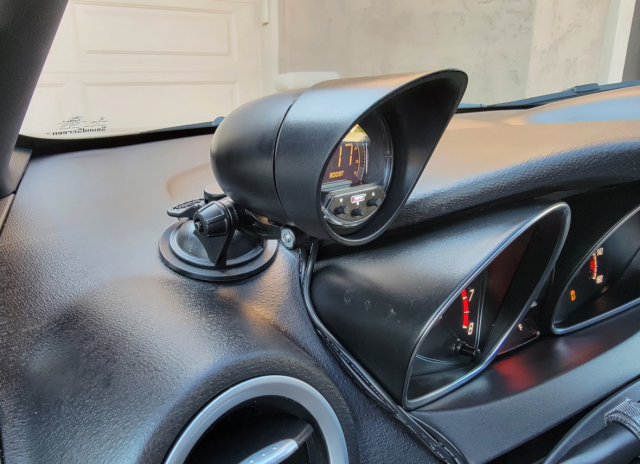
I repurposed a suction gauge pod mount from another project to relocate the boost gauge to a more visible location. The mount works great even on a curved textured surface and I can easily make small adjustments as needed.
1671859887402.png
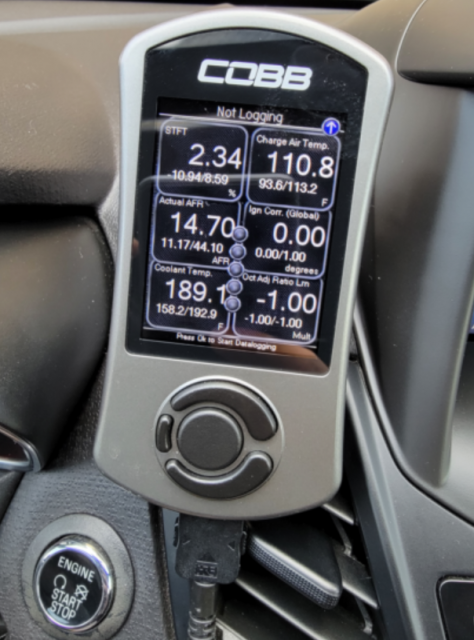
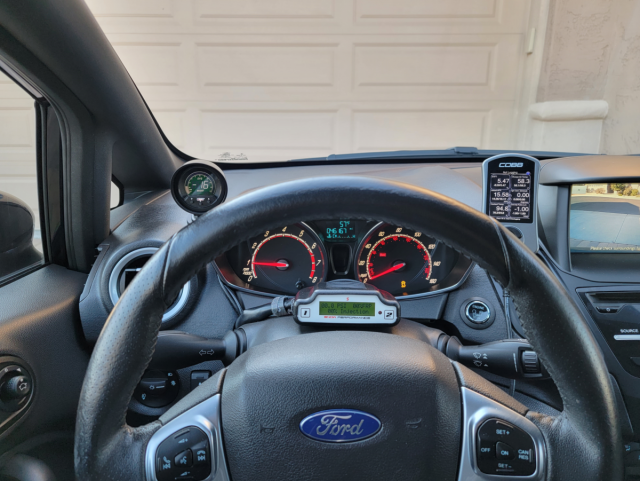
This is how everything looks now from the driver's seat. Snow Stage 3 WMI controller blocks the fuel gauge, but all I need to do is to lean forward to view the fuel level. It's not like this car's a gas hog anyways.
1671860082261.png


akiraproject24

1000 Post Club
U.S. Marine Veteran
Messages
1,110
Likes
1,259
Location
Pennsylvania
#60
Installed rear WaveSpec rotors and EBC Redstuff pads a couple of days ago.

WaveSpec rotor laid on top of the OEM rotor. Unfortunately, I didn't weight the WaveSpec rotor properly and thus can't tell you the weight difference.
View attachment 53020
Rotors and pads installed.
View attachment 53021
With the wheel back on. I'll need to clean the calipers and wheels once the pads are broken in and weather's a little warmer.
View attachment 53022
PSA for those replacing rear brake pads. Noticed that while outer pads had an even wear, inner pads wore an angle with the bottom portion having more wear.
View attachment 53023
The backing showed signs of the of the “bump” being pressed by the piston rather than sitting in the groove, thus leading to uneven pressure applied to the inner pads leading to an uneven wear.
View attachment 53024
The piston should be clocked in a way to have the knob sit in the groove before reinstalling the calipers.
View attachment 53025
I actually did that to myself when I did my rear brakes. Bought another set of pads and got them situated correctly


Top