• Sign Up! To view all forums and unlock additional cool features

    Welcome to the #1 Fiesta ST Forum and Fiesta ST community dedicated to Fiesta ST owners and enthusiasts. Register for an account, it's free and it's easy, so don't hesitate to join the Fiesta ST Forum today!


2014 Fiesta OEM+ build

Messages
152
Likes
141
Location
Montreal
#1
I thought I'd start a build thread for my 2014 tuxedo black Fiesta ST. I've owned this car new since July 2014, and it's been my daily driver ever since. It's been my only new car purchase, and I learned to drive manual on it. I bought it with the help of my grandfather when I was a 20 yr old starry-eyed college student. Throughout the years, I've only done maintenance and repairs with some small upgrades sprinkled in, like a COBB RMM, Carbon fiber shift knob, false floor mod, Rally-Armour mud flaps and 70% tint.

I currently have around 128k KM's on it (Canadian, living in Montréal). My aim is not too increase performance right now. I'm more focused on driving dynamics and road compliance. Think better damping, lighter unsprung mass, etc.

Here is the list of things I want to address and will be documenting in this thread. I am sure this list is incomplete and will evolve over time. I'll try to hotlink these things with the corresponding post.

Sound, NVH & Comfort

[x] Underhood insulation (noise & heat)
[x] Putting back OEM rear spring pads
[x] OEM Exhaust isolators
[ ] Complete rear trunk sound insulation (100ml butyl + 157ml closed-cell foam)
[ ] Complete aero flat panel under-tray
[x] Replace rear trailing arm bushings
[x] Vibra-Technics RMM Install

Suspension related

[x] New subframe (original one is rotting)
[x] New swaybar bushings & hardware
[x] New control arms & swaybar links

[ ] New front 2016+ struts w/2016 springs
[x] New rear 2016+ shocks
[ ] Swave 4-point brace
[ ] Shock tower brace (reduces dash rattles)
[x] Mishimoto rear trunk brace

Body, rust & cosmetic

[ ] Repair rear passenger quarter panel rust
[ ] Fix falling sideskirts
[ ] Fix front attachment points for rally armour mudflaps
[ ] Find good condition driver-side doors (bottoms are all rusted)
[ ] Treat underbody with rust-conversion coatings

Wheels, tires & brakes

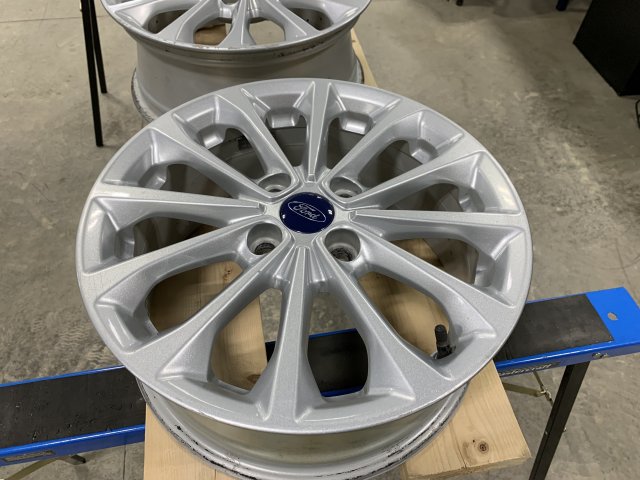
[x] OEM Fiesta 16x6.5 wheels and 205/50ZR16 DWS06+ tires. (link)
[ ] Replace front rotors, pads & SS brake lines

Engine, intake & cooling

[ ] Intake valve walnut blasting
[ ] WMI injection
[ ] Whoosh V3 FMIC upgrade
[ ] Stratified or Dizzy tune


Last edited:
OP
Volumetrik
Messages
152
Likes
141
Location
Montreal
Thread Starter #2
First up is the rear trailing arm bushings. They have been making an increasing amount of noise the past two years and recently, there is noticeable clunking. Purchased the right parts and went to work.

IMG_9389.jpeg
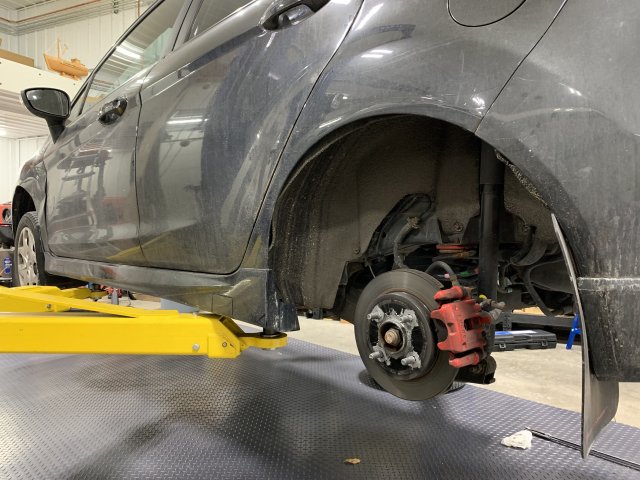
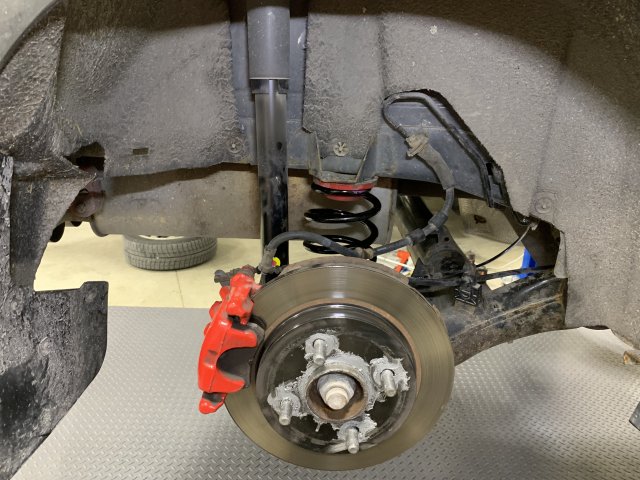
Started with lifting the car and removing the rear wheels.

IMG_9390.jpeg
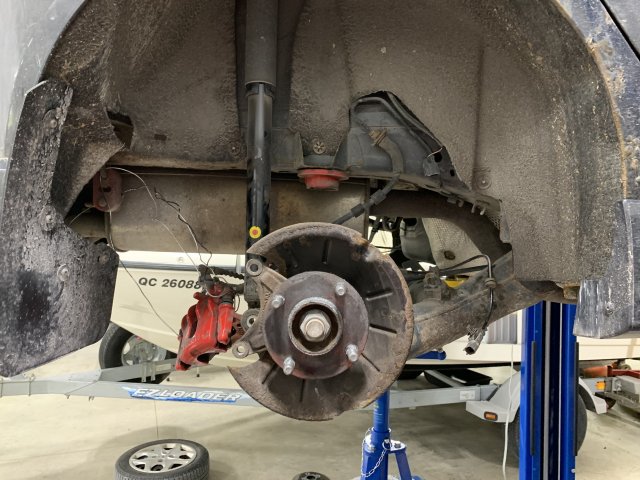
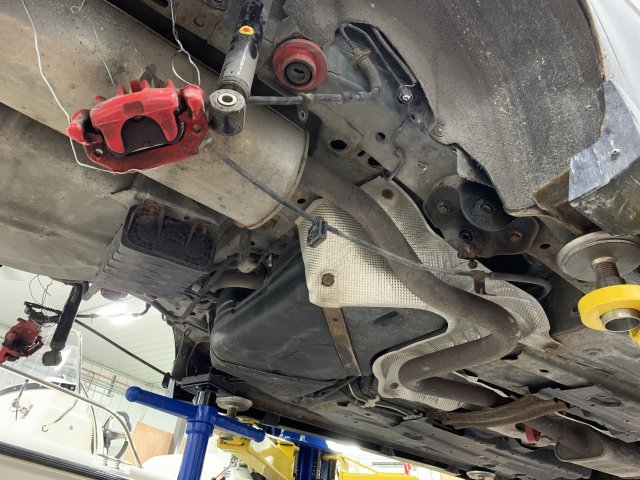
Next up is unbolting the rear calipers and hanging them.

IMG_9392.jpeg
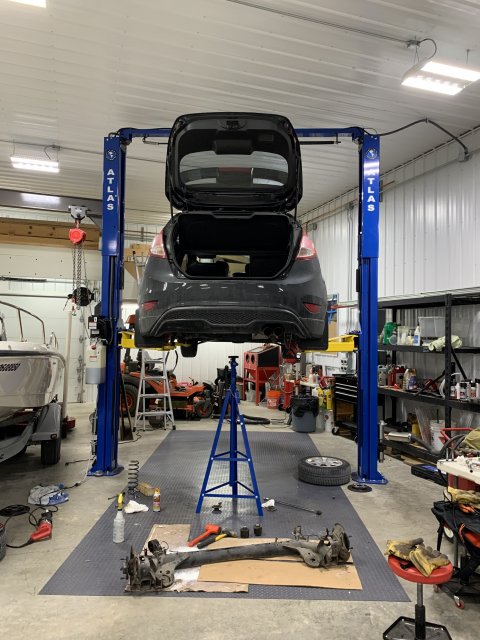
We supported the rear arm after removing the shocks and springs.

IMG_9393.jpg
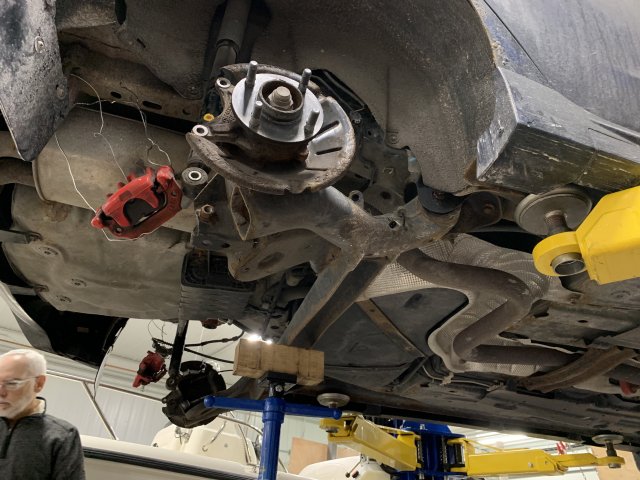
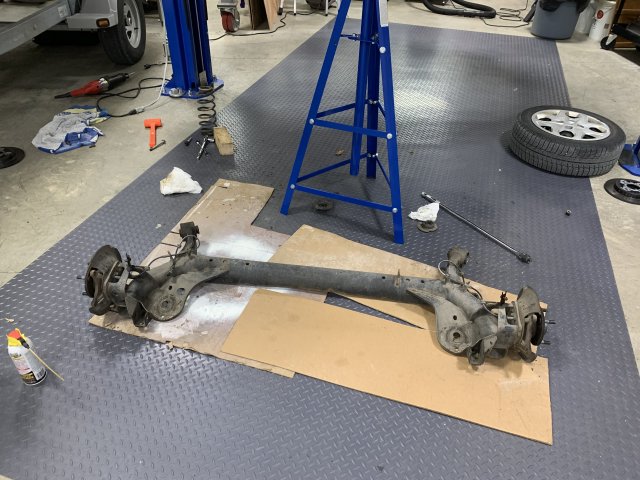
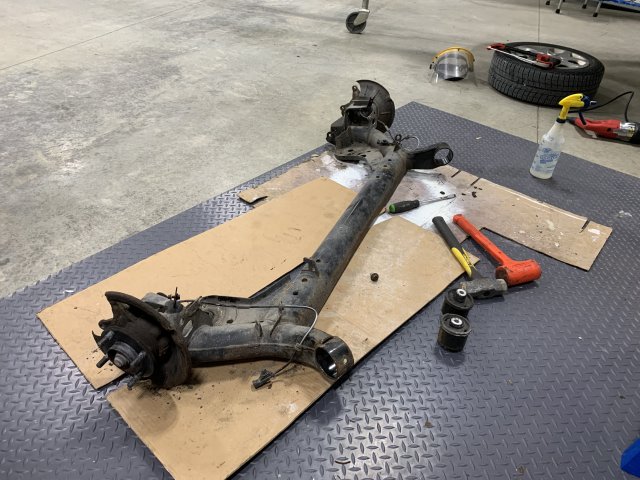
It's out! This is a two-man job to remove. Wheel-speed sensor and parking brake clips need to be untied.

IMG_9394.jpg
View of the underside after removal.

IMG_9395.jpg
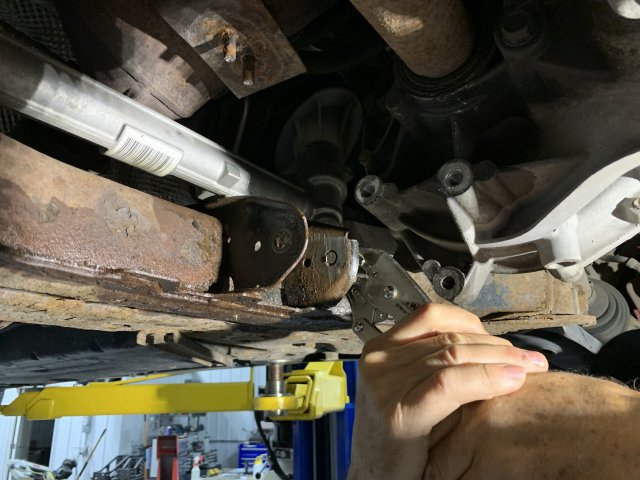
Bushing removed. They are not that difficult to remove, putting the new ones in however...

IMG_9396.jpg
This job is much easier with a lift. Very lucky that we have one.

IMG_9397.jpg
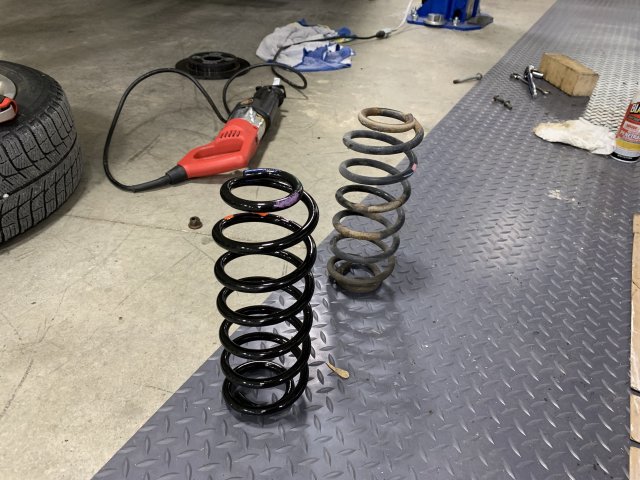
Cleaned and fluid-filmed the 2016+ springs I received from Dialcaliper. Thanks :)

IMG_9398.jpg
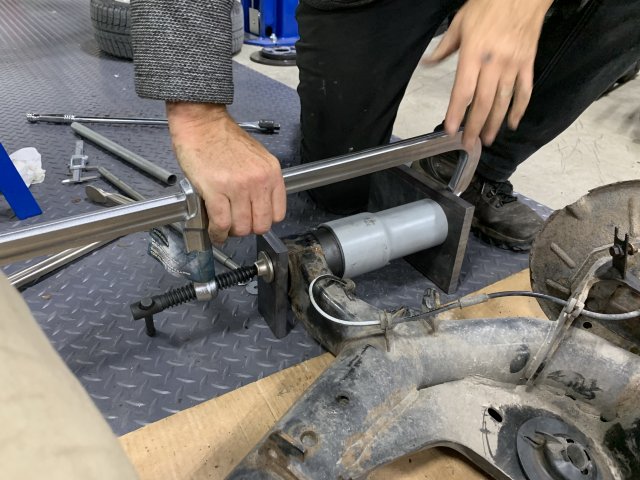
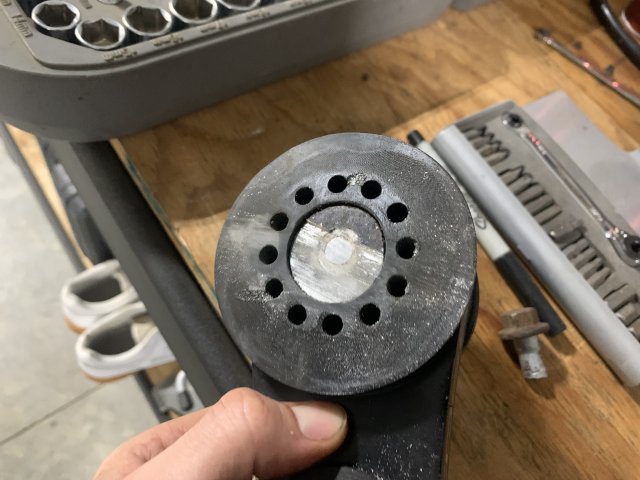
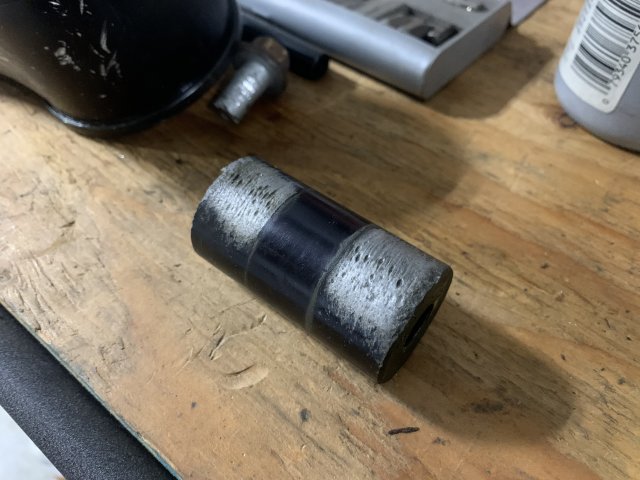
This was our technique for installing the rear bushings. We really struggled with the insertion of these because it's a plastic housing that is not round. It's oval, and it slips all over the place, especially lubed up. We turned a spare PVC pipe on a lathe to sit on the lip of the plastic bushing we inserted. This prevented us from damaging the bushing with our clamps and tools.

A tip for installation : The bushing will never enter straight. It will start out straight and start to pivot off-axis (normally with metal housing bushings, this is a big no-no). As soon as we started to continue tightening even though the bushing was off-axis, it fixed itself and started going in smoothly. Be careful with the other end of the clamp, the bushing has a protruding end that will stop you from fully inserting the busing in. You have to clamp the remaining distance using an open portion so that the protruding end will go through.

IMG_9400.jpg
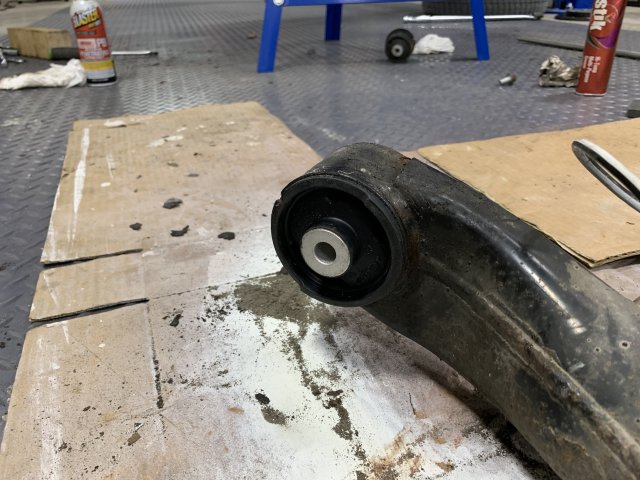
Success!

IMG_9402.jpg
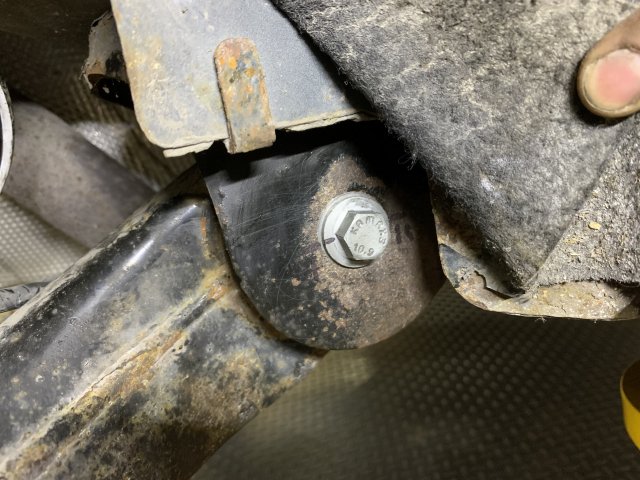
New torque to yield bolt. Torqued to spec, but not rotated 180 degrees. Marked it with a sharpie to facilitate.

IMG_9403.jpg
I would highly advise following the shop manual steps for this, especially the last torque stage. You need to support the rear suspension and lift it 5 mm from the supports, and then torque to spec and yield.

IMG_9405.jpg
Torqued and ready to go.

One last thing if you're planning to do this : You're going to finagle with this dammed axle while changing the bushings. You will most likely be on the floor, and you will most likely be applying force on the axle. You will bend the rear dust shields. Do not forget (like me) to bend back the dust shield so it clears the rotors. I have never heard such a horrible noise on a car than rubbing dust shields.


OP
Volumetrik
Messages
152
Likes
141
Location
Montreal
Thread Starter #3
I have been noticing that there is a small thunk when going off-gas when decelerating. I installed a COBB RMM when the car was at 4k km's so it was a good thing to check out. I ordered a Vibra-technics RMM because I heard it's the best in terms of NVH.

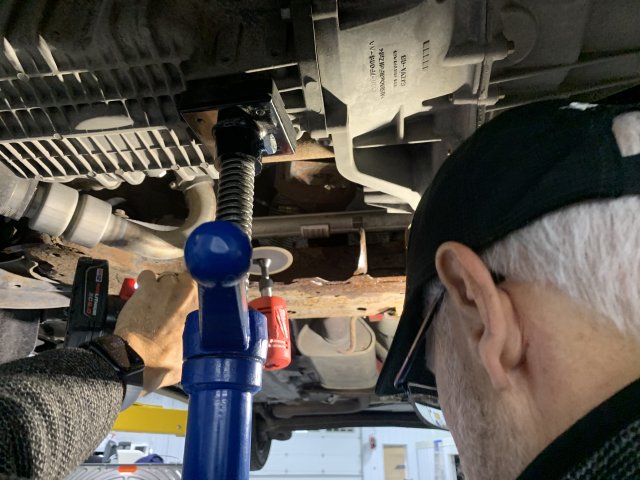
Went to undo the RMM bolts and surprise! A small and simple job turned into a full afternoon's worth of work. Let's dive in.

IMG_9428.jpg
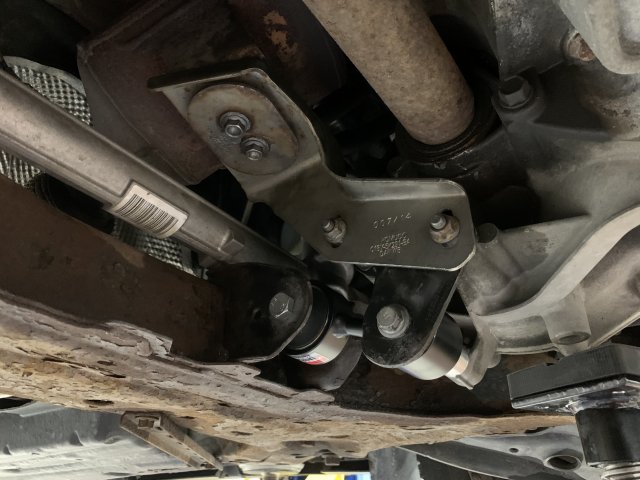
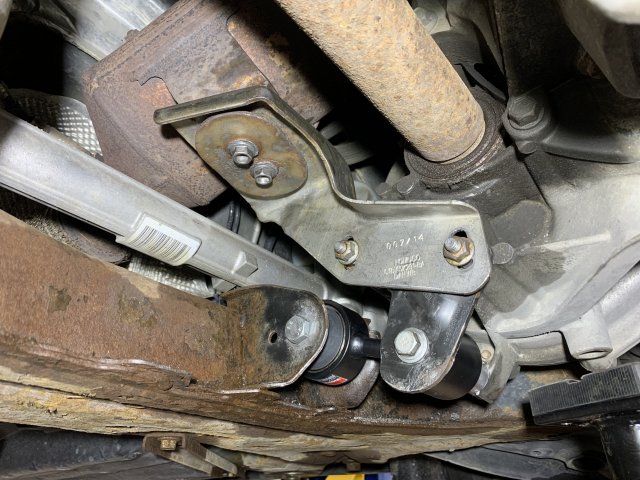
Main bolt snapped!

IMG_9429.jpg
You can see the other side is still there.

IMG_9430.jpg
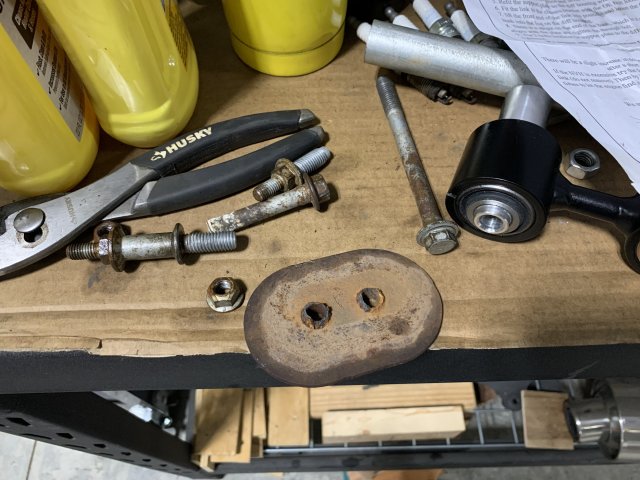
We had other bolts snap as well,as you can see.

IMG_9431.jpg
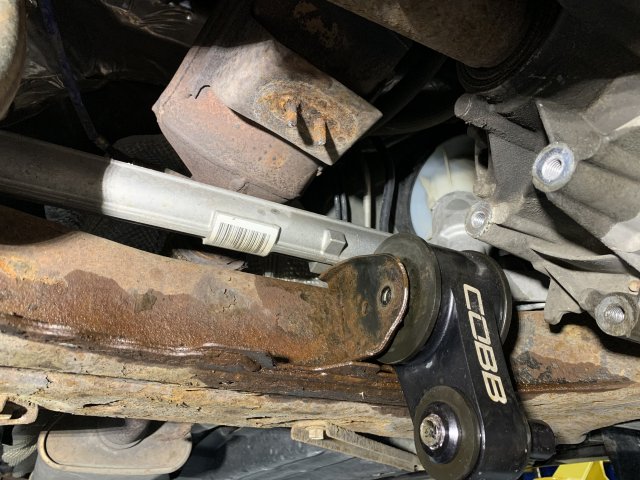
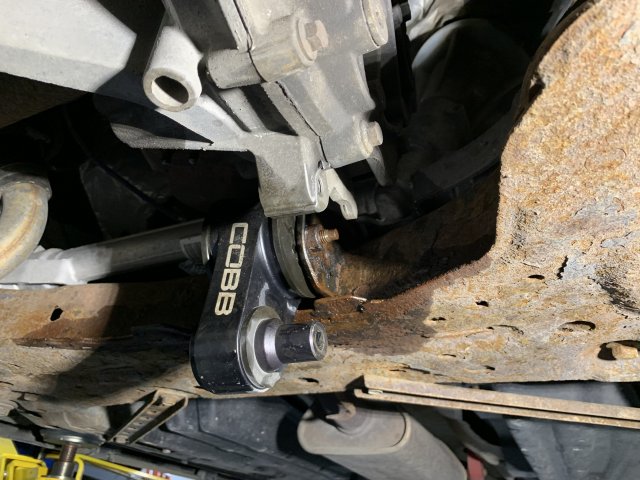
We ended up sliding a sawzall in between the RMM and the perch and cutting the bolt. You can see the cutting marks on the mount.

IMG_9434.jpg
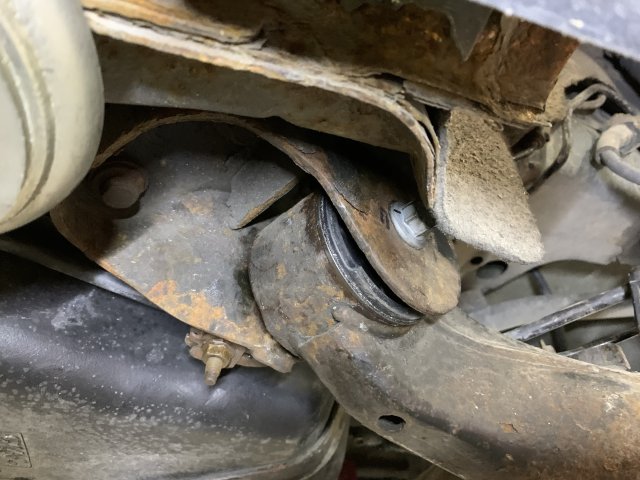
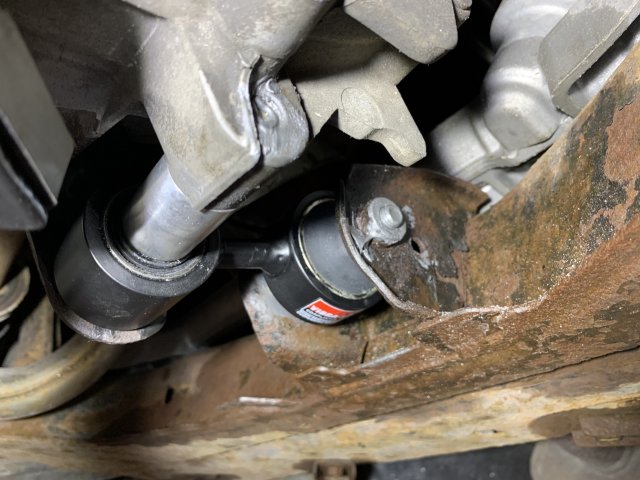
Aftermath. You can also see the ovaling of the bushing. The cause for the thunking.

IMG_9435.jpg
Worn center bushing, confirmed.

IMG_9433.jpg
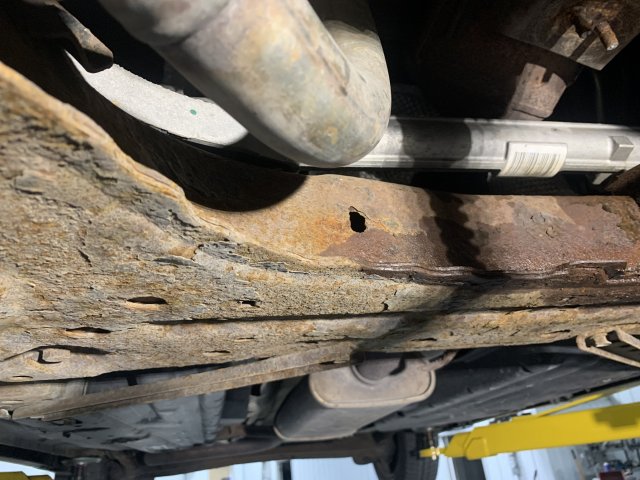
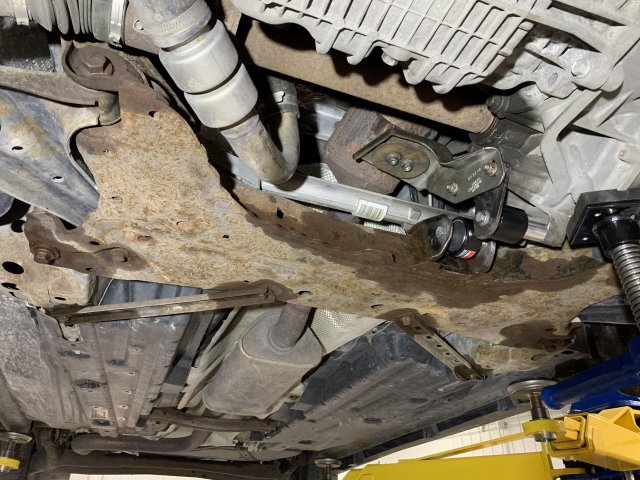
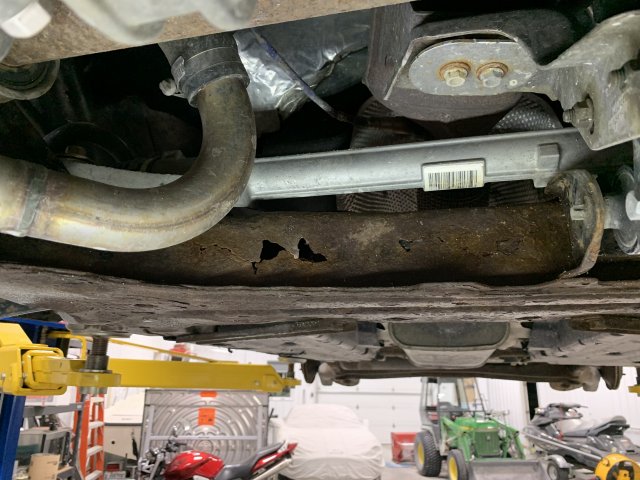
We also discovered that the subframe is rotting! There is a nice hole in the front and I will have to change it once the summer comes. No point in exposing a new subframe to a salty winter for no reason. It does seem safe to drive on, but it's a priority item when summer comes.

IMG_9436.jpg
Here, my father and me, are supporting the engine while cutting some remaining parts to clear.

IMG_9438.jpg
We ran to the hardware store and found the only metric M10x70mm bolt in the store. Very lucky. It's an 8.8 grade however... I already have the new OEM bolts for this and will be replacing during the Christmas break.

IMG_9439.jpg
We tapped drilled out and tapped the catalytic converter bracket to accept bolts and placed some new ones in.

IMG_9440.jpg
Here is another view. I submerged everything in anti-seize so when I replace the bolts with the new OEM ones, I don't have another situation like this.

IMG_9442.jpg
Since I'll be replacing the subframe in the summer, I applied penetrating oil to every subframe bolt and connection possible. I'll be doing this every time I place the car on the lift to facilitate the change over the summer.

Initial impressions of the Vibra-Technics RMM is that, jesus, there are a lot of vibrations ! I think that the previous ovaled COBB RMM was loose and not transmitting any vibrations, so the difference is quite stark. When I'll change the bolts, I'll rock the engine back and forth before torquing them down again. The vibrations are taming down a bit, but it does not help that we have cold weather (winter) so this phenomenon is exacerbated.

I'll post an update with I replace with new OEM bolts and perform the ''rock the engine before torquing'' procedure.


M-Sport fan

9000 Post Club
Messages
14,430
Likes
6,985
Location
Princeton, N.J.
#4
I really like the idea of the Turinis, and at times regret not getting them in Speedline's ($100.00 extra co$t, EACH!) optional gold color as my daily driver wheels. [:(]

But the Dekagrams are about half the price (of the optional color Speedlines), and quickly (NOT '6 months to a year+'!) and readily available if one gets destroyed.

I would order 5 Speedlines, or Braids if I ever bought those brands, purposely, because of that. [wink]


OP
Volumetrik
Messages
152
Likes
141
Location
Montreal
Thread Starter #5
I really like the idea of the Turinis, and at times regret not getting them in Speedline's ($100.00 extra co$t, EACH!) optional gold color as my daily driver wheels. [:(]

But the Dekagrams are about half the price (of the optional color Speedlines), and quickly (NOT '6 months to a year+'!) and readily available if one gets destroyed.

I would order 5 Speedlines, or Braids if I ever bought those brands, purposely, because of that. [wink]
Good point! I'm still on the fence if I want to order them or not... It's a big expense and I have other, more pressing and required items, like the rotting subframe and front suspension refresh.


OP
Volumetrik
Messages
152
Likes
141
Location
Montreal
Thread Starter #6
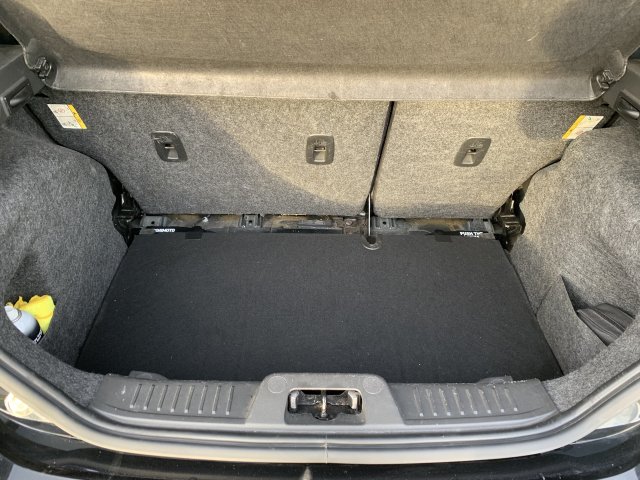
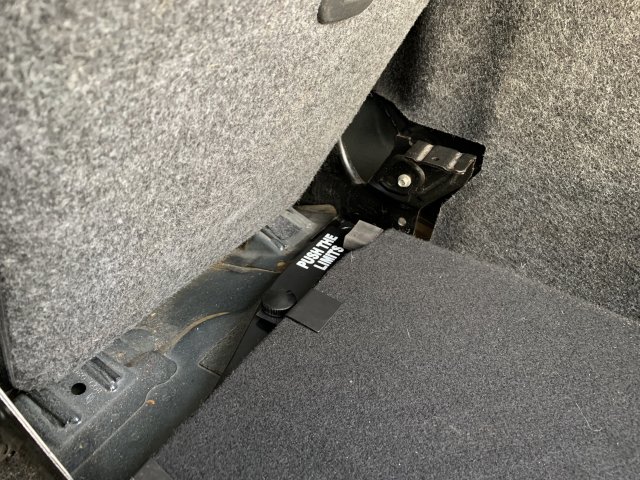
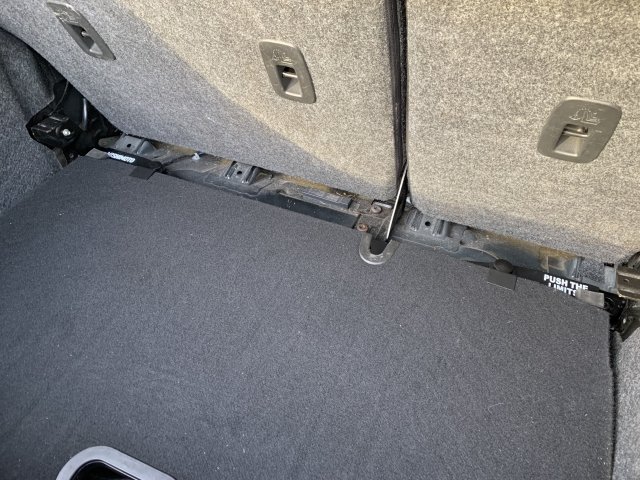
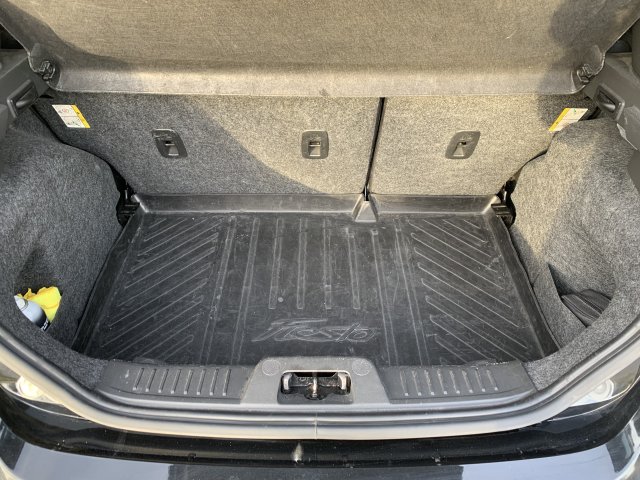
Installed the rear Mishimoto brace I ordered on Black Friday. I chose this one because it was a rectangular flat tubing build and was concerned with the compatibility with my false floor mod. I'm glad to report that it fits great, and the brackets provided are great too.

IMG_9478.jpeg
Here is the view with the cargo cover removed.

IMG_9479.jpeg
You can see the bracket holding down the false floor. I installed a rubber doughnut between the bracket and the bar, so I could ''squish'' the metal bracket onto the false floor. It's really snug now.

IMG_9480.jpeg
Extra view.

IMG_9481.jpeg
Fully done with the cargo cover installed. This is the sedan version of the cargo cover. Works well if you want to preserve the side pockets.

In terms of driving dynamics, I noticed the rear felling more solid on bumps and uneven road, but can't speak to the driving dynamics other than that yet.


Messages
325
Likes
501
Location
Raleigh, NC, USA
#7
Loving everything that you're doing. That subframe is ROUGH hahaa! That same off throttle clunk has a new RMM in my cart as well.

All the comments I've seen on the 4 and 6 point Swave braces make them sound wonderful.


OP
Volumetrik
Messages
152
Likes
141
Location
Montreal
Thread Starter #8
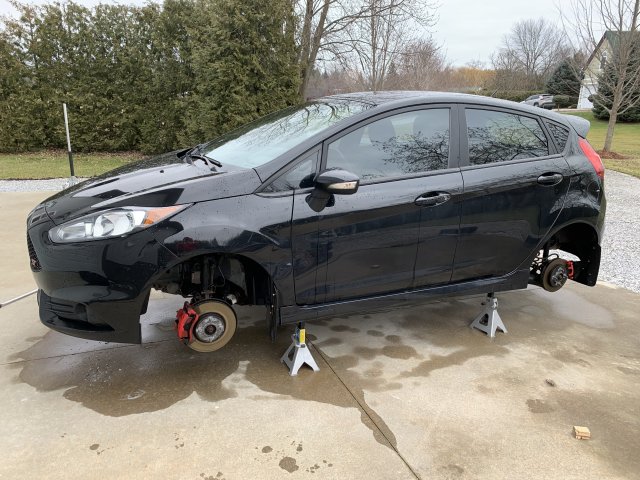
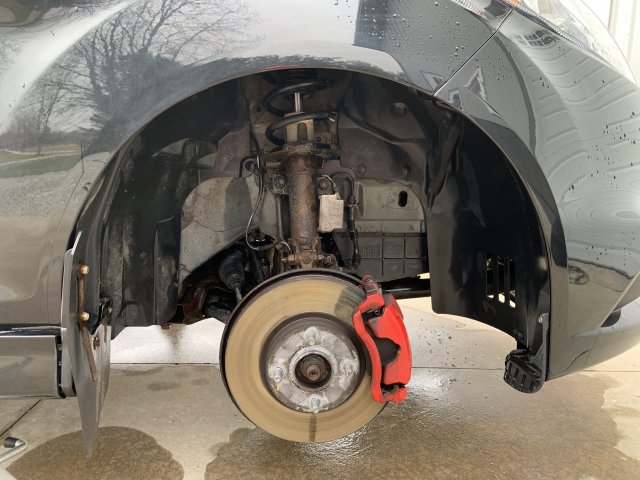
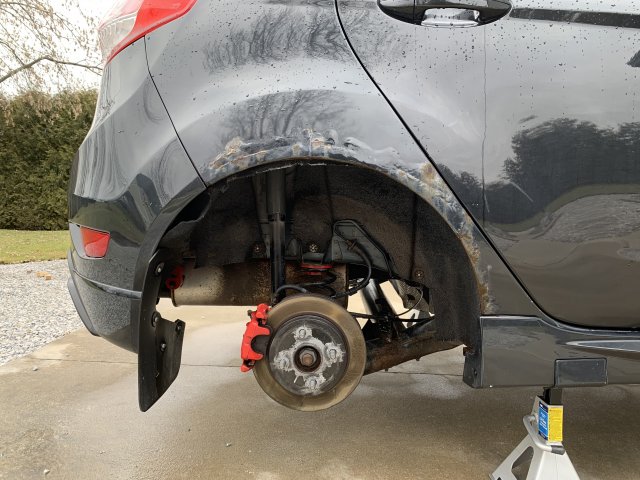
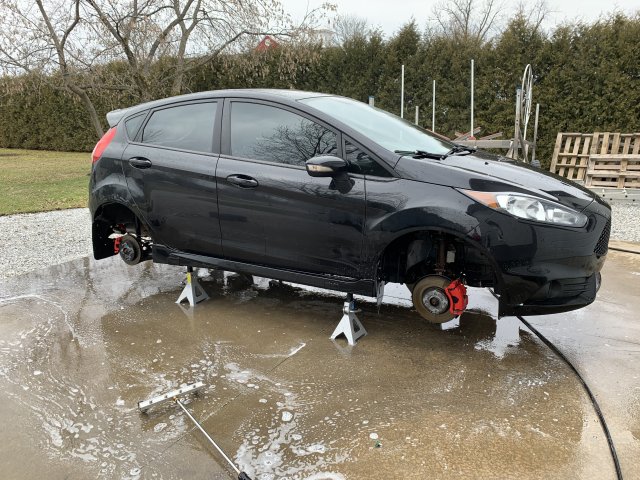
Put the car on stands today to pressure wash the undercarriage and the wheel wells. A lot of gunk and road grime was removed.

IMG_9503.jpg
Side view. This is the side where I got hit multiple times. The two doors are pretty rusted at the bottom. I'm trying to get some tuxedo black doors from other cars. We'll see.

IMG_9504.jpg
Passenger side front strut. This is the original strut and looks pretty bad. While doing the front subframe in the summer, I'll convert both front struts with the 2016+ struts. I'll replace all the hardware with new OEM.

IMG_9505.jpg
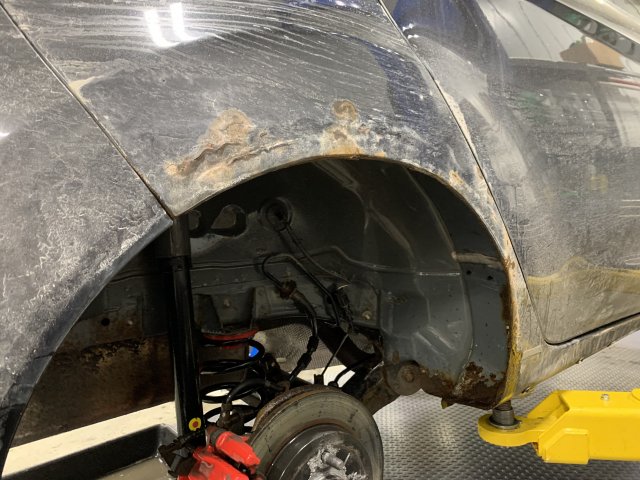
This is the rear quarter panel. I've had this fixed two times now, but after 6 months, the rust comes back. I'll have to order a new panel and take it to a shop. I've also removed the sagging liner. I'll be ordering a new one very soon. I'll install butyl 80mil sound deadening pads on the bare metal before installing back the new liner.

IMG_9506.jpg
The pressure washer attachment at the bottom of the picture is very practical. It blasts the underbody with four sprays. You just roll it under the body in a crisscross pattern, and you get a lot of difficult to reach areas.


rallytaff

1000 Post Club
Premium Account
Messages
1,291
Likes
881
Location
Los Angeles
#9
Installed the rear Mishimoto brace I ordered on Black Friday. I chose this one because it was a rectangular flat tubing build and was concerned with the compatibility with my false floor mod. I'm glad to report that it fits great, and the brackets provided are great too.

View attachment 59652
Here is the view with the cargo cover removed.

View attachment 59650
You can see the bracket holding down the false floor. I installed a rubber doughnut between the bracket and the bar, so I could ''squish'' the metal bracket onto the false floor. It's really snug now.

View attachment 59651
Extra view.

View attachment 59649
Fully done with the cargo cover installed. This is the sedan version of the cargo cover. Works well if you want to preserve the side pockets.

In terms of driving dynamics, I noticed the rear felling more solid on bumps and uneven road, but can't speak to the driving dynamics other than that yet.
I got the WeatherTech cover which still gives you access to the side pockets.


OP
Volumetrik
Messages
152
Likes
141
Location
Montreal
Thread Starter #10
Next up was adding some heat and sound insulation.

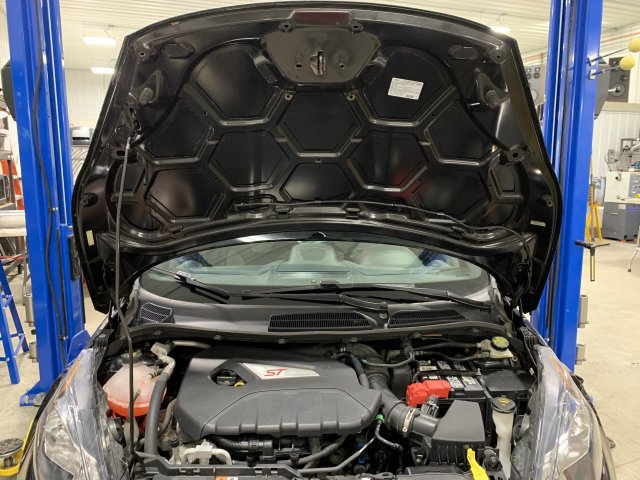
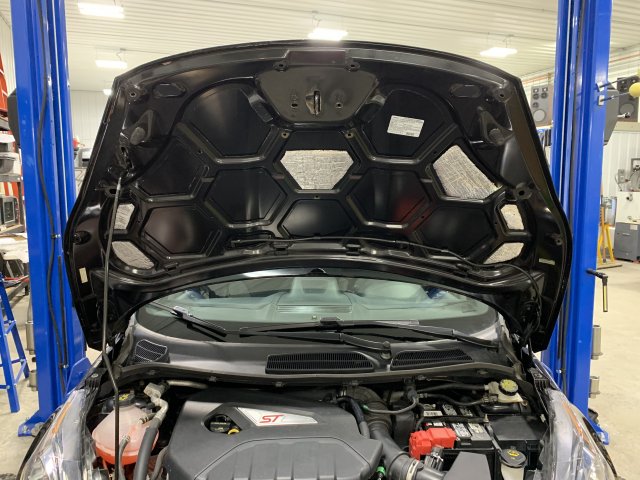
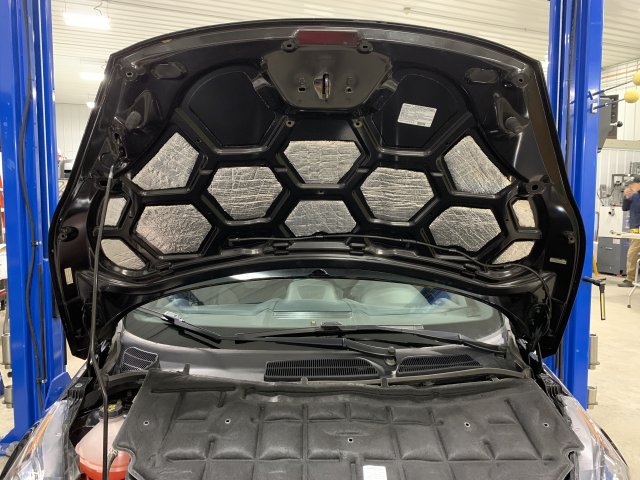
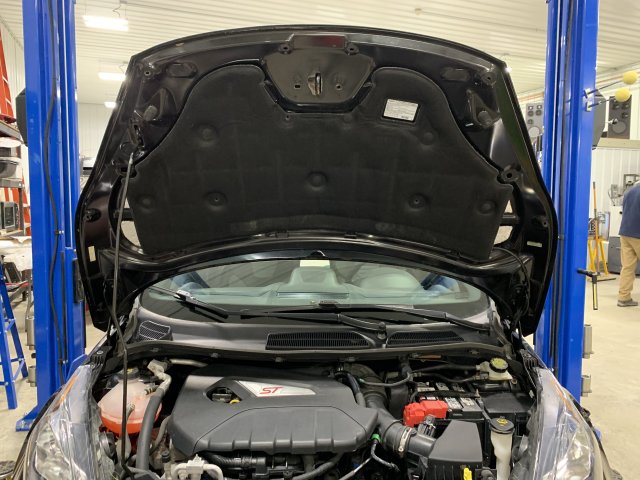
I think I removed the hood insulator cover somewhere around 2016-2017 because I liked the hexagon patterns under the hood, but younger me did not understand the notion of NVH... So I purchased a new one with some clips. I also had a roll of heat-insulating closed-cell foam that I decided to cut and apply to the crevices of the hood.

IMG_9513.jpg
Starting with a washed underhood.

IMG_9515.jpg
Starting to cut and apply the self-adhering sections. Applied using an acrylic roller. Read online that the metal grooved rollers were no good and could damage the foam.

IMG_9516.jpg
Full coverage and before applying the insulation panel.

IMG_9517.jpg
The OEM clips come in a six-pack, but there are nine holes... Classic. I'll have to order another 6 to complete. At least it hold well for now.

Was it worth it? It did not really make a noticeable difference. Maybe I'll notice in the summer when the car does not shake like a paint mixer when it's -8c outside on a cold start. Cold idles with the Vibra-technics RMM are pretty rough. Perhaps if I installed butyl panels instead of foam panels, but then the hood would be significantly heavier.


OP
Volumetrik
Messages
152
Likes
141
Location
Montreal
Thread Starter #11
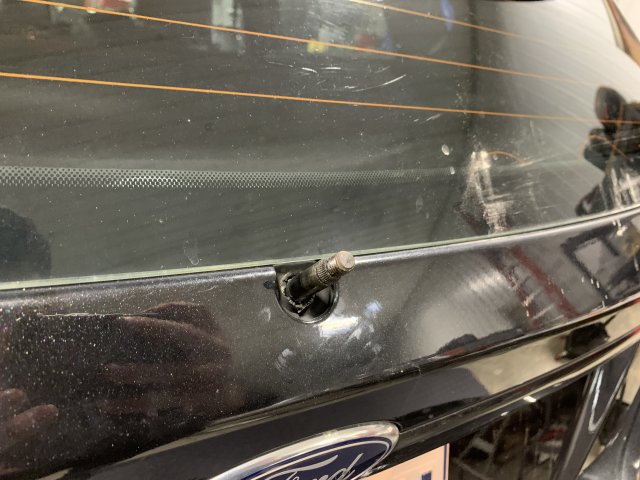
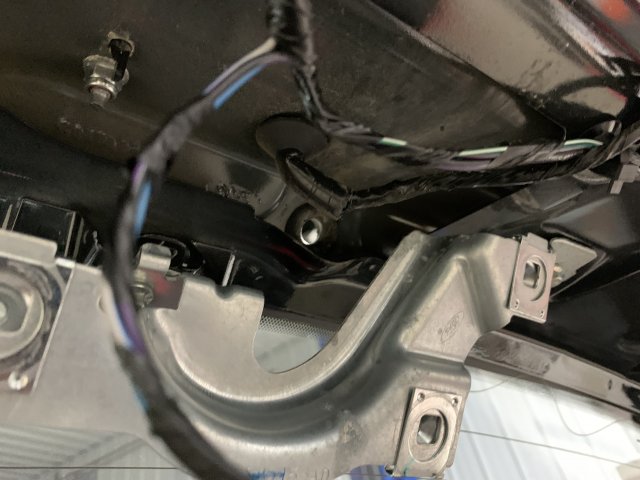
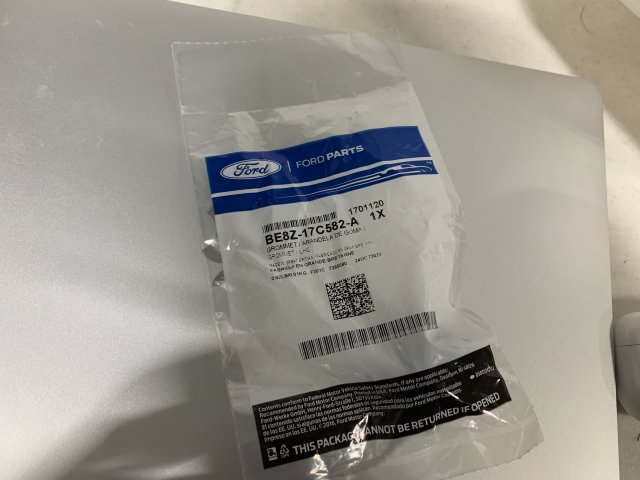
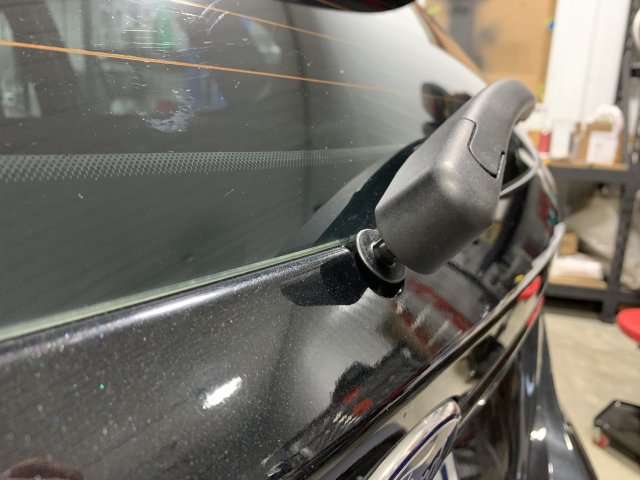
Noticed that the rear wiper bushing had cracked. Got the new rubber piece and started the installation.

IMG_9520.jpg
Here is the culprit after removing the arm.

IMG_9521.jpg
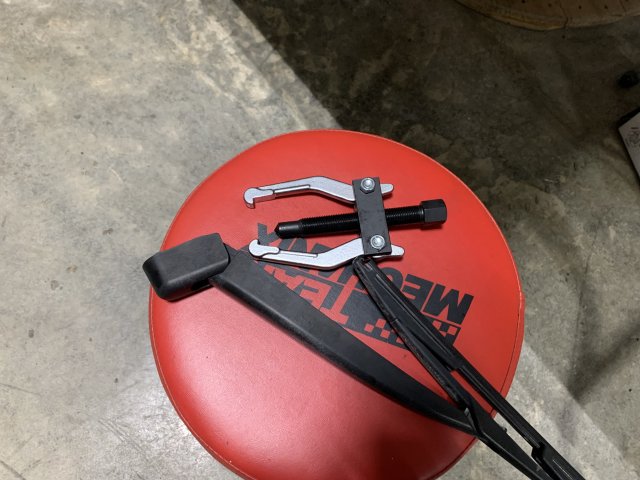
I used this tool to remove it. It was quite difficult, first time removing that arm in almost 10 years.

IMG_9522.jpg
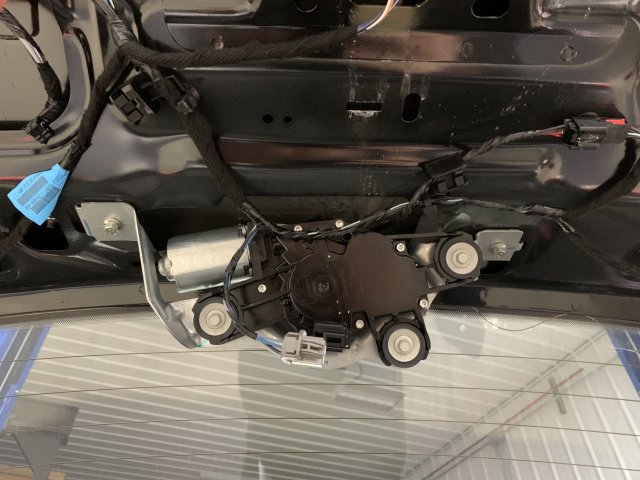
Removed the plastic trim and now had access to the wiper motor.

IMG_9523.jpg
With it removed, you can now the failed bushing.

IMG_9524.jpg
This part is directional, meaning it compensates for the angle of the hatchback. You'll see when you install it.

IMG_9525.jpg
Installed and ready to roll.

The most difficult part in re-installing the bushing into the metal portion of the hatch. I added grease to facilitate this process.


OP
Volumetrik
Messages
152
Likes
141
Location
Montreal
Thread Starter #12
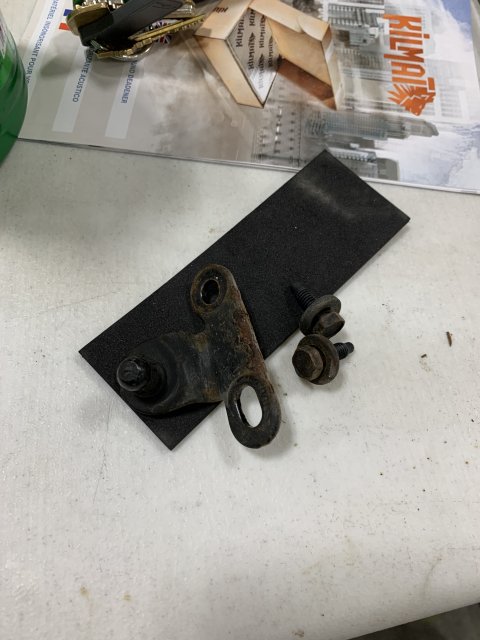
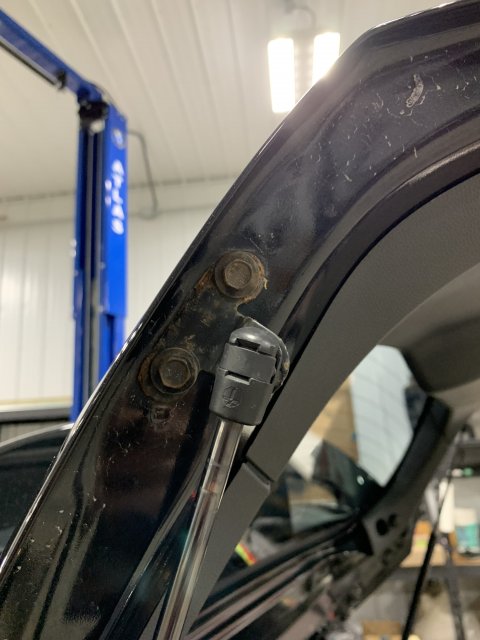
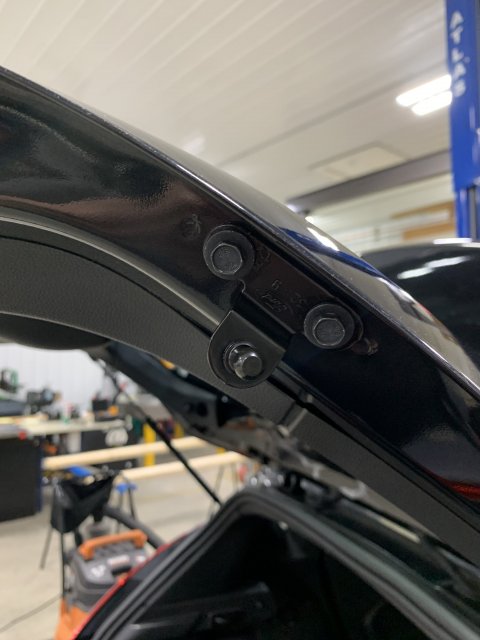
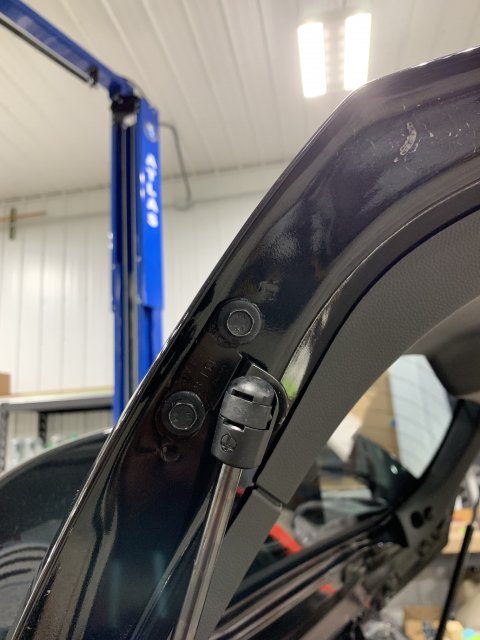
While doing the rear wiper arm bushing, I noticed that the gas struts were starting to lose power. I also noticed that the brackets and bolts were getting rusty. In the same order as the previous post, I got the replacement parts as well.

IMG_9761.jpg
Here is an example of the rust.

IMG_9763.jpg
Both sides were the same.

IMG_9765.jpg
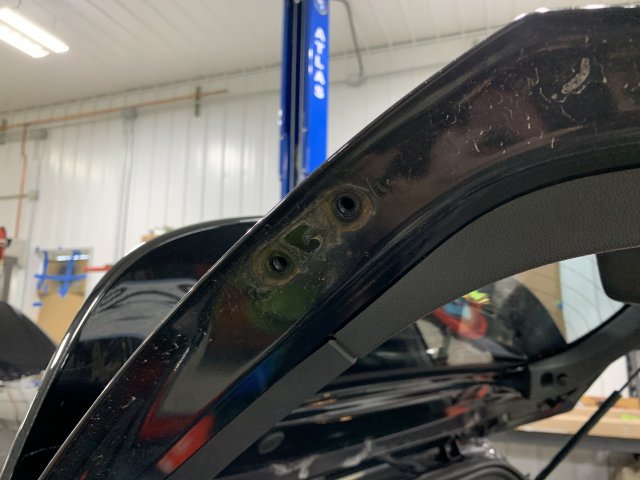
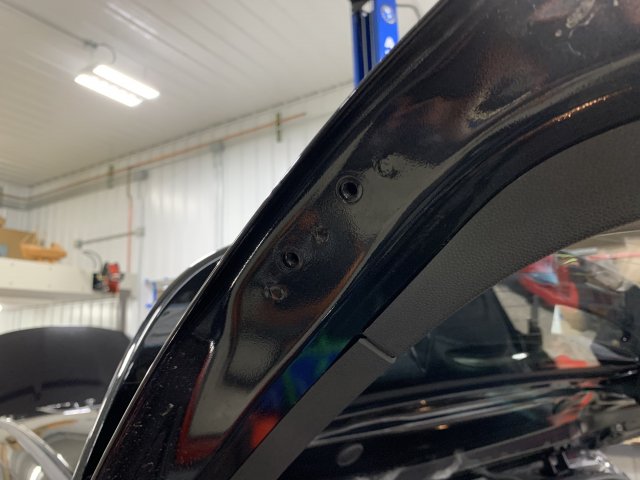
After removing the brackets and the cylinders, there was some leftover rust on the paint.

IMG_9768.jpg
Luckily, after cleaning and some M105 Compound, it was all gone.

IMG_9769.jpg
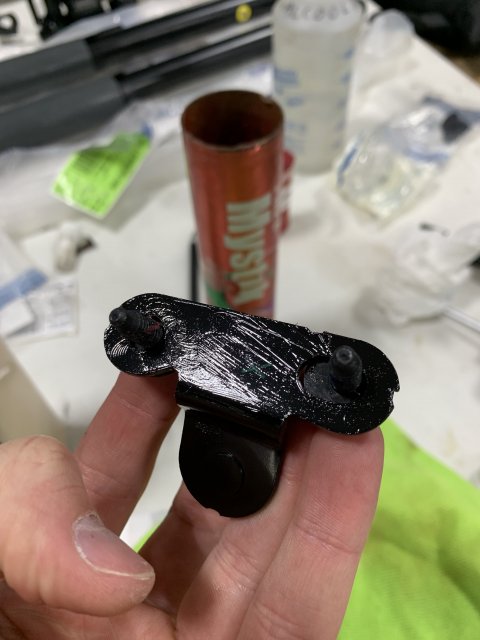
Added a bit of grease on the underside of the bracket to try to prevent future rust. We'll see if it holds up. Side effect was that stuck in place while I installed the bolts, nice!

IMG_9762.jpg
Installed. Also added a bit of grease on the ball of the pivot, but the new cylinders shipped with grease already packed in.

IMG_9770.jpg
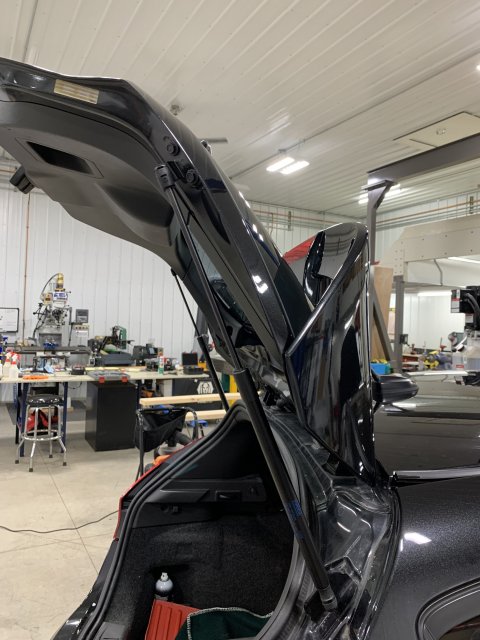
All buttoned up.

IMG_9764.jpg
Final result.

The hatch now opens with authority (lol). I forgot how slow it opened before. The only thing needed now is to order a stubby antenna, because it rubs more than before on the top of the wing!


OP
Volumetrik
Messages
152
Likes
141
Location
Montreal
Thread Starter #13
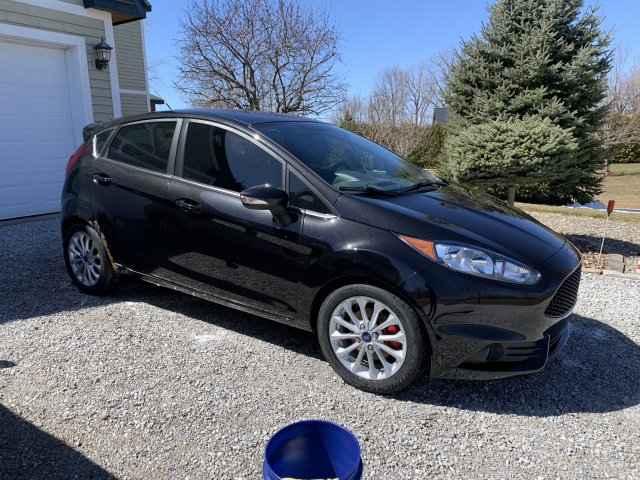
I'm activating summer mode with an interesting setup I have not seen yet.

IMG_9889.jpg
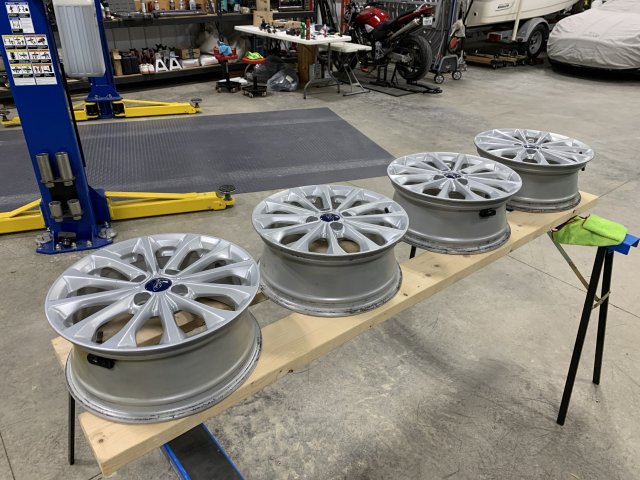
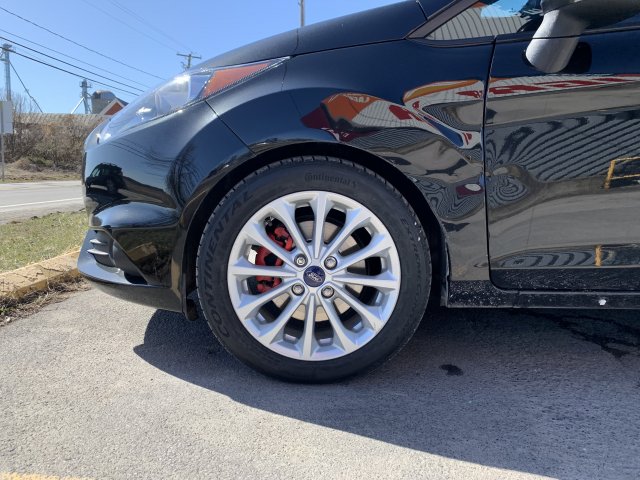
I have picked up a set of OEM wheels from a titanium (I believe) fiesta.


IMG_9890.jpg
I picked up the set with TPMS for 180$CAD. They are not perfect, there is some form of rash preset in all four of them, but overall, they are 7.5/10 I'd say.

IMG_9891.jpg
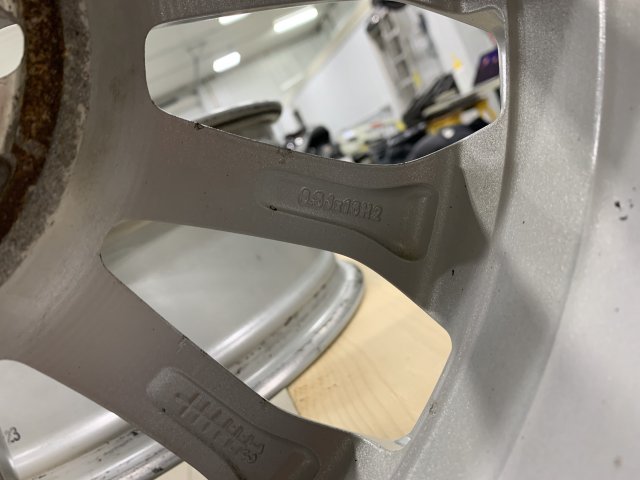
Casting marks. These are 6.5in wide. I know, thinner ! How could I ?

IMG_9892.jpg
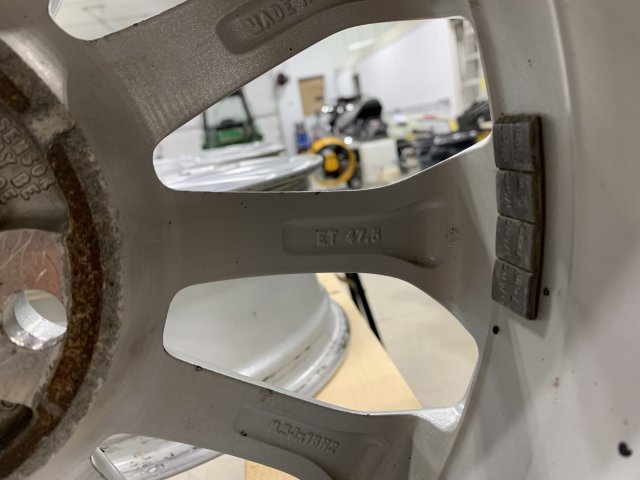
The same offset as ours.

IMG_9893.jpg
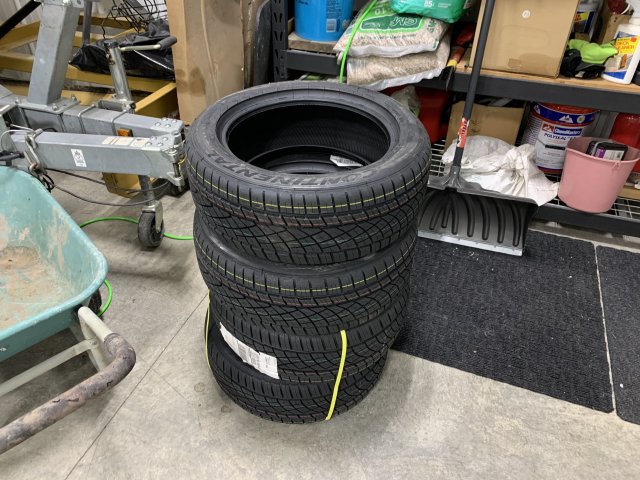
Now for the meat! A set of Continental DWS06+ in 205/50/16. Get ready for some CHUNK action. The specs range from a wheel width of 5.5in to 7.5in. 6.5in sits squarely in the middle.

IMG_9933.jpg
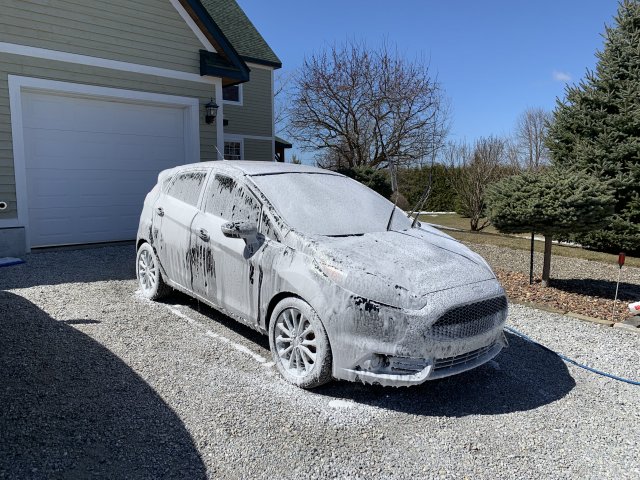
Preview of the washing process. If you have a keen eye, you'll see that the side skirt is missing. More on that in a later post.

IMG_9936.jpg
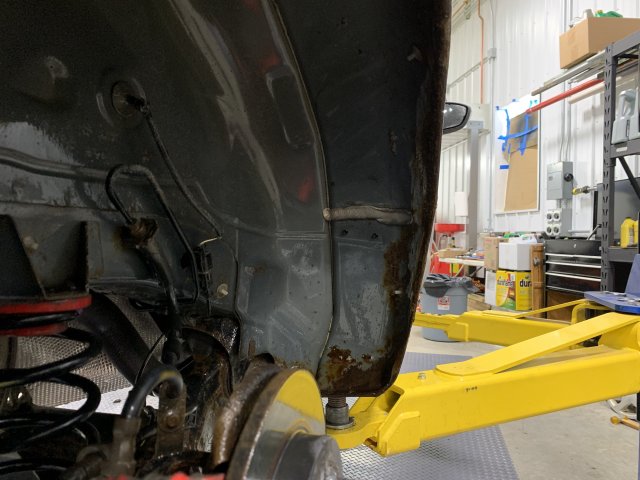
Here is a better look. You'll also see the rust in the rear quarter panel. This is the reason why I removed the skirts, I'm getting the rust fixed soon.

IMG_9940.jpg
Initial feel is very nice. They are not too noisy overall, grip levels are high and I have no issues with the turn in performance.

The sidewall protrudes ever so slightly, so It would be pretty hard to curb the wheels. I'd have to ram the sidewalk pretty hard.

Saw the calculator that @Dialcaliper posted and I have to drop the pressures way down (I had them set up at 39 PSI oem pressures).


M-Sport fan

9000 Post Club
Messages
14,430
Likes
6,985
Location
Princeton, N.J.
#14
Put the car on stands today to pressure wash the undercarriage and the wheel wells. A lot of gunk and road grime was removed.

View attachment 59694
Side view. This is the side where I got hit multiple times. The two doors are pretty rusted at the bottom. I'm trying to get some tuxedo black doors from other cars. We'll see.

View attachment 59695
Passenger side front strut. This is the original strut and looks pretty bad. While doing the front subframe in the summer, I'll convert both front struts with the 2016+ struts. I'll replace all the hardware with new OEM.
It might be a good idea to also either replace that external reinforcement bracket on the front Rallyarmor mounts (or at the very least, strip off the rust and then primer and Plasti-dip them) with a stainless replacement bar, drilled to fit.

I cannot see the raw steel, uncoated, ones (as supplied by RA) as lasting too long up there, given just how bad your subframe/axles/whole underside of the unibody looks. [:(]


M-Sport fan

9000 Post Club
Messages
14,430
Likes
6,985
Location
Princeton, N.J.
#15
I am most likely going to end up with those very same tires on my as yet unused, black satin Dekagrams as a '2.5 season' (all except warm summer) daily driver setup.
They will be 'stancer stretched' though on an 8" wide wheel. [histerical]
Which yes, will make them MUCH more prone to curbing, so I guess I am going to be parking a half mile away at the supermarket to not have to park next to any ridiculously high curbs, or road tank drivers throwing their doors open onto my poor little rally car.

I already have a 17x8 pure summer setup (or will get another if I sell those), and a 15x7 pure winter/rally working setup IF there are ever any more rallies to work on within 1000 miles of here! [mad]


OP
Volumetrik
Messages
152
Likes
141
Location
Montreal
Thread Starter #16
It might be a good idea to also either replace that external reinforcement bracket on the front Rallyarmor mounts (or at the very least, strip off the rust and then primer and Plasti-dip them) with a stainless replacement bar, drilled to fit.

I cannot see the raw steel, uncoated, ones (as supplied by RA) as lasting too long up there, given just how bad your subframe/axles/whole underside of the unibody looks. [:(]
You're a clairvoyant, I have a post on this for you exactly on this topic coming up.

The front metal brackets you're alluding to are toast. Disintegrated on one side and deathbed on the other. I cannot understand why Rallyarmor didn't go with a stainless front bracket, it's the one that gets exposed to all the elements (and it's much stiffer, so when you back up in snow, you don't have to go back and unbend the bracket).


OP
Volumetrik
Messages
152
Likes
141
Location
Montreal
Thread Starter #17
I am most likely going to end up with those very same tires on my as yet unused, black satin Dekagrams as a '2.5 season' (all except warm summer) daily driver setup.
They will be 'stancer stretched' though on an 8" wide wheel. [histerical]
Which yes, will make them MUCH more prone to curbing, so I guess I am going to be parking a half mile away at the supermarket to not have to park next to any ridiculously high curbs, or road tank drivers throwing their doors open onto my poor little rally car.

I already have a 17x8 pure summer setup (or will get another if I sell those), and a 15x7 pure winter/rally working setup IF there are ever any more rallies to work on within 1000 miles of here! [mad]
Using your analogy, I have a '3 season' set (the DW06+) shown in my previous post and a set of Vikingcontact 7's on 185/60R15 OEM 15in steelies with the OEM ford wheel covers for the other '1 season' that stretches from November to March here usually. When the weather starts getting regularly over 10c with no new snow forecasted, that's when I switch over.

It's funny, even on the 4th of April here in Montréal, we got a surprise snowstorm within 24hrs. I was glad I still had my winter set on.

I may make a dedicated post on this, but I really liked the performance of the Vikingcontact 7's. On par with the X-Ice 3 & 4 but with better road manners.


OP
Volumetrik
Messages
152
Likes
141
Location
Montreal
Thread Starter #18
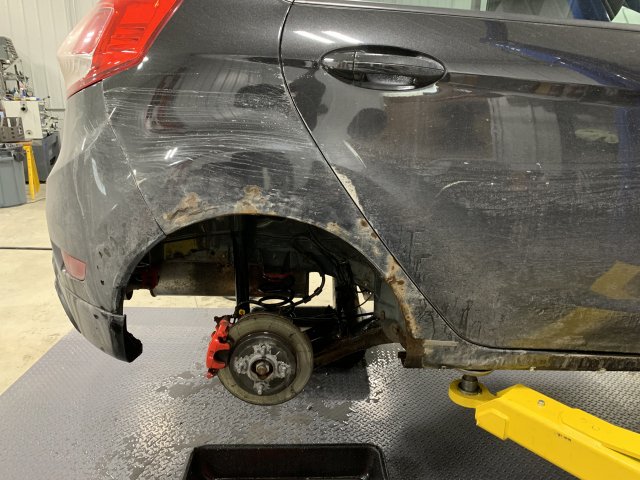
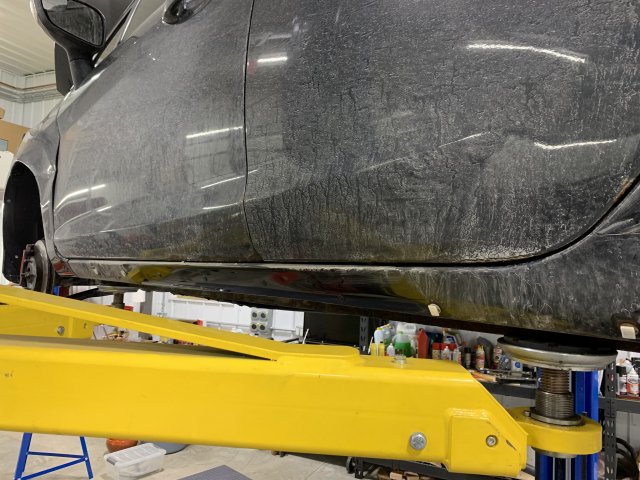
It's no secret my fiesta is pretty rusted. I'm planning to get the rust repaired and a section of the car repainted. To do so, I have decided to remove the sideskirts and examine further. Let's dive in.

IMG_9896.jpg
Starting with the worst section here. Believe it or not, but the rear caliper, pads and rotor are all new parts, less than 6 months old..

IMG_9897.jpg
Sideview of the rust. It's not so bad viewed like this, but there will be metal work needed to cut off, fabricate and replace what is rusted. The other side is also pretty bad, but not showing on the fender yet...

IMG_9898.jpg
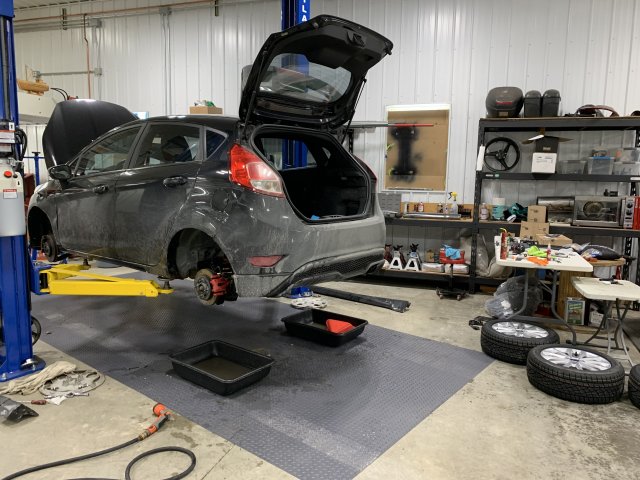
I actually should have pressure washed the care before bringing it on the lift. Next time.

IMG_9899.jpg
Here is the view of the cleanup proces, with the new wheels & tires mentionned in the previous post.

IMG_9918.jpg
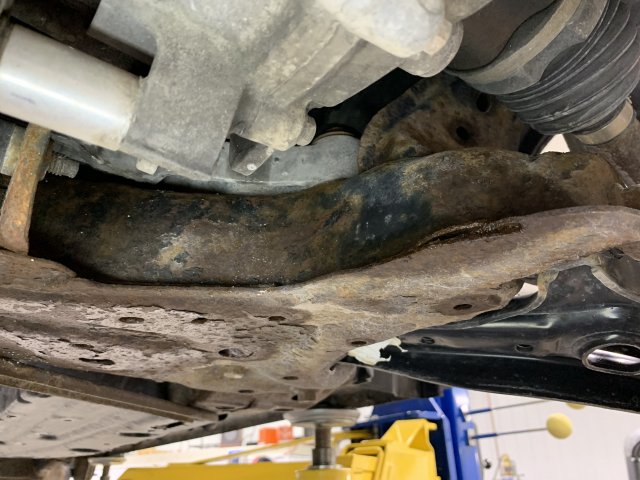
The subframe has gotten worse. I was planning to replace the subframe this summer, but oh well. A new one is on order.

IMG_9919.jpg
It's essentially flaking apart.

IMG_9920.jpg
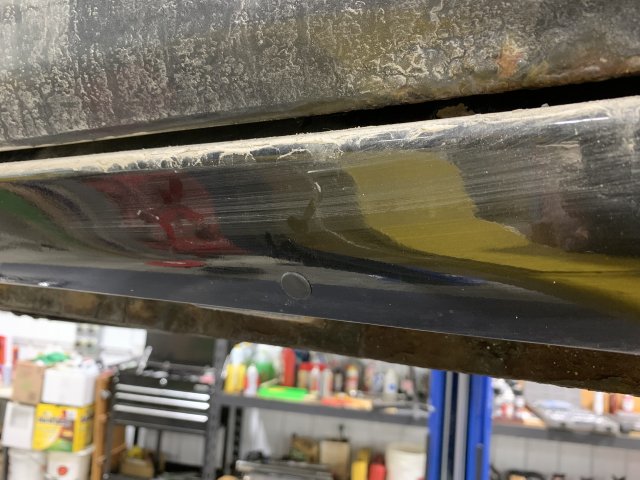
When I removed the sideskirts, a lot of clips were broken. I used a grommet kit to find just the right size ones to plug the holes.

IMG_9921.jpg
Here is an example of the grommets.

IMG_9924.jpg
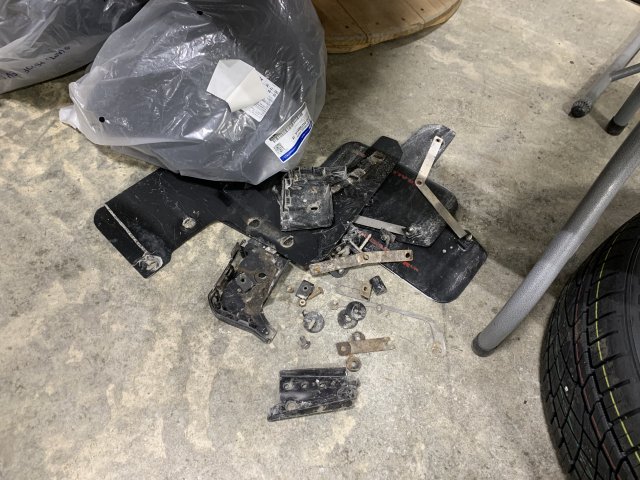
As mentioned before, and I think in the @Dialcaliper thread, the design of these mudflaps could be vastly improved upon.

I'll be making a post on my process after the repair of the fender rust and install of the subframe.


OP
Volumetrik
Messages
152
Likes
141
Location
Montreal
Thread Starter #20
Yeah it's bad! I think this particular design of subframe (stamped steel with folded over edges and spot welded) exacerbates the rust issue. It appears that salty water gets in there and cannot escape, sitting in the folded junctions.

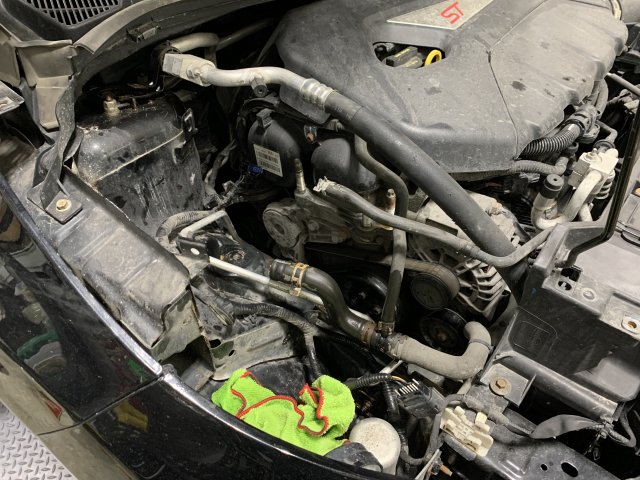
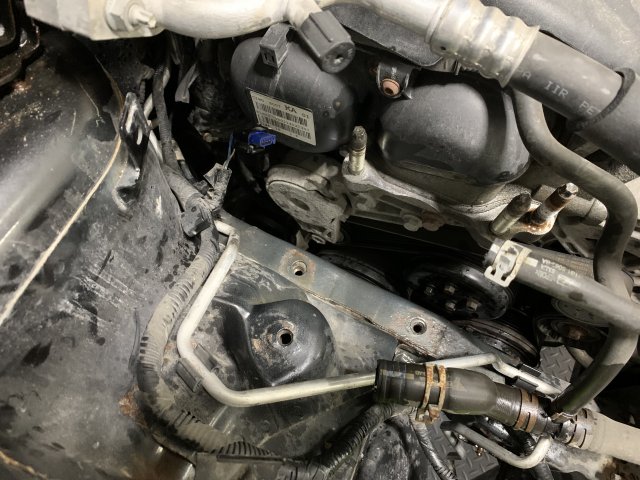
I moved on to replacing the engine mounts because I had pretty bad cabin vibrations with the Vibra-Technics RMM.

IMG_9900.jpg
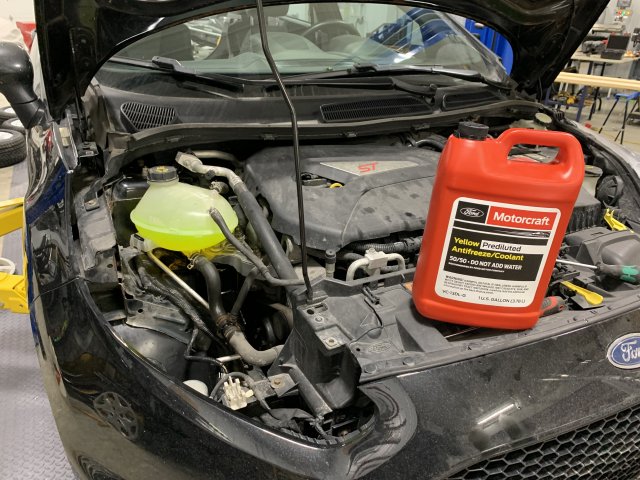
I think a good step is to remove the light first and then empty the coolant reservoir with a syringe. I emptied the tank with the light still on and to do it again, I would just remove the light straight away.

IMG_9901.jpg
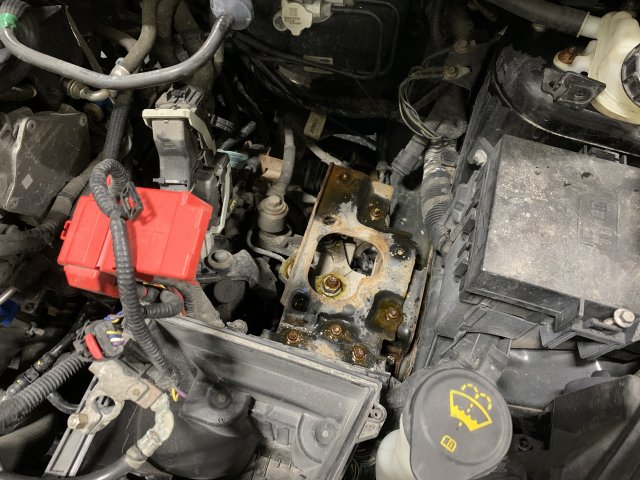
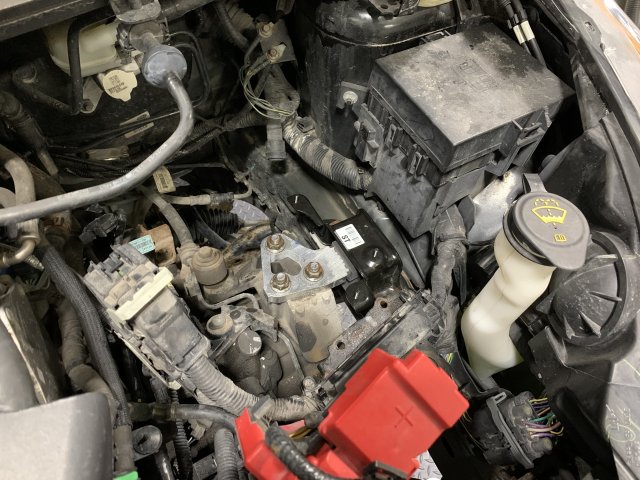
The passenger side removed. No structural rust (thank god).

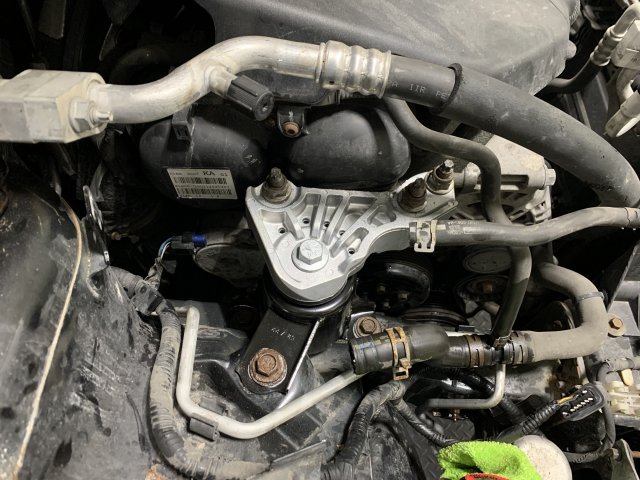
IMG_9902.jpg
New one in. I completely forgot to order new bolts. If I revisit this area, I'll change them. The washer was frozen with the bolt for the big main bolt under the coolant reservoir.

IMG_9903.jpg
Re-install the reservoir and fill with the new coolant. The old mount was pretty worn, much, much less control than the new one. It was not loose, but pretty close to it. I think these should be changed every 100k kms to be honest. I would consider these wear items.

IMG_9905.jpg
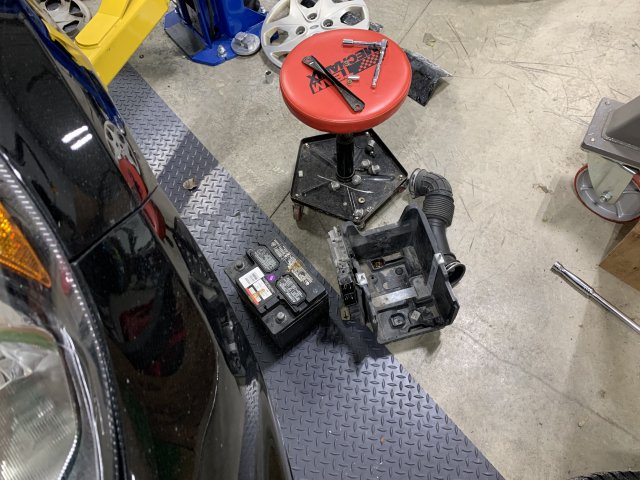
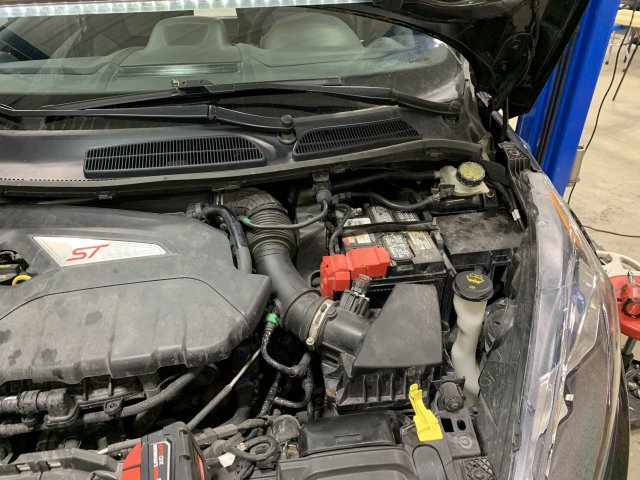
Next up, driver's side. Battery and tray are out.

IMG_9904.jpg
I always coat every possible bolt with penetrating oil before starting to undo them.

IMG_9906.jpg
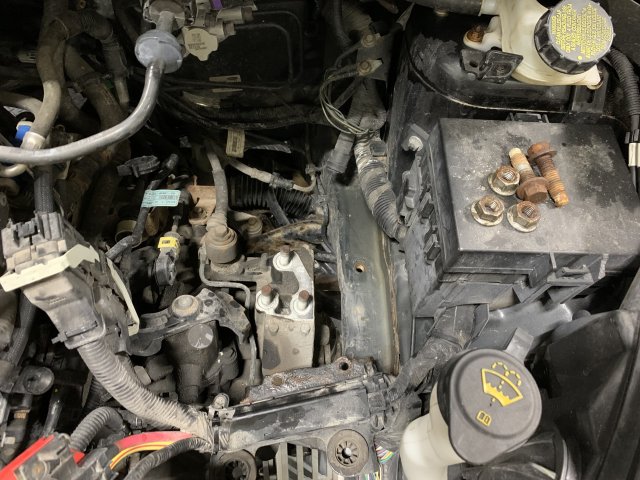
With a bit of fiddling later, the mount was out. (I was supporting the engine on the underside while doing this).

IMG_9908.jpg
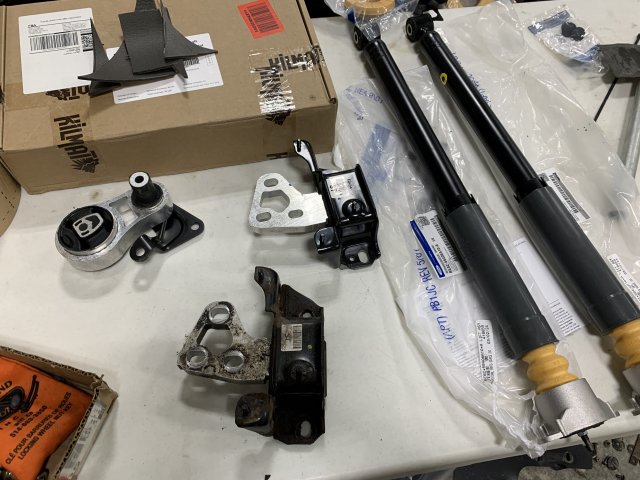
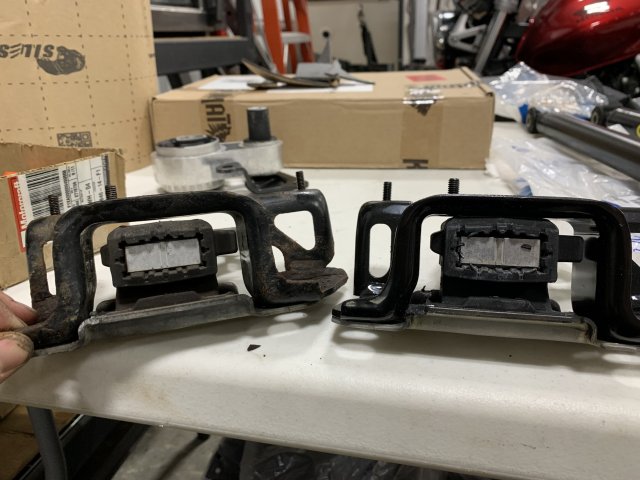
Here is a side by side.

IMG_9910.jpg
You can see the difference in the height of the rubber. I'm wondering if this is due to wear or if there was a design change? However, the part numbers were the same. This is a pretty flagrant image and should convice alot of people to do this.

IMG_9907.jpg
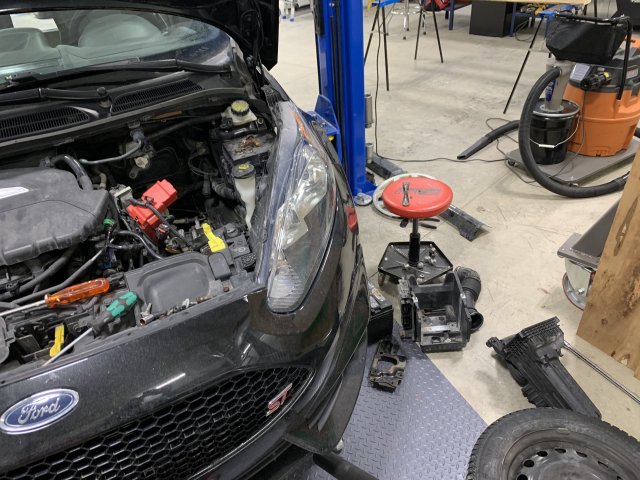
Here's an overview of what needs to come out in order to access this. It's actually not that bad. I was expecting worse. The only irritating part was fiddling with the battery tray and disconnecting the modules and cables.

IMG_9911.jpg
Back in.

IMG_9913.jpg
All buttoned up.

Now the question is, did it fix the vibrations?

No. (sigh)

I'm unsure if I'm just sensitive to vibrations or the rotting subframe is somehow enhancing the engine vibrations. Either ways, when I'll install the new subframe, I'll install the OEM RMM and see if I just forgot what normal engine vibrations feel like. I have a distinct feeling that the COBB RMM was even less vibrations than the Vibra-technics. We'll see!


Similar threads


Top