-
Sign Up! To view all forums and unlock additional cool features
Welcome to the #1 Fiesta ST Forum and Fiesta ST community dedicated to Fiesta ST owners and enthusiasts. Register for an account, it's free and it's easy, so don't hesitate to join the Fiesta ST Forum today!
180F Ford Motorcraft Thermostat now available
- Thread starter koozy
- Start date
Here's your sign.....
https://www.fordpartsgiant.com/parts/ford-thermostat-asy_bm5z-8575-a.html

Sent from my SM-N950U1 using Tapatalk
https://www.fordpartsgiant.com/parts/ford-thermostat-asy_bm5z-8575-a.html

Sent from my SM-N950U1 using Tapatalk
Last edited:
Thread Starter
#25
Thread Starter
#25
Finally got around to installing the 180 Motorcraft Thermostat. I ran out of time and will have to get back to it hopefully sometime during the weekend. I got through the hardest part, which was just removing the thermostat. Figuring out how to reach and get to things in the tight confines and what tools to use was the challenge. Now that i know how it comes out, going back together should be smooth. I took a bunch of photos as usual, because I like to document my process and procedures for future reference. Here are just a couple that briefly captured the moment.
Once access to the thermostat is available it's not too bad.


Room for activities.


Thermostat housing assembly removed.

Disassembled.

Some visible crud on the thermostat.

The old OE thermostat. I could not locate a stamping on it to indicate what temperature that thermostat was. I was surprised to see that much deposit build up on the thermostat. The ball bearing in the bleeder was no longer able to move as freely as the new thermostat.

Old next to new.

Chasing the gasket surface with fine wet sanding.

Housing ready for the new thermostat and gaskets.

New assembly with 180 thermostat ready to go back on.

I will be doing a chemical coolant flush to help remove any more deposits that may be in the system and especially the water pump.
Once access to the thermostat is available it's not too bad.


Room for activities.


Thermostat housing assembly removed.

Disassembled.

Some visible crud on the thermostat.

The old OE thermostat. I could not locate a stamping on it to indicate what temperature that thermostat was. I was surprised to see that much deposit build up on the thermostat. The ball bearing in the bleeder was no longer able to move as freely as the new thermostat.

Old next to new.

Chasing the gasket surface with fine wet sanding.

Housing ready for the new thermostat and gaskets.

New assembly with 180 thermostat ready to go back on.

I will be doing a chemical coolant flush to help remove any more deposits that may be in the system and especially the water pump.
Last edited:
Thread Starter
#28
Thread Starter
#28
What all did you remove to get to that first pic, where you had access? Some people were removing the front bumper and radiator!!!
Sent from my SM-G950U using Tapatalk
Sent from my SM-G950U using Tapatalk
Thread Starter
#35
Thread Starter
#35
Finished up today. Verdict is that it's easy. Easier than installing a downpipe. Once the alternator comes out it's pretty straight forward. I spent more time wrestling with the OE spring action hose clamps in the tight space with limited area to move. Must have the right size vice grips and hose pliers to get them off and on the thermostat housing.
Tools used to R&R the thermostat.


Tools used to R&R the thermostat.


Thread Starter
#36
Thread Starter
#36
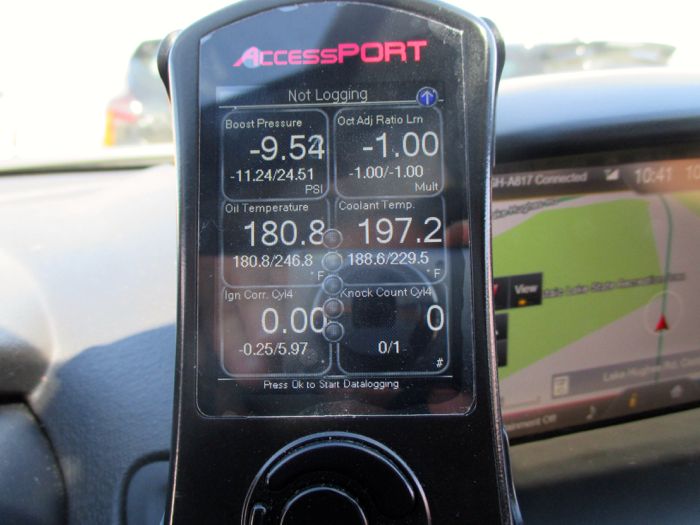
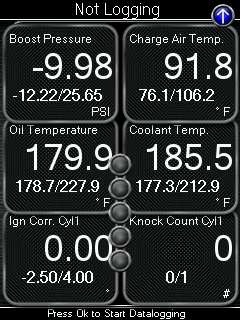
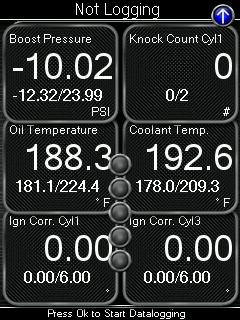
After spending considerable amount of time daily driving on the streets I'm can report that the coolant and oil temps have dropped big time. In 90 deg F ambient temp both oil and coolant hover around 188 deg F. Oil has not gone over 190 and coolant has not gone over 195 when pushed. I expect the numbers to be a little higher in the canyons/track and will update later.
After spending considerable amount of time daily driving on the streets I'm can report that the coolant and oil temps have dropped big time. In 90 deg F ambient temp both oil and coolant hover around 188 deg F. Oil has not gone over 190 and coolant has not gone over 195 when pushed. I expect the numbers to be a little higher in the canyons/track and will update later.
After spending considerable amount of time daily driving on the streets I'm can report that the coolant and oil temps have dropped big time. In 90 deg F ambient temp both oil and coolant hover around 188 deg F. Oil has not gone over 190 and coolant has not gone over 195 when pushed. I expect the numbers to be a little higher in the canyons/track and will update later.
Thread Starter
#40
Thread Starter
#40
That’s interesting, I am seeing similar temps with my mountune radiator and stock 2017 t stat. Do you remember what you were seeing before swapping to the new t stat? I seems that the newer models may have a lower opening temp on the stock part.
Here's my temps lifted from a post in my build thread. https://www.fiestastforum.com/forum/threads/3074-koozy-s-ST?p=181754&viewfull=1#post181754
Stock

Temps during a spirited canyon run with the OE Radiator and Mishimoto Oil Cooler. DHM turbo on E30 tune.

Temps during a spirited canyon run on same road with the Mishimoto Radiator and factory OE oil cooler. Stock turbo self tune Stage 3 91oct.

Last edited:
Similar threads
-
Ford Fiesta MK8.5 ST how to drain coolant
- Started by MPHblackbeautyST
- Replies: 0
-
-
FS Thermal R&D 2014-2019 Ford Fiesta ST - Catback Exhaust (New)
- Started by kazooist
- Replies: 4
-
Help! I have a 2016 Ford Fiesta S/ Which blend door actuator do I need that goes behind climate control knob?
- Started by ScooterGirl
- Replies: 8
-
Ford Motorcraft batteries. 2 choices?
- Started by akiraproject24
- Replies: 9
-
-
Brought a prospective ST into the Ford dealer to get looked at, some minor fun ensued…
- Started by SpeedandPower
- Replies: 25
-
-
-
FS 2016 Ford Fiesta ST - Recaros, 46,360 miles - Sold! please lock this thread
- Started by psiaddict1
- Replies: 6

![Big Grin [biggrin] [biggrin]](/images/smilies/biggrin.gif)