-
Sign Up! To view all forums and unlock additional cool features
Welcome to the #1 Fiesta ST Forum and Fiesta ST community dedicated to Fiesta ST owners and enthusiasts. Register for an account, it's free and it's easy, so don't hesitate to join the Fiesta ST Forum today!
WestcoaST Performance blue build
- Thread starter westcoaST
- Start date
Great job

Gives me more ideas on how to paint mine and a big help on wiring them up!
I am DIY my own setup right now, it is far more work than expected and I have not even thought much about wiring yet so this is very good info!
I am installing 38mm LED DRL in place of the high beam bulb and want dash control over them so have to run wiring there and a switch to interrupt the lead from probably the washer pump fuse(at least I have used that lead successfully on other car projects) so they turn on with the ign switch.
No LED strips on my install.
Thanks for the great info, very much appreciate the time to post all this


Rick
Gives me more ideas on how to paint mine and a big help on wiring them up!
I am DIY my own setup right now, it is far more work than expected and I have not even thought much about wiring yet so this is very good info!
I am installing 38mm LED DRL in place of the high beam bulb and want dash control over them so have to run wiring there and a switch to interrupt the lead from probably the washer pump fuse(at least I have used that lead successfully on other car projects) so they turn on with the ign switch.
No LED strips on my install.
Thanks for the great info, very much appreciate the time to post all this
Rick
Thread Starter
#84
The combination of the HID and the LED high beam is much brighter than I thought it would be. One of the reasons I used SICK HIDS for the retrofit headlamps is the quality of their wiring, including a relay and trigger built in to the drivers side headlamp. All of the wiring has quick release waterproof connectors, and is labeled. I like the switchback turn signals. They start out white, then flash yellow when you hit the turn signal. All bulbs are guaranteed for life, labor for one year.
The combination of the HID and the LED high beam is much brighter than I thought it would be. One of the reasons I used SICK HIDS for the retrofit headlamps is the quality of their wiring, including a relay and trigger built in to the drivers side headlamp. All of the wiring has quick release waterproof connectors, and is labeled. I like the switchback turn signals. They start out white, then flash yellow when you hit the turn signal. All bulbs are guaranteed for life, labor for one year.
Did you ever find out which bulbs and projectors he used for this? Mini H1? Mini d2s 3.0?
Thread Starter
#86
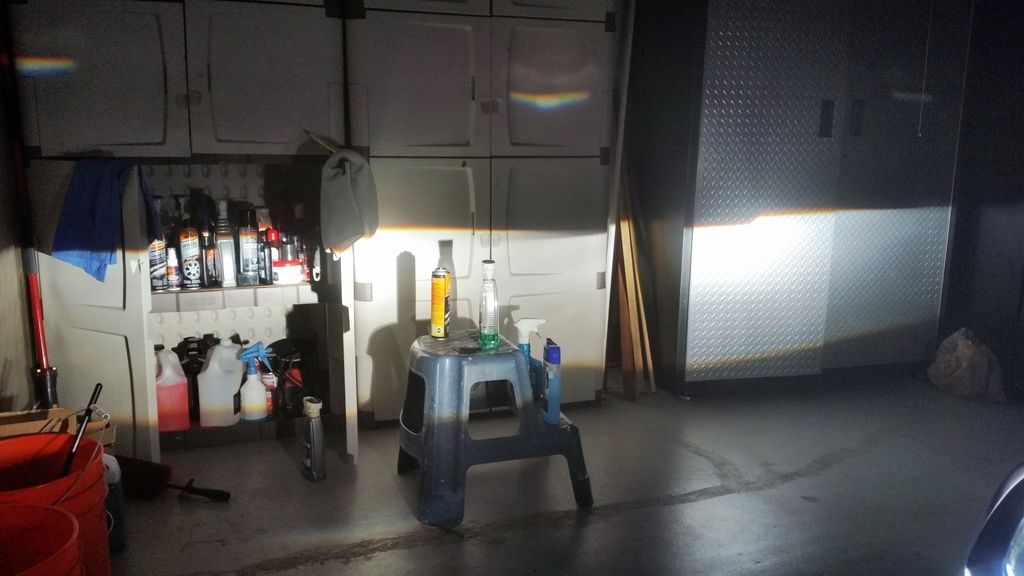
I think this picture was taken with the headlights in place, but not secured. I wanted to make sure that everything worked, but not bolted down. I plan on using my parking space at work to aim my lights, as they are a little low right now. My garage is only 23 feet long, and then slopes off on the driveway. I previously listed the projector we used in my other post, "My Sick HID retrofit, Post 15, heres the quote from my builder.
Currently using 2.5" MX-H1R Bi-Xenon Projectors (factory produced "miniature" version of the FX-R, now available in a 1.75" "micro" version as well) with advanced oval reflector (specifically designed for HID), arched/laser cut cutoff shields (for a perfectly straight/clean cutoff line), precision HD solenoid motors & steep radius crystal clear lenses. *Best performing "Bi-Xenon" (Hi/Lo) Projectors (smaller than 3") by far =)
Bulbs are A/C quartz, 55W, HID ballasts are A/C Digital/Slim/55W. I don't know who's LED or switchbacks were used.
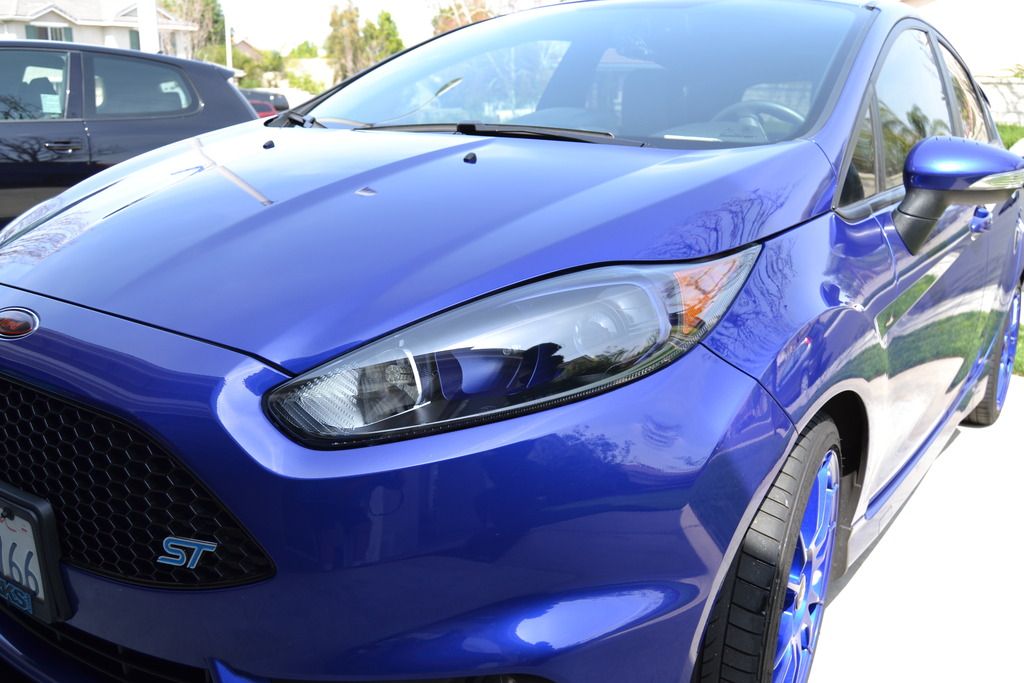

I do know how it will work at much of a distance but the 38mm LED DRL is brighter than I can look at 50 ft away in the daytime so it might be useful at night on high beam as well, it would actually always be on unless I turned off the dash switch which I guess I better consider a relay to turn them off when on low beam incase to bright for oncoming traffic.
The TRS package is very complete and waterproof connectors included as well but I am pretty sure I have to figure out the wiring, which I can do but you made it much easier for me
I have the amber/amber bulbs and the difference is not much though they revised them. I am going to contact TRS where I bought the Mirimoto bulbs to see what they will do about them since they made a change shortly after releasing them and getting complaints.
Switchbacks maybe what I have to go with.
Thanks
I do know how it will work at much of a distance but the 38mm LED DRL is brighter than I can look at 50 ft away in the daytime so it might be useful at night on high beam as well, it would actually always be on unless I turned off the dash switch which I guess I better consider a relay to turn them off when on low beam incase to bright for oncoming traffic.
The TRS package is very complete and waterproof connectors included as well but I am pretty sure I have to figure out the wiring, which I can do but you made it much easier for me
I have the amber/amber bulbs and the difference is not much though they revised them. I am going to contact TRS where I bought the Mirimoto bulbs to see what they will do about them since they made a change shortly after releasing them and getting complaints.
Switchbacks maybe what I have to go with.
Thanks
The TRS package is very complete and waterproof connectors included as well but I am pretty sure I have to figure out the wiring, which I can do but you made it much easier for me
I have the amber/amber bulbs and the difference is not much though they revised them. I am going to contact TRS where I bought the Mirimoto bulbs to see what they will do about them since they made a change shortly after releasing them and getting complaints.
Switchbacks maybe what I have to go with.
Thanks
Thread Starter
#94
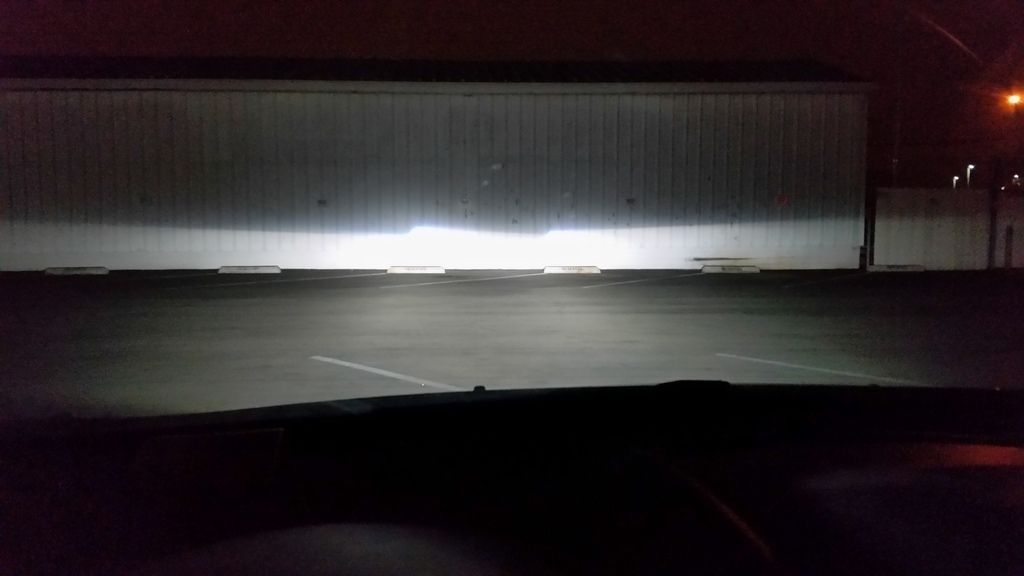
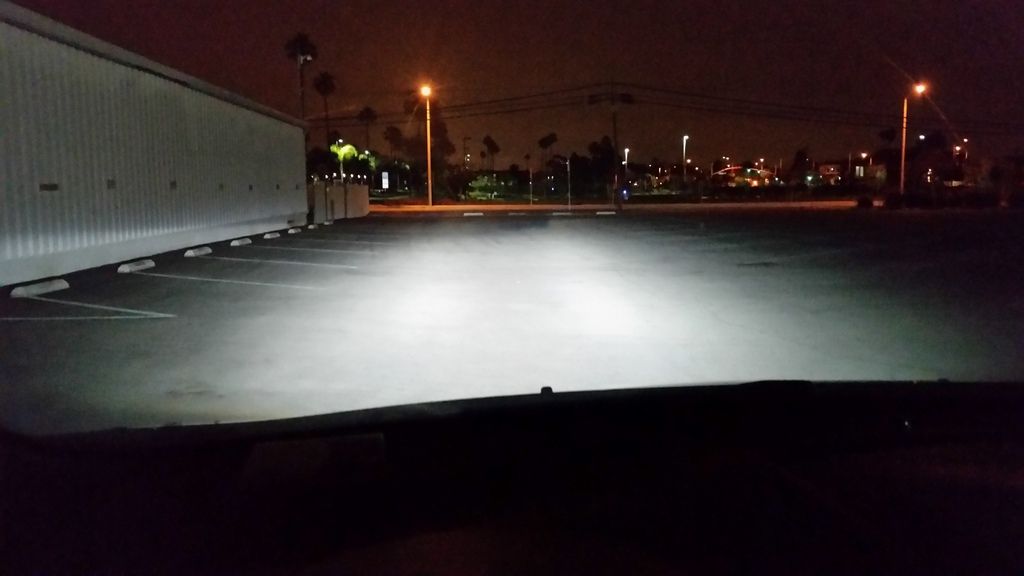
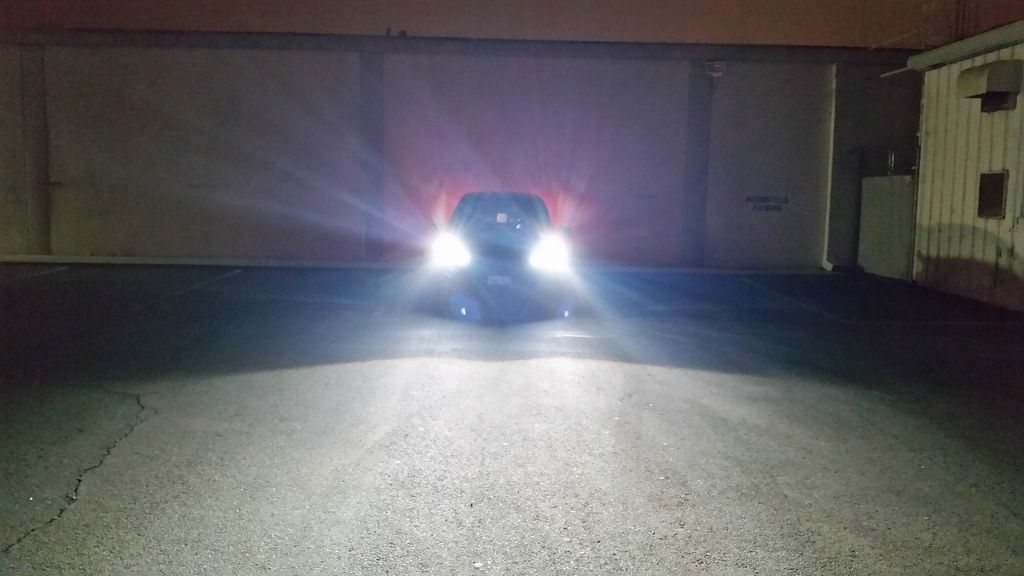
Someone asked for pics of the lights against a wall at 25 feet (distance Ford specifies for adjustment). Here they are. Lights look a little off axis against the wall, but its not noticable on the photo from behind the wheel.
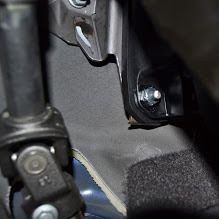
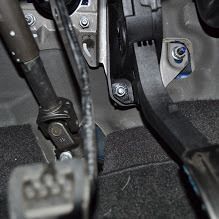
Updates on my build. I'm going to finally get back to installing more parts I have sitting around. I like to install my parts in groups, so I don't have to pull the same stuff several times to get work done. I installed the pedal spacer from No-Pistons last weekend. For $22.00 this finally resolved my seating position gripes. This spacer, in conjunction with the shift lever extension, a round shift knob, and moving the steering wheel all the way out and up, so I could move my seat back to a comfortable position, has made shifting and driving a real pleasure. The pedal install would probably be really easy for a right-handed person. I am a lefty, so I had to do some contortions to get an air wrench and extensions. No-Pistons provides washer nuts, since the OEMs are really one use only, specialty nuts. I decided to use stainless metric captive nuts and torque them to OEM specs with my inch-pound wrench.
Its kind of hard to take a pic (at least for this lefty), so I only have a few I did.
I have all of the raamat and ensolite I need for my next project (Thanks Rick). I also got some closed cell foam with aluminum one side backing from work, and will be using it for my 2J Racing intake mod. I already received the JMR plug extension. After that, the IC and front crash bar from Dead Hook is on the list, followed up by the Wilwood BBK. Somewhere in between this stuff, I will finally install my flex fuel gage in my glovebox. And I'll have to move my OCC to where the Mountune airbox used to sit. I'm thinking of using a 5/8" copper U-bend to change the hose direction into the intake manifold. I want to keep the engine cover, but that may need to go away, based on where these hoses need to go.
I'm still undecided on whose coilovers I'll end up with, most likely BC from 2JR. Maybe Modbargains.


Updates on my build. I'm going to finally get back to installing more parts I have sitting around. I like to install my parts in groups, so I don't have to pull the same stuff several times to get work done. I installed the pedal spacer from No-Pistons last weekend. For $22.00 this finally resolved my seating position gripes. This spacer, in conjunction with the shift lever extension, a round shift knob, and moving the steering wheel all the way out and up, so I could move my seat back to a comfortable position, has made shifting and driving a real pleasure. The pedal install would probably be really easy for a right-handed person. I am a lefty, so I had to do some contortions to get an air wrench and extensions. No-Pistons provides washer nuts, since the OEMs are really one use only, specialty nuts. I decided to use stainless metric captive nuts and torque them to OEM specs with my inch-pound wrench.
Its kind of hard to take a pic (at least for this lefty), so I only have a few I did.


I have all of the raamat and ensolite I need for my next project (Thanks Rick). I also got some closed cell foam with aluminum one side backing from work, and will be using it for my 2J Racing intake mod. I already received the JMR plug extension. After that, the IC and front crash bar from Dead Hook is on the list, followed up by the Wilwood BBK. Somewhere in between this stuff, I will finally install my flex fuel gage in my glovebox. And I'll have to move my OCC to where the Mountune airbox used to sit. I'm thinking of using a 5/8" copper U-bend to change the hose direction into the intake manifold. I want to keep the engine cover, but that may need to go away, based on where these hoses need to go.
I'm still undecided on whose coilovers I'll end up with, most likely BC from 2JR. Maybe Modbargains.
You need the top of the cutoff to be even to give you the distance lighting. When the rotation is off like this you are sending the most intense part of the beam way up in the air or down into the road instead of straight ahead.
I would crack them open and fix this to get the benefit of the upgrade. I can tell you from experience if you don't match the left and right cutoffs you lose so much intensity that when you realign it's like going from 35w to 50w... Huge difference. Because you have both sides rotation off you're losing on both sides and should either send them back, crack them open and realign yourself, or find someone local that can fix for you with the car present.
Perhaps they can be adjusted fairly easily. I am putting in 3" projectors instead of 2.5" which is a huge amount more effort but I just like a challenge and my trick was this.
The projectors I am using and hopefully the ones in your lights have a threaded collar and nut on the back to hold them in place. Loosen the nut and you can hopefully swivel and aim up and down then tighten back up. It might take a few tries as maybe not able to get to them well enough on the car.
To make access easier on mine I replaced the stock rubber plug on the back of the housings sanded out the middle ring so more opening, using a rubber 3" ABS pipe cap with SS hose clamp. Now I have plenty or room with nearly a 3" opening to change bulbs or adjust the projectors.
If yours still have the factory plugs just pop them off and adjust them if they are made with the collar and nut.
Hope this helps,
Rick
Thread Starter
#97
Mine are like yours Rick as there is angular adjustment by loosening the thread. My cover is rubber and it collapses at it hits the overflow tank or the fuse box. My plan is to rotate the HIDS to get rid of the "angry bird look" No need to Crack anything open. I'm installing resistors to fix the hyper flashing of the turn signals, so both will get done this weekend.
Thread Starter
#99
Good to hear you can fix it easily. The difference will be enormous.
Here are mine at ~150ft as an example. If you tried the same right now you would have a very strange pattern and not much light down the road

Here are mine at ~150ft as an example. If you tried the same right now you would have a very strange pattern and not much light down the road


Actually, I really don't see any difference between your photo and mine (reproduced below) except that your road has curbs, and mine is a parking lot, which is much wider than the standard road. Mine actually looks brighter. If you provide me with the width of your road, curb to curb, with a little trig, I can actually determine how far down the road your lights extend. I don't think it is 150 feet, more like 100 if not less. My shot is 100 feet.

No need to compare "brightness" from a photo, I could expose it differently so that it appears brighter or darker (yours is overexposed and the highlights are blown out, loss of detail on the foreground light, sky is "light" etc), but that isn't the purpose of my post. The purpose was to show how an even cutoff should look at any distance, without any separation. The highest intensity from your lights is right along the edge of the cutoff, with the most intense spot right at the "elbow" of each projector. This intensity is what gives you the width and distance. Technically if you were to block all light except for this narrow portion, and with a steady gradual drop from aiming it would be all you need. When both cutoffs are perfectly aligned you are multiplying the usable light and better focusing it down the road, and off to the sides. This is the most important part of the process, and why I was disappointed to see that your retrofitter had not done a proper job. As it sits (and if you can't adjust it well) you only have 1 spot with good convergence, on the passenger side.
The red portions are what you want to ensure are perfectly aligned (I know you love my paint skills

Similar threads
-
How can I setup the ST performance display
- Started by ScaR
- Replies: 1
-
INTRODUCING - The Game Changer in Performance Braking!
- Started by MFactory
- Replies: 10
-
-
Wagner intercooler and TB performance crashbar
- Started by Ganjie
- Replies: 0
-
-
-
SLD $13,500 2014 Performance Blue with Recaros, 69k miles, lightly modded
- Started by Tmnc
- Replies: 3
-
SLD 2015 Performance Blue - 72,XXX, Clean Title $9,000
- Started by MetalMatty
- Replies: 0
-
AY1Z-2001-E Vs AY1Z-2001-D which are the performance pads?
- Started by Stkid93
- Replies: 12
-
