• Sign Up! To view all forums and unlock additional cool features

    Welcome to the #1 Fiesta ST Forum and Fiesta ST community dedicated to Fiesta ST owners and enthusiasts. Register for an account, it's free and it's easy, so don't hesitate to join the Fiesta ST Forum today!


What did you do to your Fiesta ST today ?

Messages
284
Likes
339
Location
Morris, CT, USA
From Yesterday but got busy with reality. Installed the cerakote’d Whoosh crossover pipe, heat shield more like a blanket I fabricated for the airtec manifold, and started the install of the Radium oil catch can on the crank case side, also got the battery box back in. Ordered up some wedge washers and new bolts for the Dpro Camber plates as well. They will need to be slightly modified but should do the job. I should have the correct hose for the catch can coming soon so thats on hold at the moment.


Attachments

Messages
284
Likes
339
Location
Morris, CT, USA

Dialcaliper

Senior Member
Messages
829
Likes
1,362
Location
San Francisco Bay Area
From Yesterday but got busy with reality. Installed the cerakote’d Whoosh crossover pipe, heat shield more like a blanket I fabricated for the airtec manifold, and started the install of the Radium oil catch can on the crank case side, also got the battery box back in. Ordered up some wedge washers and new bolts for the Dpro Camber plates as well. They will need to be slightly modified but should do the job. I should have the correct hose for the catch can coming soon so thats on hold at the moment.
Nice battery tie-down! Where’d it come from?


Messages
284
Likes
339
Location
Morris, CT, USA
Thanks I may have made it at work while I had some down time. I do cnc machining for a living. Heres some better porn of it.
Nice battery tie-down! Where’d it come from?


Attachments

Last edited:
Messages
424
Likes
713
Location
Ontario, CA, USA
Cleaning out my intake valves as I posted on another threadI was having intermittent misfires at idle that were starting to become constant. Maybe this was the culprit 68k miles and been running a dammond catch can since 2020. I did switch to the revised mishimoto a little over a year ago. IMG_2087.jpeg IMG_2090.jpeg IMG_2088.jpeg


Last edited:
Messages
424
Likes
713
Location
Ontario, CA, USA
Which thread? Im curious what you’re cleaning this with. I may do the same while I have the manifold very accessible to take off at the moment.
My mistake I posted a thread about having misfires at idle. But I just closed the valves and sprayed carb cleaner in there. Let it soak then use some picks to break down the carbon. I don’t have compressed air so I used a piece of microfiber cloth and I used the pick to get in there. Did a decent job. Here are some after pictures. So far it’s at operating temperature and not misfiring. Idle is a bit smoother too. IMG_2098.jpeg IMG_2094.jpeg IMG_2103.jpeg IMG_2104.jpeg


Messages
284
Likes
339
Location
Morris, CT, USA
My mistake I posted a thread about having misfires at idle. But I just closed the valves and sprayed carb cleaner in there. Let it soak then use some picks to break down the carbon. I don’t have compressed air so I used a piece of microfiber cloth and I used the pick to get in there. Did a decent job. Here are some after pictures. So far it’s at operating temperature and not misfiring. Idle is a bit smoother too. View attachment 58764 View attachment 58765 View attachment 58766 View attachment 58767
Thank you for the info and great job looks great now.


Messages
284
Likes
339
Location
Morris, CT, USA
I may have found a little downtime at work to make a spacer quick for a pro alloy coolant reservoir. Im having an issue with fitment of that with the Radium OCC but if I mount the reservoir ever so slightly different and use a spacer while slotting out the stock mount (the mount closest to the front of the car/radiator) it should swing everything just out of the way of interference with the connecting lines. Guess will find out later if I can get on the car. Anyone else run into this issue?


Attachments

Messages
112
Likes
94
Location
Portland, OR, USA
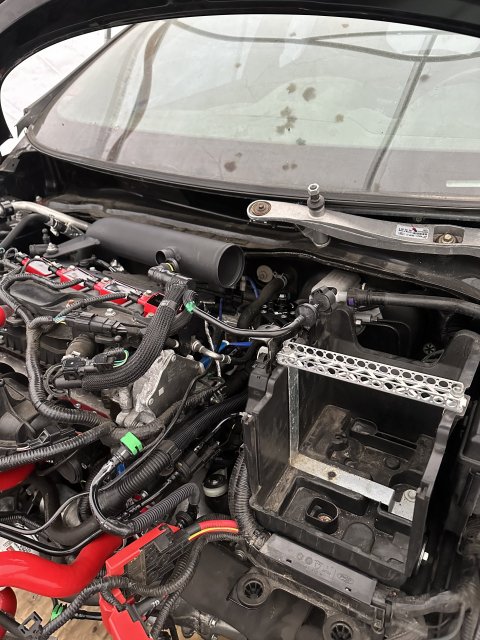
It was finally time to say goodbye to my stock radiator. Replaced it with my Koyorad that's been sitting in the garage for months. Didn't end up needing to take the bumper off, though I got it off before I found the video showing how to do it from below. Generally it was pretty easy, though a couple fins got crushed trying to get the shroud in there and some are lightly bent from the AC line rubbing as it went up but... overall, nothing I see that should cause problems. For anyone else who might see this while looking like I was, the radiator swap/removal/install video I followed is this one:
View: https://www.youtube.com/watch?v=iS89u1D3_OM
. I wouldn't bother taking the front off if you don't need to, but it is an option.

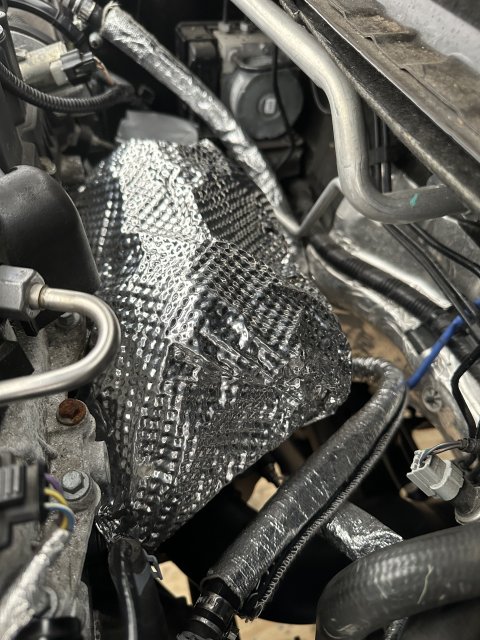
I also figured out why it was so noisy after a pull while tuning and it turns out I blew the exhaust clamp off just after the brace. Oops. Fixed that and now it's too quiet for my tastes! I spent all this money on a Thermal just to decide I like it being basically straight piped more. The lack of drone is nice, but the last couple weeks I've been driving it didn't bother me for the most part, so I may look into getting a piece of 3" T304 that has the same route as the Thermal resonator piece so I can swap between them as I get sick of either. I really didn't think I'd like a straight piped Fiesta, but after the S280 and 3" catted downpipe, the note is deep enough to sound nice and not quite as high pitched. Project for another day though


Messages
424
Likes
713
Location
Ontario, CA, USA
Great job on the install! Any chance you can tell me how you routed through the firewall? I ran my power the same place I run my 4g amp wire and I'm getting distortion. I need to Reroute but not sure where, thanks for any insight!
I used the symposer tubing, The actual symposer tubing in the engine bay is attached to a fitting where the main harness goes through the firewall. I removed the battery to get more access to it. I also removed the fitting to make fishing the wires easier. Once I did that I got like 4 long zip ties and zipped them together and using some electrical tape I taped the wire for the gauge to the zip ties and pushed it though. I tried fishing it without the zip ties and the wiring got stuck and wouldn’t budge. Once I saw the zip ties under the steering column I just pulled the zip ties and the wiring through


Last edited:

KXNGABE85

Member
U.S. Coast Guard Veteran
Messages
31
Likes
64
Location
Florida
I used the symposer tubing, The actual symposer tubing in the engine bay is attached to a fitting where the main harness goes through the firewall. I removed the battery to get more access to it. I also removed the fitting to make fishing the wires easier. Once I did that I got like 4 long zip ties and zipped them together and using some electrical tape I taped the wire for the gauge to the zip ties and pushed it though. I tried fishing it without the zip ties and the wiring got stuck and wouldn’t budge. Once I saw the zip ties under the steering column I just pulled the zip ties and the wiring through
Perfect! Thanks man I actually tried the symposer tube but I got stuck. I'll go with the zip ties and I'll take out the battery as well. Thank you for the response.


Ford ST

2000 Post Club
Messages
2,925
Likes
3,064
Location
Pleasant Garden
Well not today but in the last week. Oil and filter change,transmission fluid change the fluid still looked really good with 15,000 miles on it, and boy did I forget how much of a mess it can make when it shoots out the drain plug. The transmission does shifts a little better but I will probably wait till at least 30,000 miles next time. Also did the cabin air filter looked pretty decent for having 3 years on it, but I do keep it on recirculate most of the time. Also ran a bottle of Red line fuel system cleaner from full to empty before I did the oil change. 20231027_130826.jpg


Top