• Sign Up! To view all forums and unlock additional cool features

    Welcome to the #1 Fiesta ST Forum and Fiesta ST community dedicated to Fiesta ST owners and enthusiasts. Register for an account, it's free and it's easy, so don't hesitate to join the Fiesta ST Forum today!


Feisty the "Family Car"

OP
Dialcaliper

Dialcaliper

Senior Member
Messages
872
Likes
1,441
Location
San Francisco Bay Area
Thread Starter #21
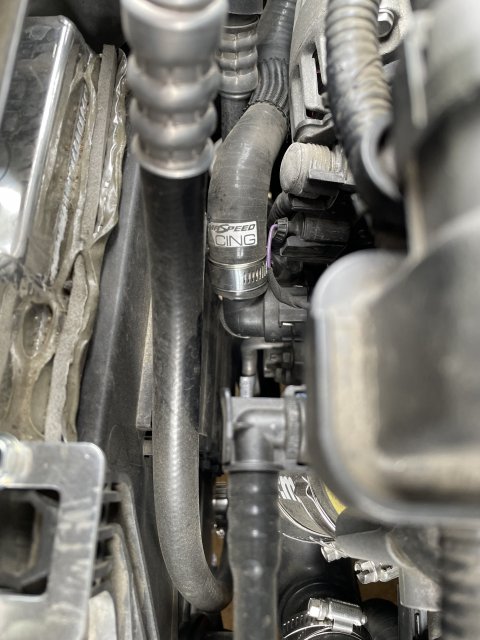
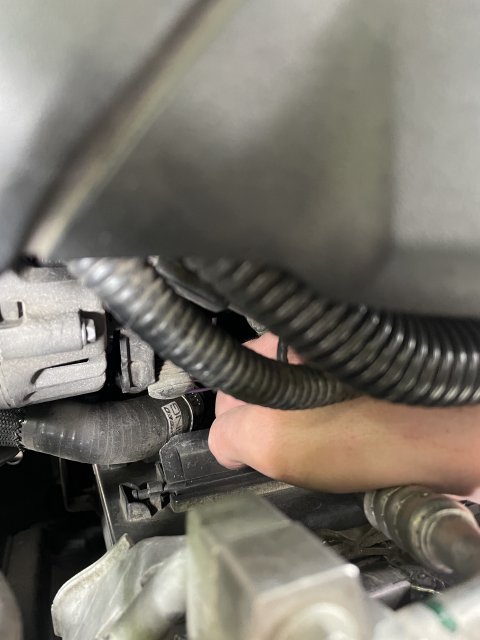
I know tons of people, especially here, run the Mountune rad, but something I noticed is the top most fan shroud flap was making contact with one of my coolant hoses, the one that comes from the bottom position on the expansion tank. It would get pushed into it by driving (incoming air) then stuck in that position and it managed to wear that hose a bit before I noticed it. I pulled the flap off and trimmed the corner to prevent the contact. Except then, even though it was easy to remove and replace, I must not have replaced it correctly because it fell off and is now gone :rolleyes:. Just something to look out for.
I noticed the contact as well, but haven't had any issues yet - I also made sure that the nylon braided sleeving that is supposed to be in that area was in the correct position to protect the hose - its possible some cars don't have it, it slipped out of place or fell off


Messages
492
Likes
550
Location
Camden, NJ, USA
#22
I noticed the contact as well, but haven't had any issues yet - I also made sure that the nylon braided sleeving that is supposed to be in that area was in the correct position to protect the hose - its possible some cars don't have it, it slipped out of place or fell off
*feverishly writes down notes while staring at BNIB mountune radiator waiting for install*


OP
Dialcaliper

Dialcaliper

Senior Member
Messages
872
Likes
1,441
Location
San Francisco Bay Area
Thread Starter #23
I know tons of people, especially here, run the Mountune rad, but something I noticed is the top most fan shroud flap was making contact with one of my coolant hoses, the one that comes from the bottom position on the expansion tank. It would get pushed into it by driving (incoming air) then stuck in that position and it managed to wear that hose a bit before I noticed it. I pulled the flap off and trimmed the corner to prevent the contact. Except then, even though it was easy to remove and replace, I must not have replaced it correctly because it fell off and is now gone :rolleyes:. Just something to look out for.
Dang, your note made me walk out and look. I was apparently thinking of the lower flap, which is up against the sandwich oil cooler line, has the braided sleeve.

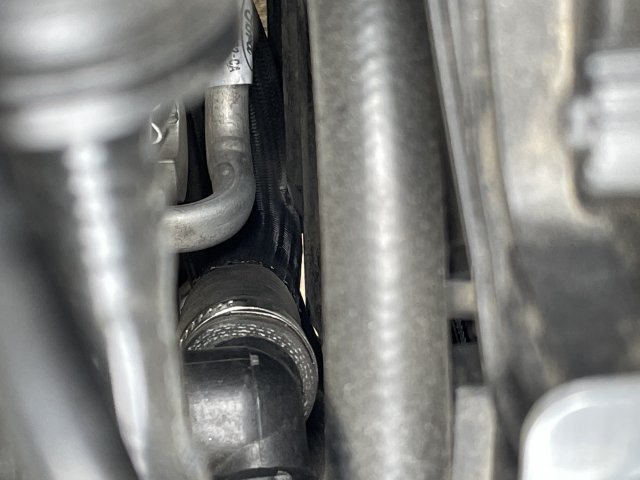
But in looking at it, I’m seeing the signs of contact on the upper flap - there’s slightly more interference because the silicone Pumaspeed hose is a little larger in OD than the original rubber line. Attached some pics but it’s hard to see and I didn’t get a good angle. I’ll have to find a way to trim the upper flap like you mentioned I guess - thanks for the heads up.


Attachments

Messages
436
Likes
409
Location
Simi Valley, CA, USA
#24
Dang, your note made me walk out and look. I was apparently thinking of the lower flap, which is up against the sandwich oil cooler line, has the braided sleeve.

But in looking at it, I’m seeing the signs of contact on the upper flap - there’s slightly more interference because the silicone Pumaspeed hose is a little larger in OD than the original rubber line. Attached some pics but it’s hard to see and I didn’t get a good angle. I’ll have to find a way to trim the upper flap like you mentioned I guess - thanks for the heads up.
Yeah for sure. And the contact even with all stock hoses takes place because of the thicker core on the Mountune rad, as it pushes the shroud just that little bit closer to the engine, thus, interference.

And I guess the other take away is, be careful when reinstalling the flap and do a better job than me, so it doesn't fall off and go bye bye. As far as I have found in research, we cant buy those flaps individually to replace.


OP
Dialcaliper

Dialcaliper

Senior Member
Messages
872
Likes
1,441
Location
San Francisco Bay Area
Thread Starter #25
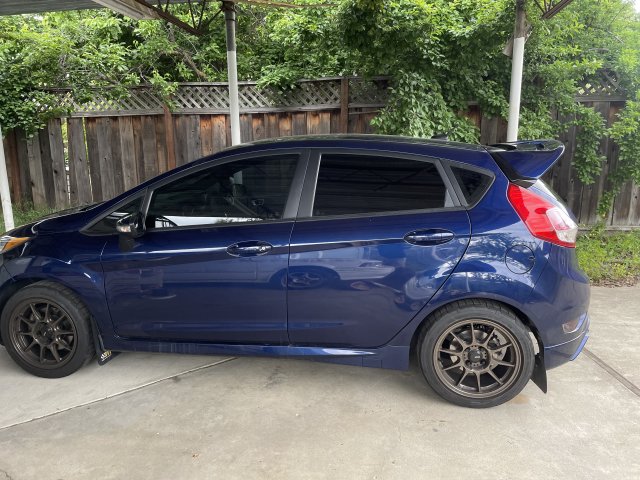
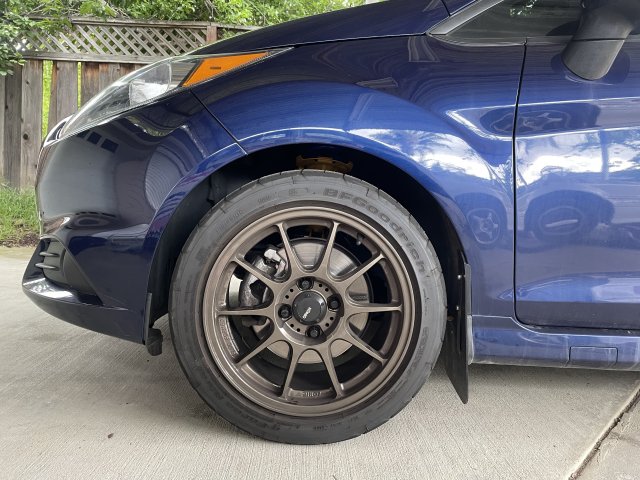
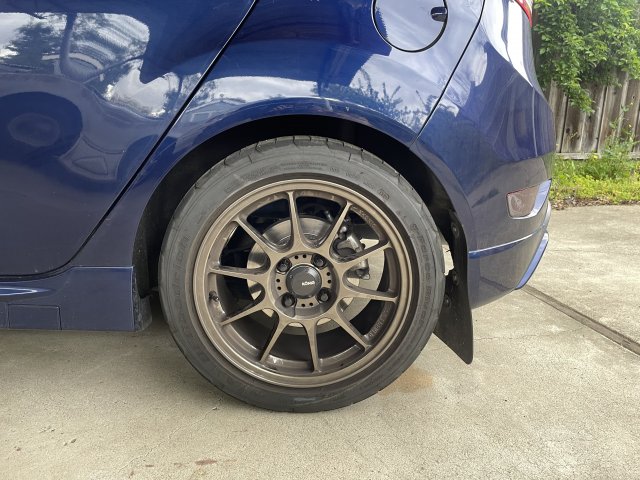
“Feisty earns his mudflaps”

It’s time for a suspension update that I hope you all will like! (This is going to be a long one)

I have also made a separate post on it here for more technical discussion and questions, without the long story and also included a parts list there.

Custom Rally Springs for Stock/B6 suspension!

https://www.fiestastforum.com/threa...ce-springs-for-oem-b6-style-suspension.30829/

So while prepping for a recent backpacking trip, which involved driving about 12 miles each way on a very infrequently maintained dirt road, I realized that the stock spring setup combined with the 2-point pierce brace I have installed simply wasn’t going to quite cut it for ground clearance. The road in question wasn’t exactly what you’d call “rally stage” or 4-wheeling terrain, but there were plenty ruts, washboard and washed out sections to make me worried, and it was a bit dicey in the bone stock Honda Fit I was driving then.

The first option I considered was swapping out for some stock fiesta springs, but I really was not happy with the idea of a soft spring setup. With some of the discussion on the forum about offroad mods, stiffer spring options with stock ride height, and ways to make something closer to the Swift spring rates, I decided I wanted something better.

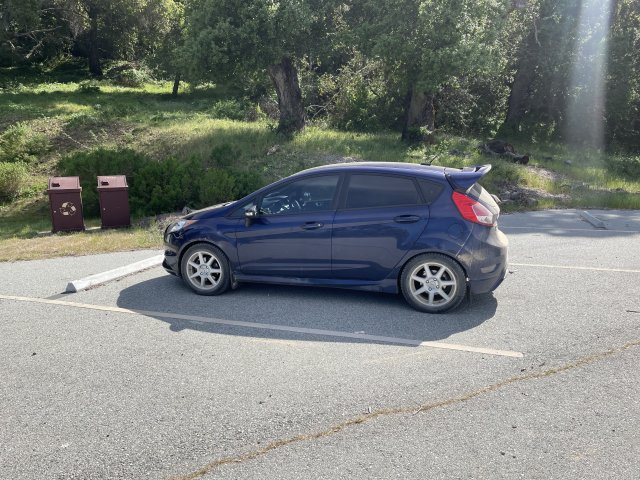
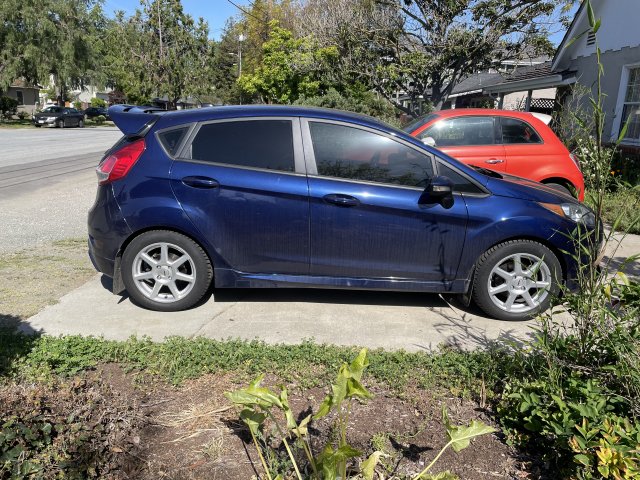
Before you read the nitty gritty details below, the short version is that I came up with a ~$350 spring setup using 225F/200R rates that turned out to sit pretty close to stock ride height. I was shooting for a bit of a "rally" lift to get some extra ground clearance, but you get what you get, and it ended up being enough for this trip (might have been a little sketchy coming out if it hadn't waited to rain until the day after we got home!)

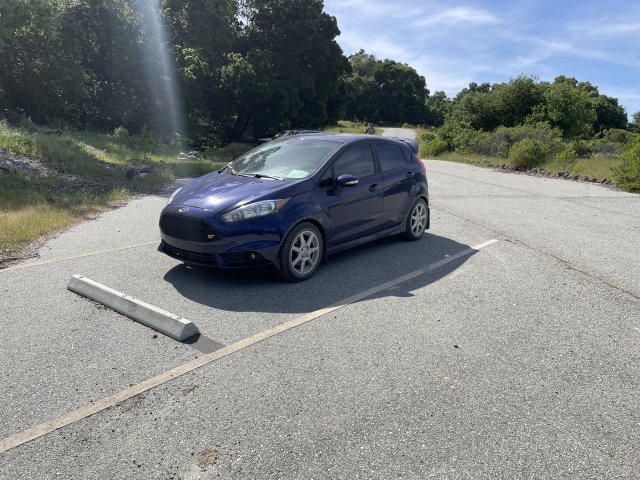
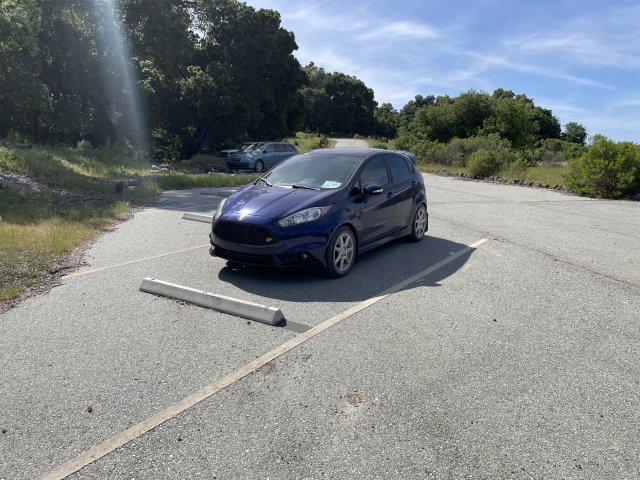
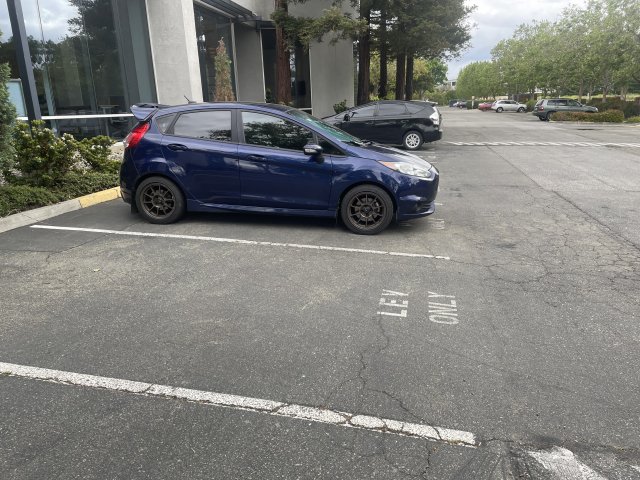
Here are some pics In the left one, there's a load of backpacking gear in the back, the right is unloaded. Note that my snow tires are 1" larger than stock diameter (also for additional ground clearance), so they fill the wheelwells a little more than the stock diameter wheels do.
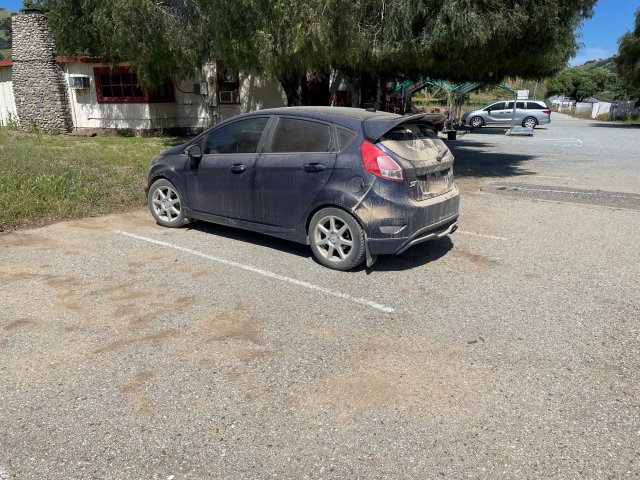
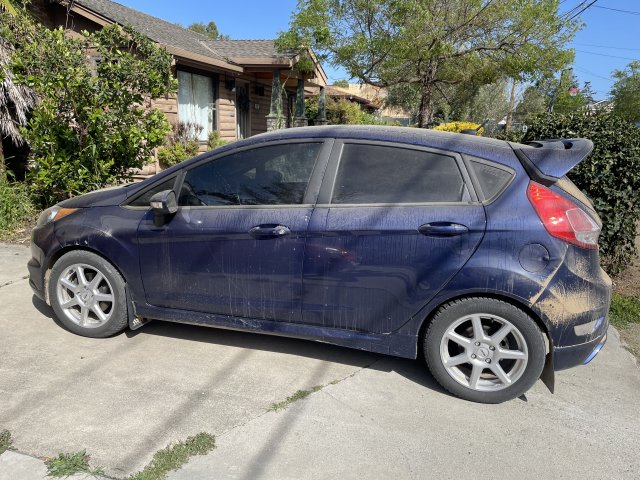
IMG_8600 (2).JPG IMG_8604.JPG

For comparison, here's a snapshot I dug up of the car on mismatched (2014F/2019R) Stock springs. I have a hard time telling the difference in ride height:
IMG_8595.JPG


I’ve been slowly working on a different custom suspension setup which has involved a whole bunch of measurements and a bit of spreadsheet math. In the process, I came to the realization that the FiST’s stock spring pigtails are actually very close to some standard coilover spring sizes, so I embarked on a side project - stiffer springs with stock to lifted ride height!

First, the easy one is spring diameters - as evidenced by the B14 setup and thanks to info from @kevinatfms, the rear springs are basically drop-in for standard 2.5” ID coilover springs. Second, and more interesting, the front spring pigtails and isolators are *almost* exact dropins for 3.0” ID coil springs. While 3.0” is not nearly as common, it is used for some large-body 2.5” diameter off-road shocks (Fox, etc), so there are choices available.

The second problem is that the stock struts (and B6’s) have approximate droop heights (preloaded spring lengths) of ~10.5” Front and ~11.25” rear. (B8’s have a shorter droop height). The problem you run into as you use a stiffer spring than stock is that the correct free length to get the ride height you want is shorter than that droop length, and your springs fall out after the first big bump you go over, trashing your shocks in the process! Your springs need to be a tad longer, with preload to spare. Enter helper springs or helper coils. If you look at like 90% of lowering springs in existence, in order to stiffen the spring and/or drop the ride height, the main spring’s free length needs to be even shorter, so they need to build in soft helper coils to keep the spring preloaded. (Which is why it's very hard to tell progressive and linear+helper lowering springs apart just visually).

The main problem you then run into with a coilover spring setup is that top of the line helper springs and standard coilover springs together will break the bank. My first attempt to price them out with common higher end Swift/Eibach/Hyperco springs and helpers came in at a ridiculous $800, which is a no go on top of the cost of B6’s when you can look at decent coilovers for that price ($1400-$1600). So I scrounged and searched a bit harder into lesser known and off-brand deals. The final version, using brand new components comes in at a fairly reasonable ~$350. If you can find used components or generic brand fleabay specials, you can do it even cheaper.

After using some simple spring rate and height stackup math, I determined that 10” long coilover springs front/rear combined with helpers would get me in the ballpark for ride height. (ended up just using some mild spacers in the front, since the tight wound coil springs fit tighter than the looser large diameter stock coils). My target was between 0.25” and 0.5” lift from stock. Basically base Fiesta height in the front, and halfway between ST and Base in the rear, but with stiffer rates.

The rear springs+helpers are basically drop-in. Its somewhat important to install the soft helpers on the bottom in the rear, but some suspension setups do it the other way around and don’t have problems, so do what you will - helpers on the bottom keeps the spring s perpendicular to the body instead of the unsprung torsion beam that moves around a lot. I zip tied the helpers to the springs partly to make the install easier, partly to give some feel-good vibes in case I calculated the spring heights wrong. This helps accommodate the tilt in the torsion beam at droop and prevents the rear main-spring from going banana shaped and wanting to exit the premises. Note that I currently have stock spring isolators installed. I might swap for urethane if I get around to it.
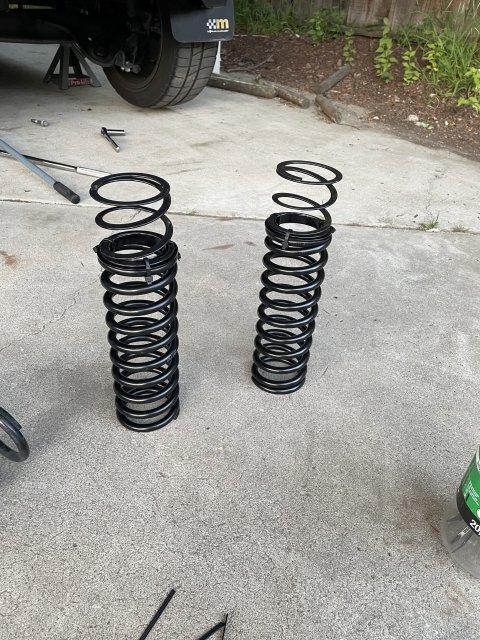
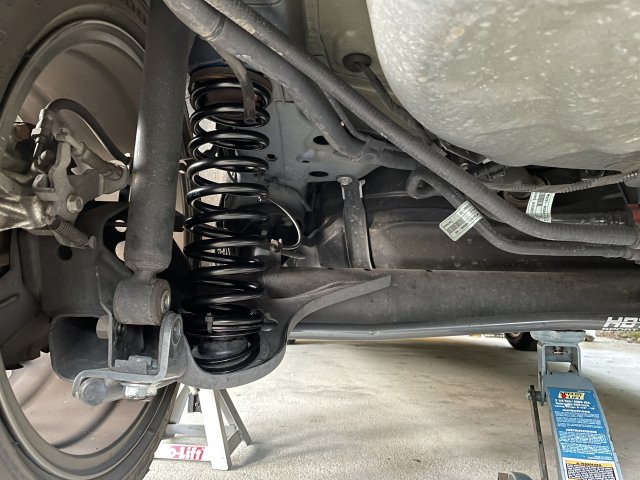
IMG_8593.JPG IMG_8594.JPG


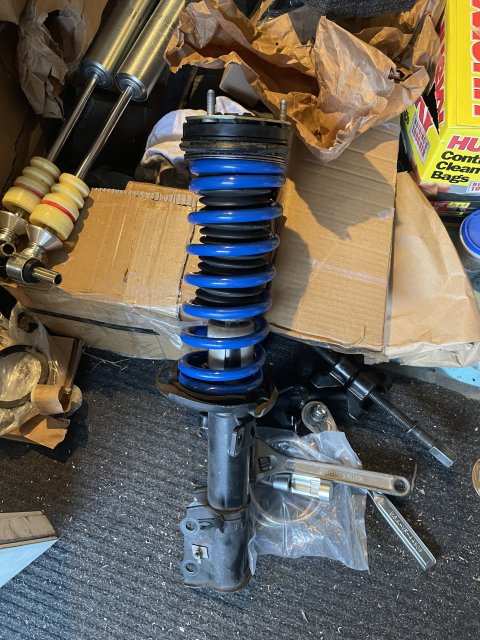
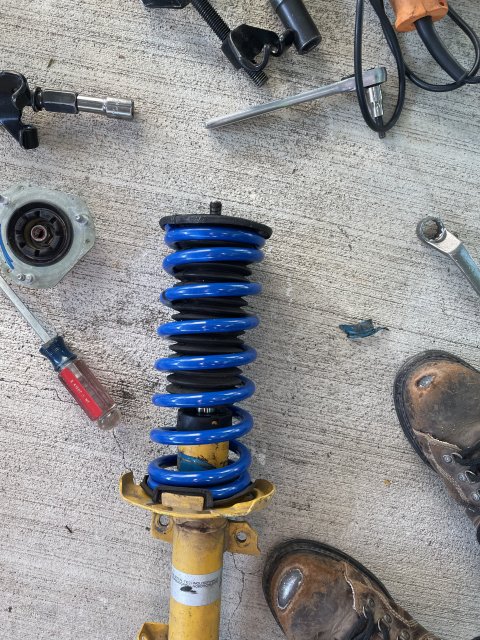
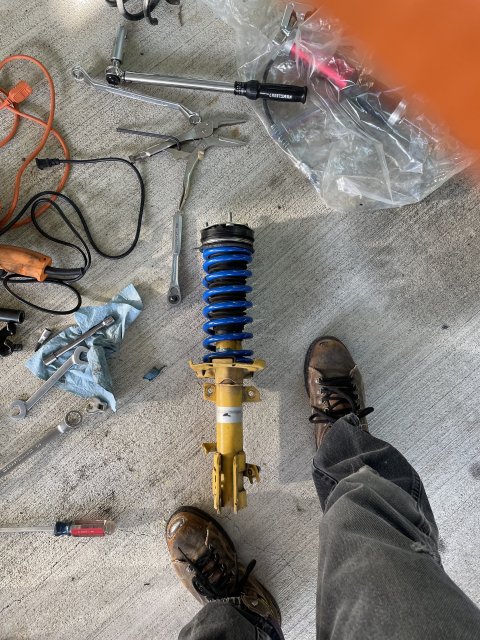
The front springs turned out to require a little more creativity. Good news is that even though the coilover springs are ground flat, the bottom of the spring still fits into the stock coil isolator like a glove. Unfortunately the plastic top bearing is a little on the large side because of the taper. (Its ideally closer to 3.25” ID at the base) The 3.0” ID helpers I bought are too small so I had to come up with something else. The gap turned out to be small enough that you can just use a spacer instead of a helper. It helped to be able to mock them up on the stock struts that are off the car:
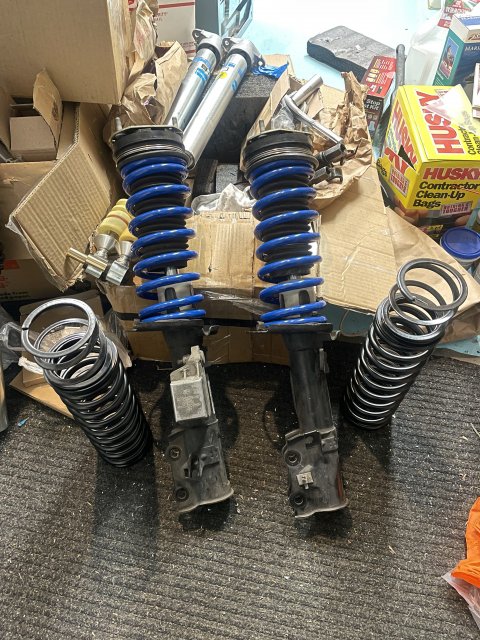
IMG_8583.JPG


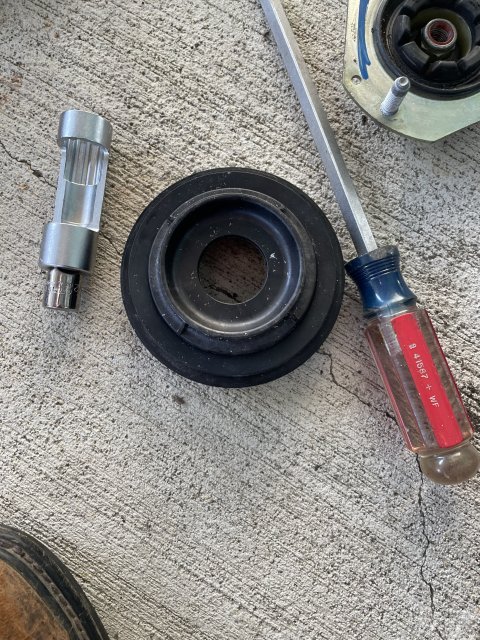
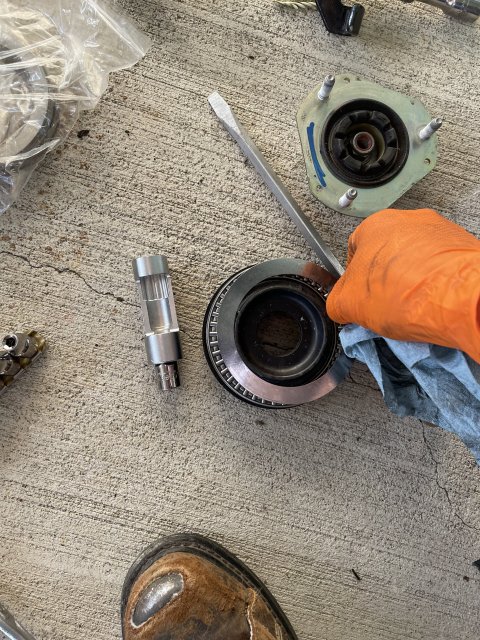
While I could have just machined a custom spacer, I really wanted this to be something anyone could put together. So of course, being in a hurry to prep for my trip, I just ordered some random cheap crap off amazon about the right diameter. The final result that fit in was a cheap roller thrust bearing plus a thick rubber gasket ring from a 3” camlock hose fitting (used in the food industry for piping such wonderful things as honey, beer and other random liquids). The bearing is not really necessary for rotation, it just happens to be a spacer that fits.
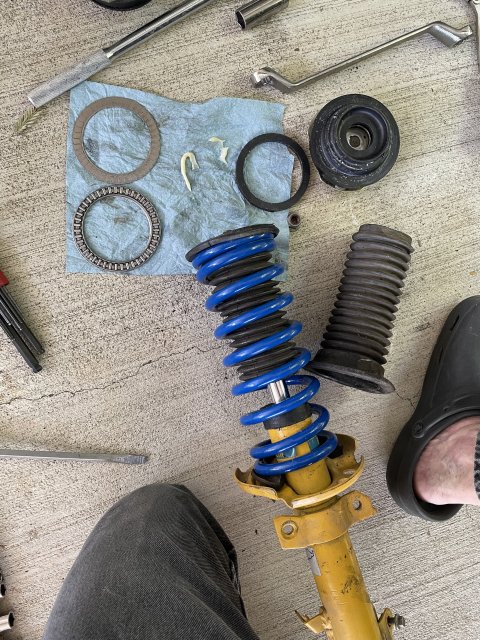
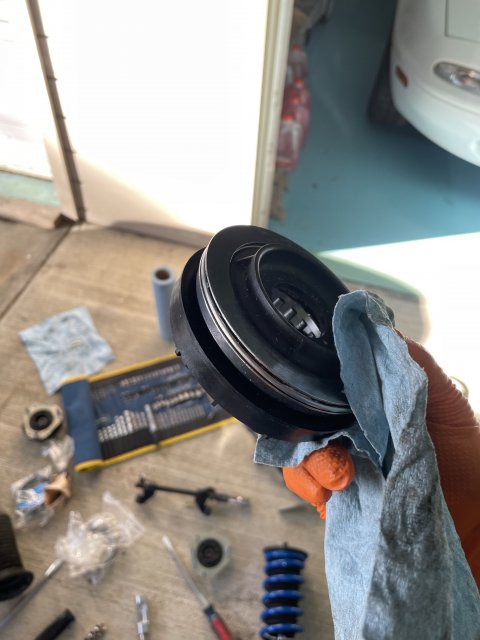
IMG_8584.JPG IMG_8590.JPG


On the rubber gasket it remains to be seen how well it will hold up, or if it will eventually just split. A poly spring isolator with a 3.25” ID would be ideal, but it seems like none of the generic ones fit and none of the application specific ones list dimensions.


Between the two, it spaced off the 10” front spring just enough to seat snugly around the stock isolator/boot, and achieved slightly more than the thread length of the top nut of preload in the spring, which seems to be just enough preload to keep it firmly in place. I’m guessing around 50-60 lbs. Light preload is actually a good thing for an offroad setup - and also ride quality on the road, but first important thing is it works. Bonus points for being able to put the strut together by hand without using the spring compressor required for taking apart the stock struts.
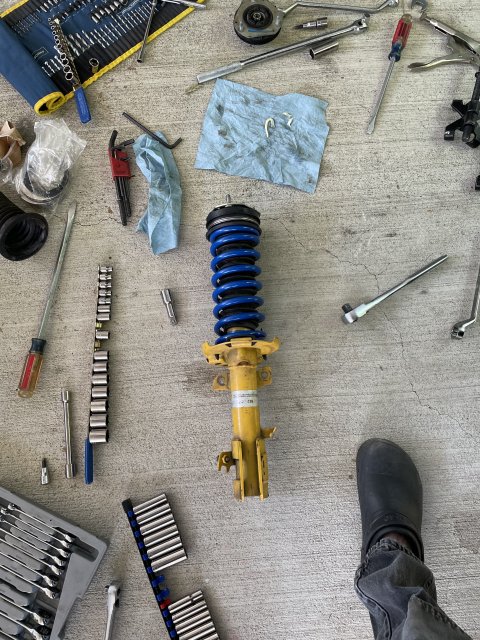
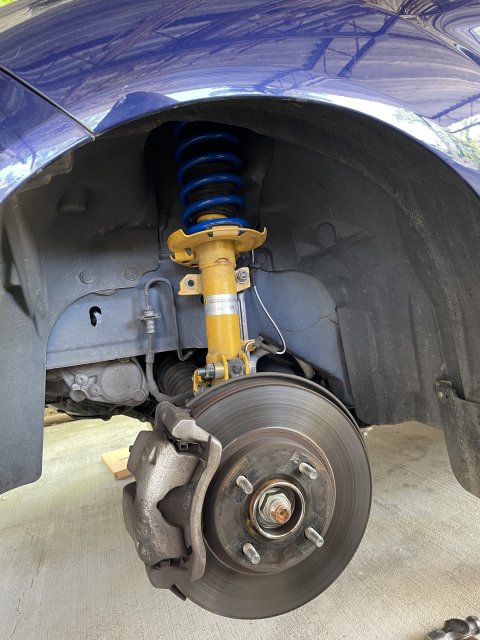
IMG_8585.JPG IMG_8587.JPG


Once the front struts are assembled, simply bolt them in place (using new hardware ideally). I went the sketchy route of sharpie marking the locations of the existing stretch bolts on the head and nut, and reinstalling them as closely as possible to the original locations (after torquing to the factory pre-install spec), mostly because I’m going to remove them again in the next month to test out my future setup. On the top I’ve used H&R Triple-C camber bolts, which are reusable. I eventually want to find a reusable set of Class 12.9 lower strut bolts so I can swap out the struts without throwing away gobs of stretch bolts, as I’m thinking about keeping this setup to run seasonally for the ground clearance.

Initial impressions are extremely positive! So far I’ve only tested on the snow tires, but the ride is fine and not too bouncy (note, I have some used B6’s in the front, but still stock struts in the rear). The car felt much more planted on the soft snow tires than it did with the stock springs, especially in the dirt. Paved and highway driving was actually pleasant. I only tested up to about 25-30mph on the dirt roads (which still actually feels kind of fast when you have to keep an eye for road hazards and sharp rocks/baby’s heads) - it was a special access event on a state park “ranger” road that’s normally closed, so everyone was asked to keep under speed to limit dust and road damage. I’m cool with that being more important than “rally dreams”.

Once I have a chance I’ll swap back to my 200TW street tires and get some additional impressions. Eventually I want to switch to B6’s in the rear, but they’ve been hard to get a hold of, especially used.
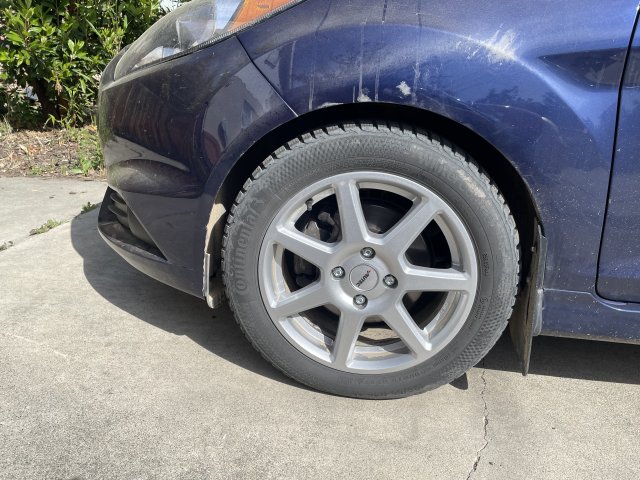
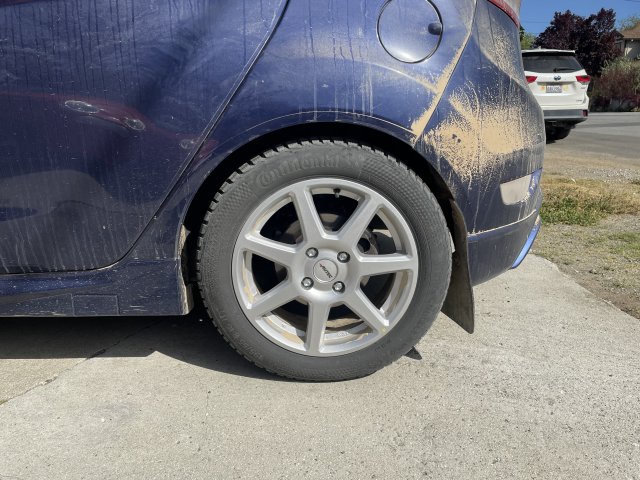
IMG_8605.JPG IMG_8606.JPG

If I find some used B6 rears, I may test out going to stiffer 250/225 rates to raise the car a little more (about 0.3” by the math) and see how it handles, or maybe just put in some taller powerflex spring isolators in the rear and add the helpers back in the front. (If anyone has just the rear B6’s lying around unused and wants to get rid of them, let me know!. I might also consider trading this complete setup, including the springs installed on the front B6 struts in exchange for a full used set of B6 shocks/struts). Who knows.

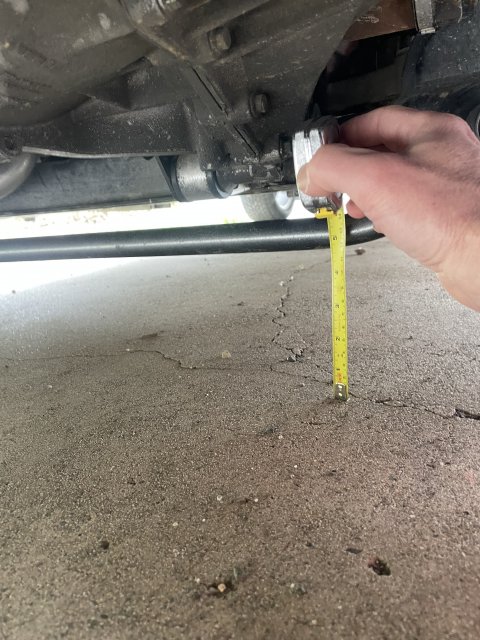
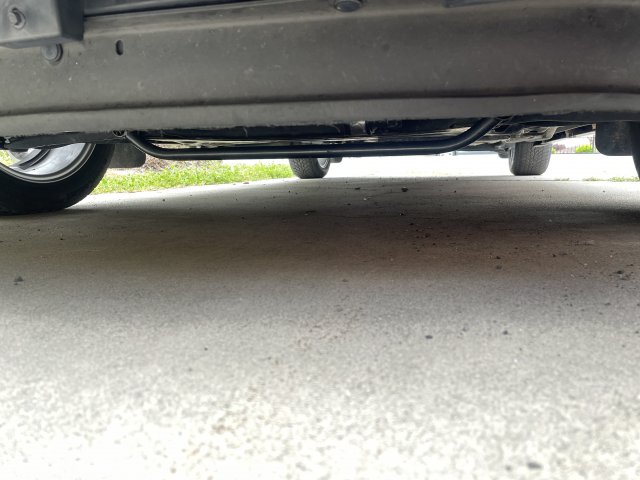
As a note, in the end, I've measured 4.75" of clearance to the bottom of the Pierce 2-point, which will eventually be swapped for a Swave-Summit 4 point and maybe a skidplate.


I also drove by a base model Fiesta the the other day and caught a glimpse of the fender heights, and there’s definitely some serious fender-gap in the rear so there's plenty of room to lift in the rear.

Lastly, a glamor shot my wife took:

_O4A9999 (2).JPG


Attachments

Last edited:

kevinatfms

Senior Member
Messages
889
Likes
940
Location
Germantown
#26
FWIW, Class 10.9 bolts should be more than sufficient for the knuckle bolts.

The OE fasteners are Ford W500742-S442 and are M12x55mm in length. They are listed at $15/bolt.

Just a quick search on Mcmaster which has these which are slightly longer but M12x60 and a flanged head. 10 per pack:
https://www.mcmaster.com/98093A773/

pair with these serrated flange nuts:
https://www.mcmaster.com/90716A104/

Ill keep looking for some that are zinc coated and still Class 10.9 rated or greater but these seem to be the best option right now besides OEM.


OP
Dialcaliper

Dialcaliper

Senior Member
Messages
872
Likes
1,441
Location
San Francisco Bay Area
Thread Starter #27
FWIW, Class 10.9 bolts should be more than sufficient for the knuckle bolts.

The OE fasteners are Ford W500742-S442 and are M12x55mm in length. They are listed at $15/bolt.

Just a quick search on Mcmaster which has these which are slightly longer but M12x60 and a flanged head. 10 per pack:
https://www.mcmaster.com/98093A773/

pair with these serrated flange nuts:
https://www.mcmaster.com/90716A104/

Ill keep looking for some that are zinc coated and still Class 10.9 rated or greater but these seem to be the best option right now besides OEM.
If you look at the factory bolts, they're actually already marked on the head as Class 10.9 (the SFT apparently denotes a company based out of Michigan, not surprising). You could just torque a new, unused set to 84 ft-lb (standard torque for M12x1.75, Class 10.9), but *not* do the factory 120 deg torque to yield and they would be safe to reuse that way, so there's no reason to go out and buy a different 10.9 bolt. What worries me is that Ford decided it was necessary to use a 10.9+torque to yield in that location, and as evidenced by the balljoint pinch bolts, they seem to have cut it pretty close on bolt strength.

So oddly enough, I already *have* located a suitable Class 12.9 zinc flake nut and bolt from a vendor in Australia, but the pricing changes with quantity, so with international shipping, a single set would be pretty damn expensive. The nuts are non-locking so I was planning to use Nord-Lock washers on both sides (which are also reusable).

I got quote for a small quantity, but to make the price reasonable, I'd need to buy at least 5-6 full sets. I'm already very tempted to just order them and sell the extras. If I did that, it would come out about ~$60 shipped for a set of 4 (with nuts and nord-lock washers), which is similar to the list price of the OEM bolts. (The OEMs can be had cheaper than $15 if you look around).

I'd say if at least 2-3 people are definitely interested, I'd just go ahead and buy it and eat the remainder of the cost.


Last edited:
OP
Dialcaliper

Dialcaliper

Senior Member
Messages
872
Likes
1,441
Location
San Francisco Bay Area
Thread Starter #28
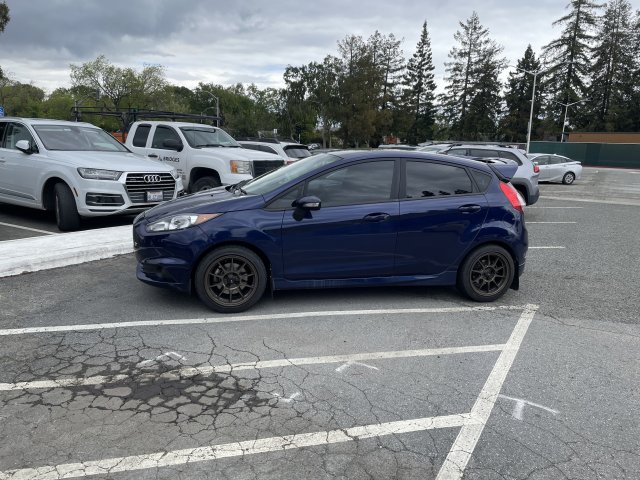
Finally got a chance to swap back to summer tires. I’m pleasantly surprised - the car settles faster over bumps and feels great, and either I’m hallucinating or the ride quality is actually better now that the suspension isn’t ridiculously overdamped.

Ride height is pretty much stock but with stiffer rates.


Attachments

Last edited:
OP
Dialcaliper

Dialcaliper

Senior Member
Messages
872
Likes
1,441
Location
San Francisco Bay Area
Thread Starter #29
Yeah for sure. And the contact even with all stock hoses takes place because of the thicker core on the Mountune rad, as it pushes the shroud just that little bit closer to the engine, thus, interference.

And I guess the other take away is, be careful when reinstalling the flap and do a better job than me, so it doesn't fall off and go bye bye. As far as I have found in research, we cant buy those flaps individually to replace.
I took your suggestion on trimming the flap. I was actually able to sneak a sheet metal nibbler in to trim the corner by just flipping the flap up (without removing it from the fan shroud). Bonus that it now swings and opens freely up instead of stopping at the hose (most of the other flaps are either blocked or restricted in movement)

Cleaned it up with a file and ready to go!


Attachments

Messages
436
Likes
409
Location
Simi Valley, CA, USA
#30
I took your suggestion on trimming the flap. I was actually able to sneak a sheet metal nibbler in to trim the corner by just flipping the flap up (without removing it from the fan shroud). Bonus that it now swings and opens freely up instead of stopping at the hose (most of the other flaps are either blocked or restricted in movement)

Cleaned it up with a file and ready to go!
Nice! Good on ya. Better than me for sure.


OP
Dialcaliper

Dialcaliper

Senior Member
Messages
872
Likes
1,441
Location
San Francisco Bay Area
Thread Starter #31
Just a minor update on the “custom” springs - just finished an 1100 mile road trip down to SoCal (complete with requisite ER visit), and things are holding up. I’m really happy with the ride quality on freeway driving and also some rather rough/potholed roads - definitely less jarring than the stock setup, and also more stable. As far as I can tell, the rubber rings are holding up but I plan to keep an eye on them, and eventually plan to replace the rear upper spring isolators

Unfortunately because of said ER visit, work on the car is going to be on standby for a little while…


FiestaSTdude

1000 Post Club
Premium Account
Messages
1,448
Likes
1,786
Location
Cary, NC
#32
Just a minor update on the “custom” springs - just finished an 1100 mile road trip down to SoCal (complete with requisite ER visit), and things are holding up. I’m really happy with the ride quality on freeway driving and also some rather rough/potholed roads - definitely less jarring than the stock setup, and also more stable. As far as I can tell, the rubber rings are holding up but I plan to keep an eye on them, and eventually plan to replace the rear upper spring isolators

Unfortunately because of said ER visit, work on the car is going to be on standby for a little while…
That's awesome that the suspension is working, not so awesome that you had to go to the ER
Thanks for keeping us updated on these, I'm definitely considering copying them on my Fiesta


M-Sport fan

9000 Post Club
Messages
14,431
Likes
6,988
Location
Princeton, N.J.
#33
The plastic zip ties holding the tender springs to the main rear springs are holding together as well??

Any plans to upgrade that binding method to something much more permanent/durable?


OP
Dialcaliper

Dialcaliper

Senior Member
Messages
872
Likes
1,441
Location
San Francisco Bay Area
Thread Starter #34
The plastic zip ties holding the tender springs to the main rear springs are holding together as well??

Any plans to upgrade that binding method to something much more permanent/durable?
Seems to be holding up, but I’m not too worried even if they do go - I think the zip ties aren’t even strictly necessary as long as you’re using them with the proper spring coupler, I really just put them in for feel-good and ease of installation (installing the stack of 3 pieces on each side is slightly annoying without them) The tenders are nearly bottomed at full droop, and are only there to take up the angle mismatch so the mainspring can remain mostly straight (and not go banana shaped or lift at the back)


OP
Dialcaliper

Dialcaliper

Senior Member
Messages
872
Likes
1,441
Location
San Francisco Bay Area
Thread Starter #35
Tiny update - haven't had a chance to work on the car for a bit for some unexpected medical issues that came up. Custom spring setup seems to still be going strong.

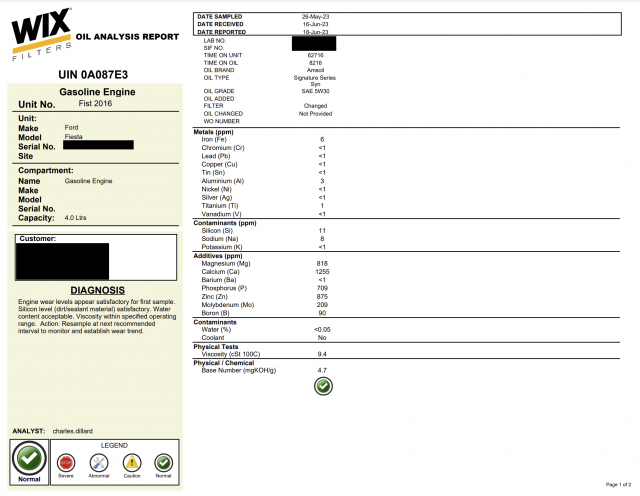
But I sent in a first oil sample to the lab Wix uses for analysis (got the kits cheap) and the results came back looking strikingly good -

~62k miles on the car, and 8200 miles on the oil already - estimate about 60% short commuting (10 miles), 20% road trips and 20% driving the piss out of it in the hills. Still haven't gotten out to a trackday or autocross yet sadly.

I was expecting something more noticable, but wear metals are almost negligible, additive numbers still reasonably high, and base number still 4.7, which if I interpret correctly, means there still quite a bit of life left in the oil. Seems pretty likely I’ll get at least 15k miles out it, maybe more, unless I finally get out to a trackday.

Running Amsoil Signature 5W30 because if you purchase off Amsoil's website and pay $20 for a year subscription, they've got quite the racket set up - quarts are $12 instead of $15.50 so the subscription pays off after 6 quarts, and Amsoil filters are also discounted. I just bought a case (shelf life is like 5 years if you store it somewhere mild). Shipping free over $100. Pretty good deal especially if you plan to run it in more than one car, and/or buy oil for friends as well.


Attachments

Last edited:

M-Sport fan

9000 Post Club
Messages
14,431
Likes
6,988
Location
Princeton, N.J.
#36
I used to be an Amsoil Preferred Customer, and used (mostly) their products, including their oil filters, and Signature Series oils in my Z28, and the first few changes in this car as well.

I switched to the Ravenol DXG 5W-30 to try something new, but they have almost doubled their prices on the 5 liter jug since I last bought it, so I am going to try the LiquiMoly 5W-30 Molygen (the green dyed stuff) next, at less than HALF the co$t of the Ravenol.


OP
Dialcaliper

Dialcaliper

Senior Member
Messages
872
Likes
1,441
Location
San Francisco Bay Area
Thread Starter #37
I used to be an Amsoil Preferred Customer, and used (mostly) their products, including their oil filters, and Signature Series oils in my Z28, and the first few changes in this car as well.

I switched to the Ravenol DXG 5W-30 to try something new, but they have almost doubled their prices on the 5 liter jug since I last bought it, so I am going to try the LiquiMoly 5W-30 Molygen (the green dyed stuff) next, at less than HALF the co$t of the Ravenol.
Hope the Liquimoly works well for you! I figured if I’m going to go through the trouble of using fancy ass oil, I might as well go whole hog and get a few $20 analysis kits to make the best use of it.

The research I've done seems to imply that barring something really weird and not well proven (nano-particles looking at you), from a lubrication standpoint, any oil is as good as it’s viscosity (which gradually gets thinner over time), and anything extra you pay for it is additives and longevity before it turns acidic or loses too much viscosity. If you’re doing 3mo/3000 oil changes, synthetic is a total waste of money, but the additives are there for long life and hard abuse. If I ever manage to get out to a HDPE, I’m curious to do before/after oil sample and see what the result really is.


Last edited:

M-Sport fan

9000 Post Club
Messages
14,431
Likes
6,988
Location
Princeton, N.J.
#38
^^^Yes, besides the great tungsten/'trimer' moly additive pack, the Ravenol DXG does have one of the lowest NOACK scores for any 5W-30 oil out there (the 10W-30 Signature Series is most likely THE lowest in this metric, being in the 4.0s, if memory serves correctly), substantially lower than what LiquiMoly claims for their 5W-30 Molygen.

But it is NOT an extra $50.00 worth lower (to me at least) for the same 5 liter jug. [wink]
All other specs are very close, or similar, between these two oils.


Messages
421
Likes
527
Location
Indianapolis, IN, USA
#39
The research I've done seems to imply that barring something really weird and not well proven (nano-particles looking at you), from a lubrication standpoint, any oil is as good as it’s viscosity (which gradually gets thinner over time), and anything extra you pay for it is additives and longevity before it turns acidic or loses too much viscosity. If you’re doing 3mo/3000 oil changes, synthetic is a total waste of money, but the additives are there for long life and hard abuse. If I ever manage to get out to a HDPE, I’m curious to do before/after oil sample and see what the result really is.
Any thoughts on the additives to reduce the risk of LSPI? Seems like a good idea, hence the new GF6 rating and recommendation (over SN plus).

(Or one could just not floor it at 1200 rpms…)


OP
Dialcaliper

Dialcaliper

Senior Member
Messages
872
Likes
1,441
Location
San Francisco Bay Area
Thread Starter #40
Any thoughts on the additives to reduce the risk of LSPI? Seems like a good idea, hence the new GF6 rating and recommendation (over SN plus).

(Or one could just not floor it at 1200 rpms…)
Definitely a good idea given the possible consequences. Besides low RPM, LSPI seems to be a result of GDI engines having “low octane” oil from the cylinder walls and intake air that can combust prior to either the fuel or spark ignition. LSPI oils are essential oils designed to achieve higher equivalent octane to prevent knock in engines designed around high octane fuel.

As we learned from E30 class effective fuel octane is basically whatever the blend of fuel/oil in the cylinder is, Also made worse with modern turbo/GDI that people cheap out drive around with running 87 octane gas.

A lot of the oil and residual fuel that can cause it is introduced via blow by from the PCV system being fed back into the cylinder along with the air. In that context, running a catch can could potentially provide additional protection.

Or as you say, don’t floor it at low RPM. I usually don’t romp on it anywhere below 3000 RPM because there’s just no point! I think LSPI is a larger problem in cars with automatics as they annoyingly tend to shift into the highest possible gear for fuel economy, and short of using flappy paddles the only way to downshift is to floor it at very low RPM

Not as much a problem in manuals, N/A engines or cars with port injection


Last edited:

Similar threads


Top