• Sign Up! To view all forums and unlock additional cool features

    Welcome to the #1 Fiesta ST Forum and Fiesta ST community dedicated to Fiesta ST owners and enthusiasts. Register for an account, it's free and it's easy, so don't hesitate to join the Fiesta ST Forum today!


Spice under the Knife. ( Now S280 powered!)Dpro’s 2018 Orange Spice STGOKRT official Build! Part two the rebuild coming!

Dpro

6000 Post Club
Messages
6,361
Likes
5,983
Location
Los Feliz (In the City of Angels) aka Los Angeles
#1
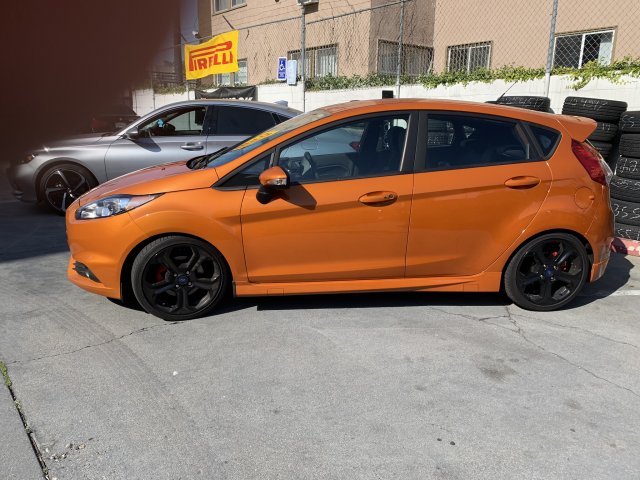
Ok So here she is at the Dealership pickup in July... She is a Factory ordered car with Smoke Storm Recaros . Most Orange Spice Recaro cars get ordered by the dealers with Molten Orange Recaros I hose Smoke Storm as I feel the Molten Orange Recaros do not go well with the Orange Spice. It looks like someone was trying to match the interior to the paint and failed. Lol that is my opinion.


Shortly after taking her home.


So I did star buying stuff and Actually slapped a Thermal RD Exuast within. 1k of ownership courtesy of Ron at Whoosh Motorsports.
As well as a Mountune RMM from the package be,ow. No I do not have pics of those installs but will and have pics of installs going forward.

I also picked up a Mountune FB3 package on a Labor Day sale. It included a Cobb Accesport with tunes from Mountune, a Mountune Intake, Mountune Intercooler and Mountune RMM.

I also ordered a custom California plate for my little go kart


So just to list things out about. I have changed some plans on the fly. All going in is parts I have already.

Except on Intercooler where I have a newer Mountune Bar and Plate that is larger than the old Tube and Fin they used to sell.
It has more rows and is dimesnionally quite close to the CPE 1/2 longer core,1/2 narrower vs CPE being a 1/2 shorter core and and 1/2 wider.
It evens weighs the same as the CPE core at 17lbs.
Of course it does not have Delta fins. If I do not sell it for what I want I will install and run it as currently Mountune equips it in their MRX280 kit with the MRX Turbo.
This is not your daddys Mountune Intercooler. Lol

Long overdue list updates Mar 7th 2021

Suspension
ST XTA coilovers
Hotchkis rear sway bar
Summit 4 point Front Traction Brace


Engine and Performance

Installed.
ST200 Airbox
Revo Foam Filter
Whoosh crossover pipe
Mountune 2018 evap compliant intake tube
Whoosh symposer delete
Vibra Technics RMM
Thermal RD Exhaust
Cobb AP3 with Tunes by Adam@TunePlus for Turbo Technics S280.
Turbo Technics S280 Turbo
with Turbosmart Tuneplus spec 14 psi Wastegate
Turbosmart EV plumb back blowoff valve
Powerflex passenger side engine mount insert
Powerfex trans mount insert
Mountune Sportcat Downpipe


Drivetrain
Going in
Mountune quick shit kit
Whoosh motorsports trans shift cable bushing

Future drivetrain mods
Wavetrac LSD

Cooling
Mountune Triple pass Aluminum rad
Mountune Bar and Plate Intercooler


Wheels and tires
Konig Black 16x8 Dekagrams with Federal RS Pro’a
Rota Titans 17x8 with Falk 215/40 Falken RT660’s

Exterior TBD


Last edited:
OP
Dpro

Dpro

6000 Post Club
Messages
6,361
Likes
5,983
Location
Los Feliz (In the City of Angels) aka Los Angeles
Thread Starter #2
Now on to the mods. My mods got somewhat delayed due to the fact that When I went to a Clear Bra my Clear Bra guy noticed that at the inside ares around the Fog lights and lower grill at the Corners Ford had falied to fully spray the paint.
So off she went to Ford for a complet respray of the Front bumper. When she came back the Initial respray had not come out quite perfect and there were stil flaws. She went back again. Lol

This time not only did she come out nice but the body guy filled the license plate mount holes.
I have ordered a Sto N sho low pro removable lic plate holder for her. It will be in at the end of the week when it is mounted I will post pics.


OP
Dpro

Dpro

6000 Post Club
Messages
6,361
Likes
5,983
Location
Los Feliz (In the City of Angels) aka Los Angeles
Thread Starter #3
Fun times begin. This past weekend came time to put on a Whoosh Motosports crossover pipe and a Ford ST 200 Airbox. I sold the Mountune one and picked up a ST200 one the Airboxs are essentially the same as the Mountune was a Prototype for the Factory ST200 one. The difference being the Factory base is plastic rather than metal which translates to less Temps on the induction air.

Now a lot of people say this can be installed without removing your cowl . I had read and seen both non cowl removal and cowl removal. I chose to remove the cowl which involved removing the windshield wipers none of this is hard its just time consuming. Lol


You also remove your headlights which invovles two screws and one pop rivet per side . There are clips and the biggest deal is the bottom clip which is know for notoriously breaking on people so it is recommended to pick up spares from Ford . They are not cheap thought about $9 each.I got lucky and mine did not break.

You then remove your stock airbox and stock induction hose.

Then you remove your windshield wipers with a mm socket. Once you have done that you have . Two per side bolts on the cowl and push clips to remove. Once bolts clips are removed you can remove the upper cowl piece . Which gives you access to the lower piece which has slide clips that attacht to tthe firewall and a lip that pushses into a groove on the bottom of your windshield that fits like a ziploc.
You also lift up the botton of each side of your window weather stripping that locks down softly over it.

Once that is out you now have wasy access to your crossover pipe. You basically loosen your hose clamps on the lower side going to to the stock turbo inlet elbow and twist gently and tug to reomove the stock crossover pipe.
Do not forget to pull the metal centers on the factory grommets as you will not only need both but it makes putting the grommets on the new pipe mount very easy.


Like I said at this point you are ready to install the aftermarket crossover pipe . I chose a Whoosh cause Ron has great pricing!

I did not take a pic of the pipe out my bad.

Now if you did not get the larger elbow that is available you just put the step down silicone hose that comes with the crossover pipe on the factory elbow. Leave the lower clamp relatively loose so you can better position the setup when putting in the crossover pipe


Revo Drop in Air Filter


Oh after attacking the cold air intake hose to the bottom of the ST200 box route down into your engine bay and around the inside of your bumper it come out in the area below the healdight and riht by your fog light. Its a nice open area that is cold air.


Putting every back together is pretty much a reverse of taking it out. Don’t got crazy with brute force except maybe when installing the Airbox as Ford did a pretty damn good job of making them clip in tight. Lol with the headlights it takes a little finesse.

More stuff to come guys.


dmb

Active member
Messages
554
Likes
213
Location
Seal Beach, CA, USA
#4
I miss all the old MX tracks and desert races that were everywhere in the 70's. I'm Glad you started your Mod's can't wait to see more.


OP
Dpro

Dpro

6000 Post Club
Messages
6,361
Likes
5,983
Location
Los Feliz (In the City of Angels) aka Los Angeles
Thread Starter #6
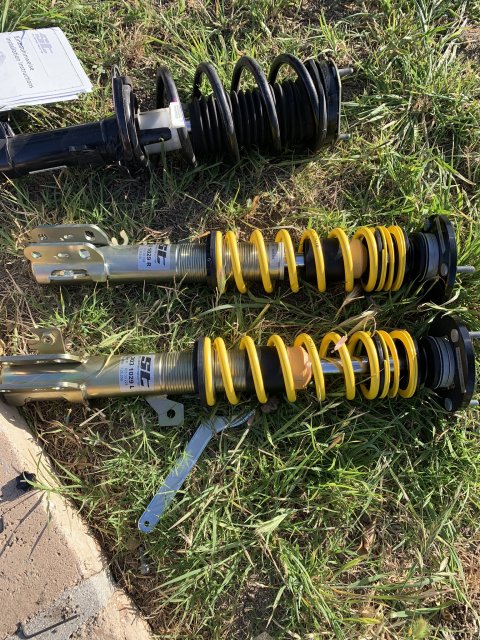
More goodies arrived today this time its my new ST XTA coilovers. Pretty stoked about these but it will be a week or so till they go in as I am completely tied up this weekend.


Last edited:
OP
Dpro

Dpro

6000 Post Club
Messages
6,361
Likes
5,983
Location
Los Feliz (In the City of Angels) aka Los Angeles
Thread Starter #10
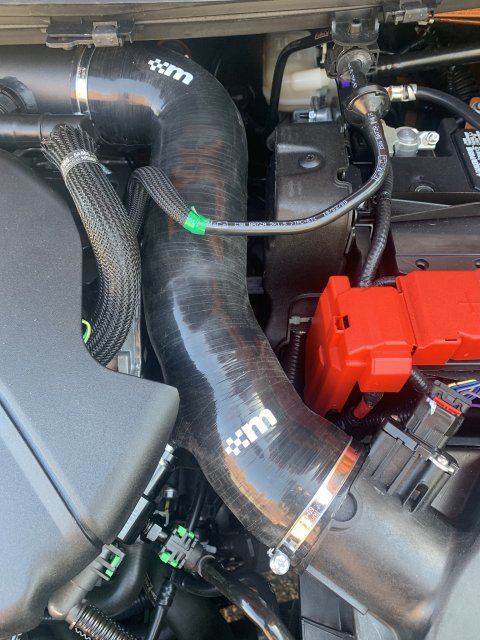
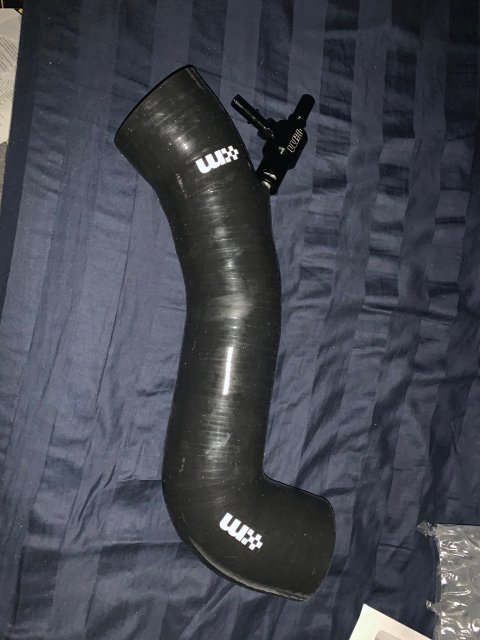
Final piece in my intake tract upgrade for now a Mountune 2016+ Intake tube that links to stock evap lines with no changing evap lines. In the car working great no codes and definitely notice more turbo sounds including whoosh from the stock diverter valve. Soon i will be puttimg in my Turbo Smart blowoff valve. CC19501D-6B93-483F-AB5A-D618FEC46BF4.jpeg 1AA7443E-10B3-4545-BF20-5D0AF93DC255.jpeg


Last edited:
OP
Dpro

Dpro

6000 Post Club
Messages
6,361
Likes
5,983
Location
Los Feliz (In the City of Angels) aka Los Angeles
Thread Starter #11
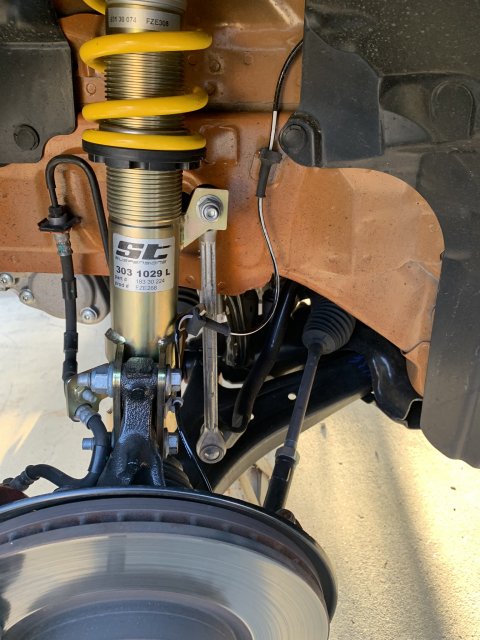
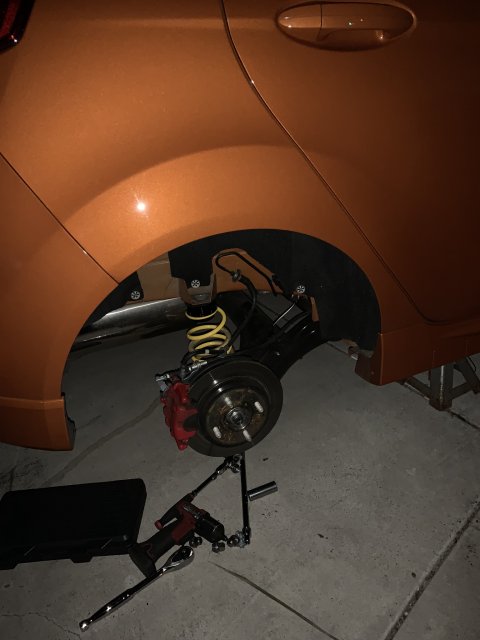
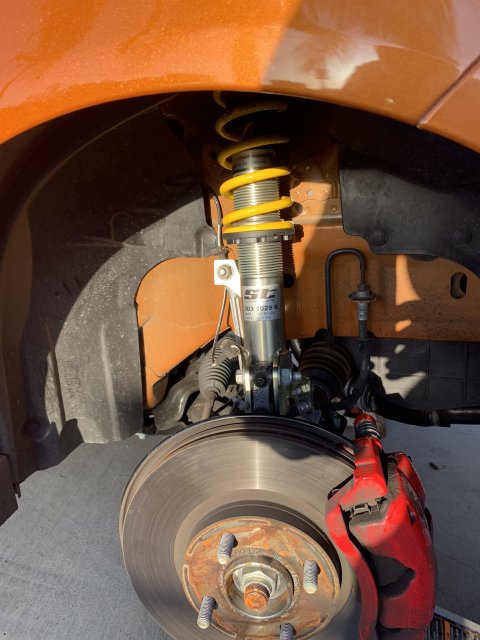
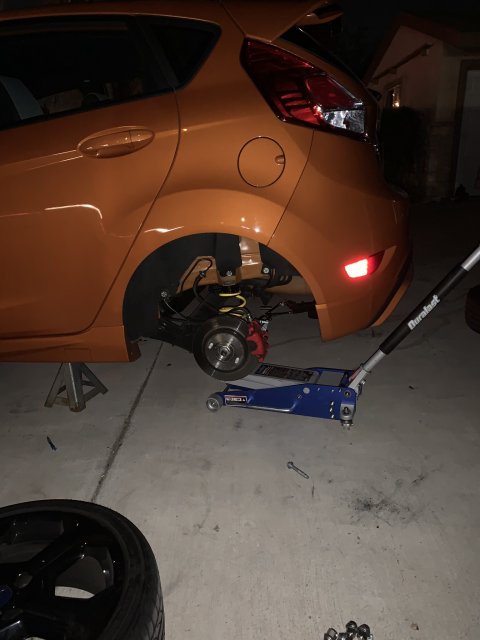
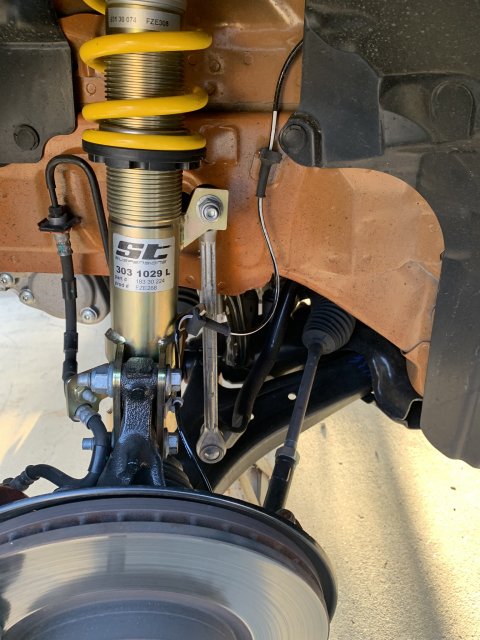
Well time came ST XTA coilovers had to go in . Did a couple of things to make the install go a little quicker. Used a 13 flex ratcheting wrench on the strut tower bolts so did not need to remove headlights or cowl. Then i also attached the rear shocks to the mounts on the twist beam put the floor jack under it and jacked it up to the body to bolt in the top mount.
I wil add on the top mount we milled the hole 10mm to fit the larger bolt and piston rod diameter of the ST shock. Most people say dremel it or file or try to drill using the mill allowed it be precision and no squeak is the end result.y EBB1360C-9765-42BD-AC62-DCE4D488BBE2.jpeg 6277BA40-7A6F-4094-90C5-E2B5F358A71F.jpeg F85E7146-17EF-4AD1-84BD-EF82A6B6887D.jpeg 3AAE69FD-C313-46EE-8CB2-290AF89A0EA9.jpeg 3AAE69FD-C313-46EE-8CB2-290AF89A0EA9.jpeg F85E7146-17EF-4AD1-84BD-EF82A6B6887D.jpeg E50DE24F-FD24-45EB-9E59-B44E7074D3F7.jpeg 6277BA40-7A6F-4094-90C5-E2B5F358A71F.jpeg


Attachments

Last edited:

M-Sport fan

9000 Post Club
Messages
14,461
Likes
7,013
Location
Princeton, N.J.
#14
I know it is asking you to guess, or 'extrapolate' a lot, but do those threaded damper bodies, and the rear weight jackers on that setup seem to allow at least a factory ride height, or would the static ride height still be pretty low, even at their max height adjustment? [dunno]


OP
Dpro

Dpro

6000 Post Club
Messages
6,361
Likes
5,983
Location
Los Feliz (In the City of Angels) aka Los Angeles
Thread Starter #16
I know it is asking you to guess, or 'extrapolate' a lot, but do those threaded damper bodies, and the rear weight jackers on that setup seem to allow at least a factory ride height, or would the static ride height still be pretty low, even at their max height adjustment? [dunno]
Actually I have to look at the spec sheet, It does tell in the spec sheet the mininum ride height vs max for the setup.
From just looking at the fronts it does look like one could get Factory height out of adjustment. One would probably have eliminate the helper spring.

The rear is more of a question mark.


Last edited:
OP
Dpro

Dpro

6000 Post Club
Messages
6,361
Likes
5,983
Location
Los Feliz (In the City of Angels) aka Los Angeles
Thread Starter #17
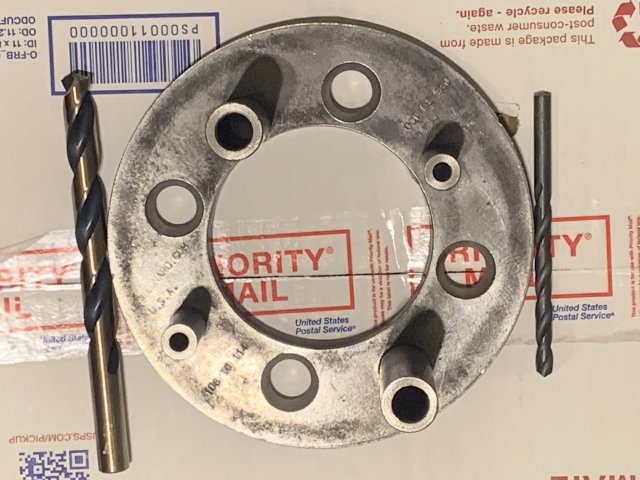
Ok another item arrived today. This is going to allow me to have multiple bolt patterns on my hubs. It came with two high speed drill bits I am planning on sorting the proper drill so this can be done on the car without removing the hubs.
I will also be renting this out but more about that later . 4x100 and 4x114 choices! 2B6AB69D-6E15-491A-9ABD-AD8AC5CC673B.jpeg


D1JL

7000 Post Club
Staff Member
Premium Account
U.S. Navy Veteran
Messages
7,906
Likes
4,148
Location
SFV, So.Cal.
#18
I am planning on sorting the proper drill so this can be done on the car without removing the hubs.
That is what the drill guides are for, so you don't need a drill press.
You can bolt the jig on the hub, on the car then drill the two small pilot holes.
Next rotate the jig and drill the other two small pilot holes, and re-drill the now existing pilot holes larger, using the larger drill guides.
Again rotate the jig and re-drill the last pilot holes to the larger size.

At least that is the way the one I used to have worked


OP
Dpro

Dpro

6000 Post Club
Messages
6,361
Likes
5,983
Location
Los Feliz (In the City of Angels) aka Los Angeles
Thread Starter #19
That is what the drill guides are for, so you don't need a drill press.
You can bolt the jig on the hub, on the car then drill the two small pilot holes.
Next rotate the jig and drill the other two small pilot holes, and re-drill the now existing pilot holes larger, using the larger drill guides.
Again rotate the jig and re-drill the last pilot holes to the larger size.

At least that is the way the one I used to have worked
Ya its kinda self explanatory once you look at it and see the 114 side and the 108 side.
I also jumped on this even after ordering another one, because of the ability to do both 108 or 114.
Unforntunately the other guy was not willing to do a refund so I will have two but I will be willing to rent them.


Last edited:

D1JL

7000 Post Club
Staff Member
Premium Account
U.S. Navy Veteran
Messages
7,906
Likes
4,148
Location
SFV, So.Cal.
#20
Yes, that is a nice one.
I didn't notice that it did two sizes until you mentioned it. :)


Similar threads


Top