TUNE+ Upgraded Wastegate Actuator (Surge Cure)
- Thread starter Tune+
- Start date
Finally ready to jump on this install. I got everything to the point where I am sweating blood and tears with the heat shield. It wasn't too complicated to get it unbolted from all corners, albeit I highly recommend removing the cowl (wipers, etc) and jacking up the car to get to the bottom bolt that is 'hidden' underneath the DP heat-shield.
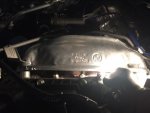
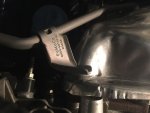
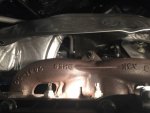
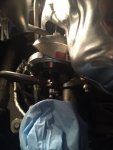
Now trying to remove the heat-shield I am stuck due to the coolant lines. The left line (facing front of car) and its top bracket simply seem in the way and although it may be possible to move it enough to get out of the way it does look/feel like a delicate line. I've already moved it about 3/14 inch, but am afraid to push my luck further. Any recommendations for me at this point?
Here are pics of what I am talking about...


Hope you all are off to a smoother weekend than I. I patiently await for completing this.
Thanks in advance!
Now trying to remove the heat-shield I am stuck due to the coolant lines. The left line (facing front of car) and its top bracket simply seem in the way and although it may be possible to move it enough to get out of the way it does look/feel like a delicate line. I've already moved it about 3/14 inch, but am afraid to push my luck further. Any recommendations for me at this point?
Here are pics of what I am talking about...


Hope you all are off to a smoother weekend than I. I patiently await for completing this.
Thanks in advance!
- Member ID
- #1979
- Messages
- 776
- Likes
- 189
I was able to get it out by shoving it upward under the car. What I was really doing is bending the top coolant line that's located near the bolt. In the end I pushed that out by about 2 inches to get the shield out. It helps to shove upward as far as possible and the pull it out from the top. I got the right corner (when looking at the car) out first and then the side with the coolant line. Be aide I did so much useless pulling from the top I ended up mangling the thing. It looks normal when it remove it but I can't get all the lines to mate up again. Good news is that the bolts are about a buck fifty and the foil shield is only like 49 bucks from Tasca. Good luck!
Thanks [MENTION=2065]jayrod1980[/MENTION] and [MENTION=411]westcoaST[/MENTION] for the prompt replys. I guess I'll work up the nerve to get the coolant line a bit further out of the way. And thanks for the dealer tip as I wouldn't be surprised I have to get a new shield.
Get a screwdriver and pry out the coolant line on the left side of the motor towards the firewall. I wedge the screwdriver in between the coolant line bracket and the engine head. Once you get the line out enough you can slide the left side of the headshield out from underneath it. Once that is out the rest should shimmy out. I got it down to a science, takes me like 2 minutes to pull it out and get it back in.
Thanks guys! This would definitely be a daunting and frustrating process without your suggestions. Really appreciate it.
Now back to it!
- Member ID
- #1979
- Messages
- 776
- Likes
- 189
I think we are talking about the same coolant line... The one on the passenger side of the car. You can safely pry it out pretty far... The bracket doesn't make it lose coolant, you aren't disconnecting anything. I do need to buy a new one myself knowing what I know now. Good to know the replacement comes with two bolts. Two of them are longer anyway than the others.
[MENTION=1146]Joszer[/MENTION], I was glancing at that as a possibility, albeit I did want to keep disconnects to a minimum. I guess not too much liquid --if any-- would be lost and that should indeed provide the additional needed clearance, specially considering the coolant line is routed underneath some sort of electrical wires, which also limits the movement of the coolant line.
Thanks guys! This would definitely be a daunting and frustrating process without your suggestions. Really appreciate it.
Now back to it!
Thanks guys! This would definitely be a daunting and frustrating process without your suggestions. Really appreciate it.
Now back to it!
No need to disconnect it. It'll bend back just enough to get the passenger side corner of the heatshield off. You're basically there in the last photo you posted on this page. Free the passenger side corner of the heatshield free by bending back the coolant line with aid from a screwdriver and lifting up and the other side should come out without a hitch.
Finally the actuator is installed. As suggested by [MENTION=1146]Joszer[/MENTION] I moved the coolant line farther towards the firewall. I didn't insist on getting the shield out, but as I created enough room to get my hands in there I simply worked within that constraint. Not as easy as with it completely off, but I was able to get it back on and bolted (2 top ones only).
Here you can somewhat see that I could get access to the flapper

I would then move the shield back into position to get to the actuator mounting screws. Ends up being a two-step process, but it worked. Here is the [MENTION=3805]Tune+[/MENTION] actuator installed.

Few tips:
- I didn't deal with removing the vacuum hose until the actuator was off the bracket. This makes it easy to access the clip securing the hose. Then don't forget to attach the hose to the new actuator first, slide clip back on AND then bolt the actuator on.
- To set the actuator pre-load, just follow the [MENTION=3805]Tune+[/MENTION] video https://youtu.be/_UDVTVmQ0xw
- I used both stock screws to secure the flapper, as this would mate up well with the clip
- I also used the stock actuator heat-shield, not sure if needed, but figured it wouldn't hurt
- I discovered that if you have a nice size piece of cardboard under the engine area and you drop a screw or other small object, if it falls all the way thru, you can most likely just pull the cardboard out and pickup the fallen object, without having to crawl under the car
Thanks again to those who reached-out with help.
Now off to get some logs for [MENTION=3805]Tune+[/MENTION].
Enjoy your Sunday and have a great week.
Here you can somewhat see that I could get access to the flapper

I would then move the shield back into position to get to the actuator mounting screws. Ends up being a two-step process, but it worked. Here is the [MENTION=3805]Tune+[/MENTION] actuator installed.

Few tips:
- I didn't deal with removing the vacuum hose until the actuator was off the bracket. This makes it easy to access the clip securing the hose. Then don't forget to attach the hose to the new actuator first, slide clip back on AND then bolt the actuator on.
- To set the actuator pre-load, just follow the [MENTION=3805]Tune+[/MENTION] video https://youtu.be/_UDVTVmQ0xw
- I used both stock screws to secure the flapper, as this would mate up well with the clip
- I also used the stock actuator heat-shield, not sure if needed, but figured it wouldn't hurt
- I discovered that if you have a nice size piece of cardboard under the engine area and you drop a screw or other small object, if it falls all the way thru, you can most likely just pull the cardboard out and pickup the fallen object, without having to crawl under the car
Thanks again to those who reached-out with help.
Now off to get some logs for [MENTION=3805]Tune+[/MENTION].
Enjoy your Sunday and have a great week.
- Member ID
- #938
- Messages
- 259
- Likes
- 59
Finished install today. Man, that heatshield is a motherf'er! Like [MENTION=2529]Ext569[/MENTION] I didn't completely remove the heat shield. I pushed coolant line away and bent the shit out of the heatshield. It worked, but made re-installing the heatshield extremely difficult as the bolt holes didn't line up anymore. Not a lot of room to work in there. My right arm is toast.
Full review to follow. So far Tune+ tune is a freakin beast! I was rolling 25mph in 2nd, went full throttle and lost traction... at 25!
Full review to follow. So far Tune+ tune is a freakin beast! I was rolling 25mph in 2nd, went full throttle and lost traction... at 25!
Thread Starter
#395
Finished install today. Man, that heatshield is a motherf'er! Like [MENTION=2529]Ext569[/MENTION] I didn't completely remove the heat shield. I pushed coolant line away and bent the shit out of the heatshield. It worked, but made re-installing the heatshield extremely difficult as the bolt holes didn't line up anymore. Not a lot of room to work in there. My right arm is toast.
Full review to follow. So far Tune+ tune is a freakin beast! I was rolling 25mph in 2nd, went full throttle and lost traction... at 25!
Full review to follow. So far Tune+ tune is a freakin beast! I was rolling 25mph in 2nd, went full throttle and lost traction... at 25!
It may be easier to get the heat shield completely off without mangling the sucker if you remove the coolant line, BUT it just seems like more work than necessary. I was able to install it with the heat shield still in n the way, working on one side then on the other and repeating until done. This way I ended up bolting the shield back in 3 spots. I'd work at it and when I was stuck stepped away for a break and I'd come back at it.
Isn't it easier to remove the coolant hardline, rather than trying to bend it backwards? Is there a crush washer that needs to be replaced? The line from Ford is less than $20.00 picked up. I plan on doing this replacement soon as my back is finally healing.
- Member ID
- #1979
- Messages
- 776
- Likes
- 189
I curse the day I ever touched this heat shield. I bought a new one because I couldn't get the drivers side bolt in. Well can't with the new one either. Not only was a nightmare trying to get on and off, but it seems somehow I have stripped the thread on the bolt hole! With that side not on, the bolt doesn't grab at all. What to do now? I notice that even with that bolt in the shield doesn't hold airtight to the manifold anyway.
For those of you that have done this mod or screwed with the heat shield, does it sit flush against the manifold? I'm really concerned about heat venting up into the rubber and wires at the top of the engine and the intake since its plastic at that point.
Nothing like wasting an entire night trying to fix something and it turning out to be something else.
Similar threads
-
Tune+ Full E85 Tuning with XDI Pump and 50% Injectors
- Started by anticon
- Replies: 3
-
FS For Sale: (Connecticut) Fiesta ST 2019, Full Bolt ons, Tuned by Tune+, 16,500 miles.
- Started by JesusSavedMe134
- Replies: 3
-
What are the gaps for Tune+ NGK 1 step colder?
- Started by esp_martin
- Replies: 5
-
-
-
-
Tuning: Cobb vs Tune+ vs JST vs Stratified vs Dizzy ? (price and performance) -
- Started by TalkToTheFiST
- Replies: 27
-
FS: Tune+ Upgraded Turbosmart Wastegate Actuator for Fiesta ST (Brand New)
- Started by Cesso
- Replies: 5
-
-

![Cool Smile [coolsmile] [coolsmile]](/images/smilies/cool.png)