-
Sign Up! To view all forums and unlock additional cool features
Welcome to the #1 Fiesta ST Forum and Fiesta ST community dedicated to Fiesta ST owners and enthusiasts. Register for an account, it's free and it's easy, so don't hesitate to join the Fiesta ST Forum today!
MAPerformance Intake R&D, Results, and Information
- Thread starter maperformance
- Start date
Thread Starter
#43
Thread Starter
#43
Any future plans to provide different color options for powder coat (Red)?
got mine today and put it in right away...very nice peace...love the noises this thing makes! 


http://www.maperformance.com/ford-f...performance-2013-ford-fiesta-st-fist-cai.html
I'm waiting on mine still, along with the cat-back - can't wait.
Thread Starter
#49
Thread Starter
#49
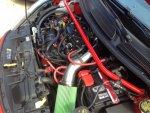
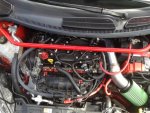
Maperformance, got the intake on. Fit is great! I went to this one, replacing my 2JR because it is much easier to maintain . I forgot how peaceful it is inside the car without the extremely loud 2JR, lol. Just waiting on the mishimoto OCC now.
View attachment 7184 View attachment 7185
View attachment 7184 View attachment 7185
I was going to take some video this weekend. I am utilizing our charge piping with BOV on my car, and I have it setup to use the factory BPV and our installed Turbosmart Veeport. It sounds awesome when they are both working. I just wanted to do some testing and see how it drove and it definitely is working good!
Looks great! I'm glad you like it!
I was going to take some video this weekend. I am utilizing our charge piping with BOV on my car, and I have it setup to use the factory BPV and our installed Turbosmart Veeport. It sounds awesome when they are both working. I just wanted to do some testing and see how it drove and it definitely is working good!
I was going to take some video this weekend. I am utilizing our charge piping with BOV on my car, and I have it setup to use the factory BPV and our installed Turbosmart Veeport. It sounds awesome when they are both working. I just wanted to do some testing and see how it drove and it definitely is working good!
Thread Starter
#51
Thread Starter
#51
Hrm...what? Why would you run both together? Doesn't the kit eliminate/block off the BPV? ![Screwy [screwy] [screwy]](/images/smilies/icon_smile_screwy.gif)
I have no disabled the factory BPV again to work as a temporary block off as we are machining our block off plates currently to ship with our kits. I will be using just the Vee Port in the future, the cool dual stage sound wasn't enough for me to keep it

Well, Fedex came pretty late last night.
I was able to sort of install it while holding my iPhone as a flashlight. Since I was working in the dark, some instructions could have been useful. I couldn't see where that arm was to be mounted in the dark. Other than that, the coupler was a bit of a pain in the ass to wiggle on, and it needs to go on the right way for everything to mount up. It can go on both ways and get the intake on, but it just dangles around in the engine bay then.
I removed the engine cover first. Then I removed the OEM intake by unscrewing the clamp thats up by the cowl. Then I took the 4 screws holding the top of the airbox down. After unplugging the MAF and that line on the intake with the green clip. the whole piece came off. The lower intake box that has the filter just wiggled out for me. The previous owner had an Ingen intake, so Im not sure if he forgot to put screws back in or what.
The silicone coupler that is provided needs to go with the shorter end of the elbow on the rest of the OEM intake that connects to the turbo. I did this the wrong way in the dark, and the arm that mounts to the engine could not line up because of this. I put the filter and MAF sensor on the stainless pipe, then wiggled it into the engine bay. You will see the mounting point when you put it in, theres a few hoses/lines around it so its a bit hard to get the 10mm wrench on it. I was able to get it off with a ratcheting wrench, and had very little room to move a ratchet wit no extension.
Also, you need a t20 torx to get the original MAF sensor off. The bolts on the new one I think were a 3mm hex head.
My only concern is the line that connects to the line on the intake that is clipped on with the little green clip. Not sure if its because it was taken on and off a few times by the previous owner and me a couple times while getting the intake on, but even with the clip on you can slide it off. I think it just cant grip the stainless steel as tight as it could the OEM plastic. I may put some electrical tape on the nipple so the clip has something to push into and then tape it down for extra security. I did a few 2nd and 3rd gear WOT runs and it didn't come off yet.
It sounds great. Partial throttle you hear the spool quite a bit. With the windows up and heavier throttle, the sound symposer drowns out the intake a little (going to delete that soon). I didn't notice any power differences with this compared to the drop in filter I already had with my Access Port. Its also like 60*F out now, so cant comment on head issues.
I attempted my install last night, and had the same issue with the support brace - I wasn't sure where to attach it. After looking at pictures I realized the short part of the elbow attached to the stock intake tube, but I was unable to get it on as easy as the other side - I'll try some soapy water when I redo it on Saturday.
I ended up putting the stock intake back on, which was no big deal since i have to install a DHM symposer delete on Saturday, and it all needs to come back out anyway. I didin't realize how much stuff needs to come out for that (battery, battery tray) and I didn't have time to do it last night lol.
For the hose that goes into the tube (with the green clamp) you can probably get a small hose clamp to hold it on.
FYI guys, Adam is no longer with MAP, he is tuning full time on his own! All status on orders, direct to support@maperformance.com
FYI guys, Adam is no longer with MAP, he is tuning full time on his own! All status on orders, direct to support@maperformance.com
FYI guys, Adam is no longer with MAP, he is tuning full time on his own! All status on orders, direct to support@maperformance.com
Similar threads
-
-
FS For Sale: Fiesta ST MAPerformance Intake (Tube and Coupler Only)
- Started by JRifold
- Replies: 3
-
FS For Sale: Cobb AP w/ 2016 MAPerformance Intake (Tube and Coupler Only)
- Started by JRifold
- Replies: 4
-
Maperformance Intake (check engine light)
- Started by Hyunwulf Fiesta
- Replies: 2
-
-
-
-
-
-


