James Barone Racing Fiesta ST Catch Can

Member ID
#3017
Messages
13
Likes
2
#61
Sorry you guys have had trouble with the drain hose. We didn't run in to the hose kinking with any of our installs. Once it's fed down as the can is installed, it hangs really nice. The instructions leave it somewhat up to the installer to decide where they'd prefer it to be located. The hose should be secured with one of the included zip ties so it doesn't move around.

Our test cars have had no issues with the hose we include. We chose this hose because of it's resistance to fuel and oil as well as it flexibility. If the hose was not long and the drain valve not located low or at the end there would be no way to drain it without removing the catch can. Turning the wheels hard left and reaching in through the wheel well is how most drain it.

We've found no other location in the engine bay to locate the catch can that would make it easier to install or easier to drain.

Thanks,
Jamie


BoostBumps

4000 Post Club
Staff Member
Member ID
#13
Messages
4,277
Likes
1,032
#62
Sorry you guys have had trouble with the drain hose. We didn't run in to the hose kinking with any of our installs. Once it's fed down as the can is installed, it hangs really nice. The instructions leave it somewhat up to the installer to decide where they'd prefer it to be located. The hose should be secured with one of the included zip ties so it doesn't move around.

Our test cars have had no issues with the hose we include. We chose this hose because of it's resistance to fuel and oil as well as it flexibility. If the hose was not long and the drain valve not located low or at the end there would be no way to drain it without removing the catch can. Turning the wheels hard left and reaching in through the wheel well is how most drain it.

We've found no other location in the engine bay to locate the catch can that would make it easier to install or easier to drain.

Thanks,
Jamie
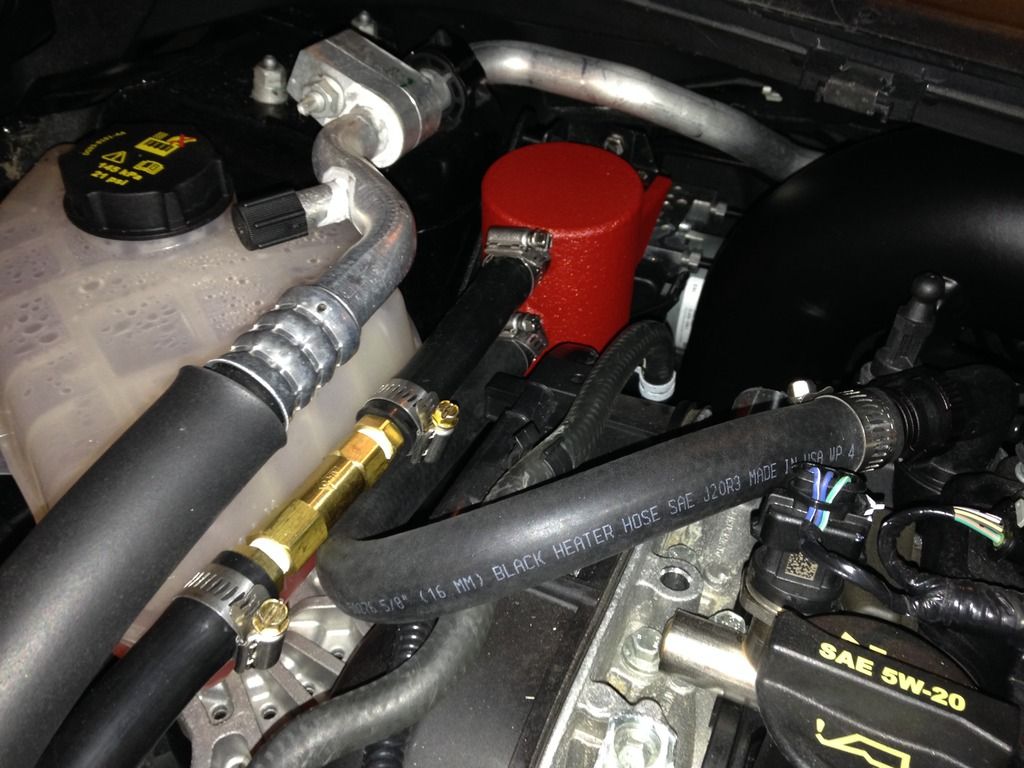
I just like to play it safe and thats the reason for replacing the drain hose and plastic clamps for worm clamps....Also slightly modifying the bracket did help quite a bit clear the issues I saw with the upper bracket #2 hitting the upper insulated cowl / firewall area and allowed for more room to raise the OCC upward in order for the bottom PCV line hose to clear a sharp edge the hose was resting against....Now my current setup works very well and install looks very clean...I'm very pleased!


jeff

2000 Post Club
Member ID
#3723
Messages
2,310
Likes
3,232
#63
I just installed one of these. It looks nice, fits well, and is well made. The folks at JBR are prompt and courteous.

I did make a few slight modifications to the bracket as suggested by a few above; it fits a bit better and feels a bit more sturdy in place.

A+


Sourskittle

4000 Post Club
Member ID
#864
Messages
4,567
Likes
861
#64
Just wanted to mention my buddy went big turbo recently and because of a TB spacer, he needed a special cut pipe from what the normal pipe is. He called these guys, they cut the pipe, re-did the edge where the coupler goes on, and had it shipped in 1.5 days. Extremely nice customer service.

The install went smooth and he's really happy with it.

It would be nice if they had more products for us, but it seems like they do what they do very well.


Member ID
#3017
Messages
13
Likes
2
#65
I'm happy to hear the kits are working well for you guys. I understand that a few have made modifications to the mounting bracket. If someone could provide the details we can look in to making a permanent change to them.

Thanks,
James


Member ID
#4577
Messages
5
Likes
0
#66
James - just got your kit in stock and installed. install went really smooth. did notice that you supplied extra worm clamps for the drain and spigot, versus the zip tie.

i did develop a vac leak though somewhere between the intake manifold port and the check valve. so i need to chase that down. im pretty sure it is a leak, at least. if i pinch the tube (restrict the air) between the IM and the check valve the hissing goes away.

thoughts anyone?


OP
Hijinx

Hijinx

3000 Post Club
Member ID
#923
Messages
3,290
Likes
1,669
Thread Starter #67
James - just got your kit in stock and installed. install went really smooth. did notice that you supplied extra worm clamps for the drain and spigot, versus the zip tie.

i did develop a vac leak though somewhere between the intake manifold port and the check valve. so i need to chase that down. im pretty sure it is a leak, at least. if i pinch the tube (restrict the air) between the IM and the check valve the hissing goes away.

thoughts anyone?
There's is probably a pin point hole in there somewhere.


DP03

Member
Member ID
#4555
Messages
183
Likes
21
#68
I'm really not sure why the cans are still being considered in that rear location? Mishi has proven that a forward mounted location is clean and allows draining from the top of the car via a valve on the bottom of the can.

Am i correct that this can is drained from the bottom, with the valve being at the bottom of the hose? If so the oil sits in the hose, not the can until its drained. If I have that right I'm not sure I see th logic of locating is this position?

Not a knock on the product. Looks like a nice piece. But the rear location does not make sense or look convenient.


Member ID
#4577
Messages
5
Likes
0
#69
There's is probably a pin point hole in there somewhere.
I just replaced all hoses with 5/8" braided vinyl tubing from home depot. Still hissing. Blah. Two week old car leaking hah.

edit: just took the catch can totally out of play:

1) unplugged pcv side from pcv
2) unplugged IM side from can
3) plugged IM hose previously connected to the catch can directly to the pcv (mirroring stock setup, but with check valve in place)

so the path now looks like

IM port > hose > check valve > pcv port

no more leaks

im concluding there must be a leak within the hardware of the catch can itself. i cant think of anywhere else a leak would be coming from - and just blew $18 on replacement hoses for nothing. sigh


Member ID
#3235
Messages
47
Likes
10
#70
I just replaced all hoses with 5/8" braided vinyl tubing from home depot. Still hissing. Blah. Two week old car leaking hah.

edit: just took the catch can totally out of play:

1) unplugged pcv side from pcv
2) unplugged IM side from can
3) plugged IM hose previously connected to the catch can directly to the pcv (mirroring stock setup, but with check valve in place)

so the path now looks like

IM port > hose > check valve > pcv port

no more leaks

im concluding there must be a leak within the hardware of the catch can itself. i cant think of anywhere else a leak would be coming from - and just blew $18 on replacement hoses for nothing. sigh
If there is a hardware issue talk with JBR, stand up guy and should help you out.


Member ID
#4577
Messages
5
Likes
0
#71
Took it all out and found that there was a split/slice in the drain hose, not sure if it was caused by rubbing or movement down there or what - but replaced that with some of the braided line I picked up from home depot, and it looks like it is fine now - leak has left.

Hopefully this stays strong and doesn't slice the replacement hose - maybe there's something sharp down there it was rubbing on.


Member ID
#3017
Messages
13
Likes
2
#72
I just replaced all hoses with 5/8" braided vinyl tubing from home depot. Still hissing. Blah. Two week old car leaking hah.

edit: just took the catch can totally out of play:

1) unplugged pcv side from pcv
2) unplugged IM side from can
3) plugged IM hose previously connected to the catch can directly to the pcv (mirroring stock setup, but with check valve in place)

so the path now looks like

IM port > hose > check valve > pcv port

no more leaks

im concluding there must be a leak within the hardware of the catch can itself. i cant think of anywhere else a leak would be coming from - and just blew $18 on replacement hoses for nothing. sigh
As mentioned in my email reply, the cans are welded shut except for the inlet, outlet and drain ports. They are then pressure tested for leaks. I suspect two potential issues, the CV may have been in backwards or the drain valve was open.


jeff

2000 Post Club
Member ID
#3723
Messages
2,310
Likes
3,232
#75
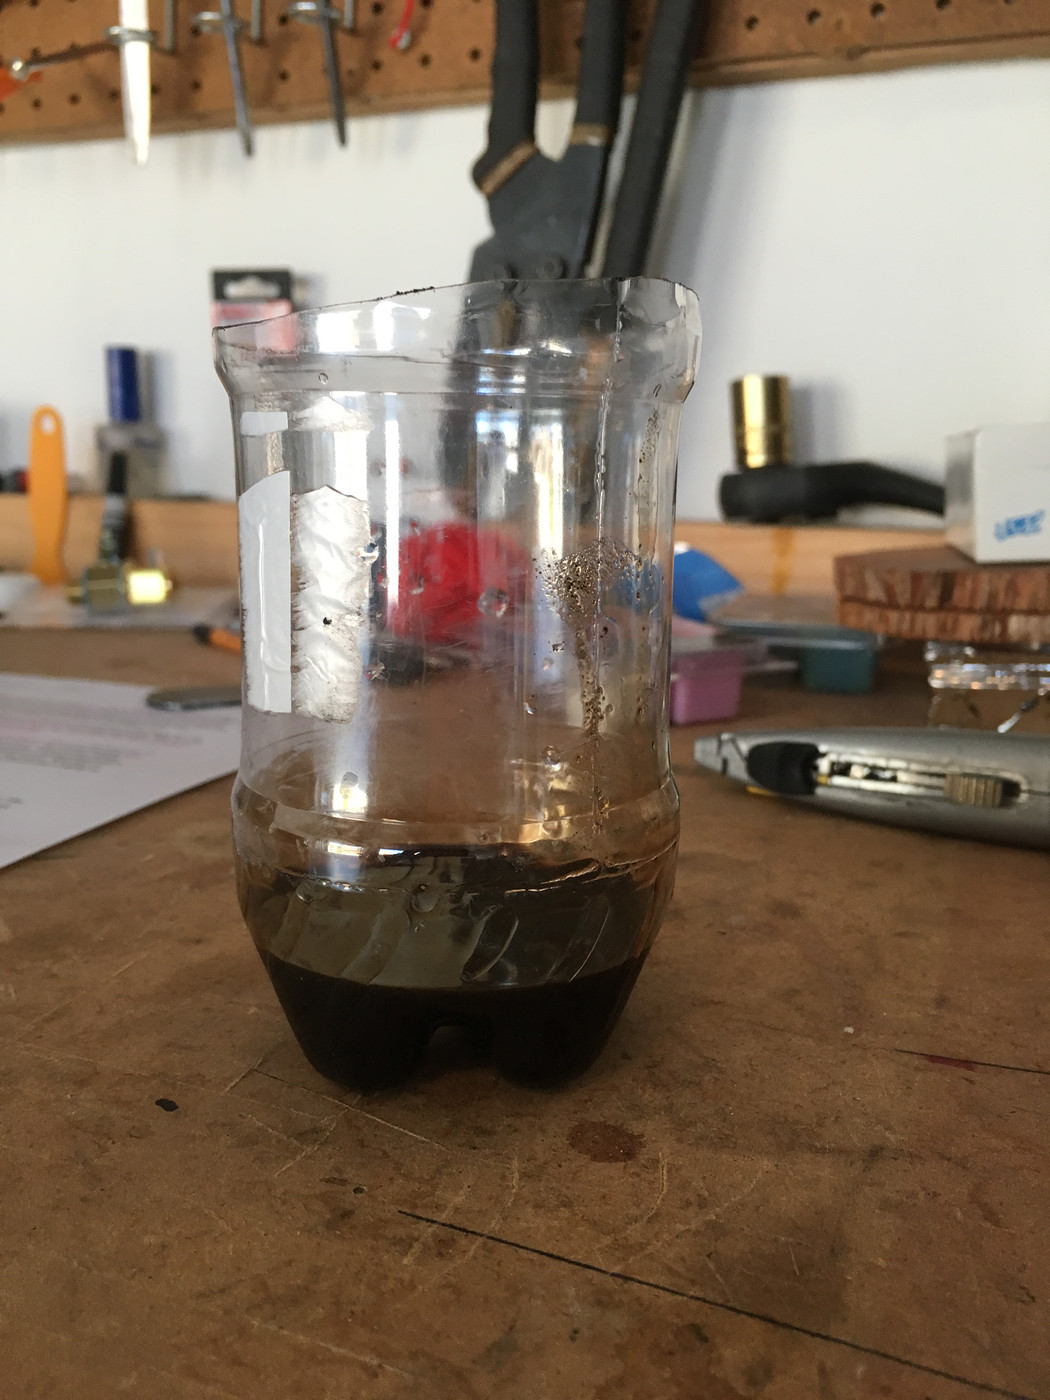
Bumping this epic thread to remind you guys to check your catch cans periodically....I’m getting about one ounce per 1500 miles from my JBR. Just drained some muck out of there. And this is WITH a breather cap also installed folks...

if you don’t have one....go buy one!!! Unless you have aux fuel that is....but if not this mod really is excellent!!!


Member ID
#13149
Messages
112
Likes
95
#76
I tried to order off their site and wouldn’t load into the cart and says product not found? I emailed the company and waiting for a response. Hopefully just a glitch on the site.


M-Sport fan

9000 Post Club
Member ID
#4150
Messages
14,460
Likes
7,011
#77
Bumping this epic thread to remind you guys to check your catch cans periodically....I’m getting about one ounce per 1500 miles from my JBR. Just drained some muck out of there. And this is WITH a breather cap also installed folks...

if you don’t have one....go buy one!!! Unless you have aux fuel that is....but if not this mod really is excellent!!!

I drain the Damond at every oil change (< 4K miles), and then once in between each change just to be 'safe'. [wink]


Thread starter Similar threads Forum Replies Date
Jerickson88 Fiesta ST Build Projects 0

Similar threads


Top