-
Sign Up! To view all forums and unlock additional cool features
Welcome to the #1 Fiesta ST Forum and Fiesta ST community dedicated to Fiesta ST owners and enthusiasts. Register for an account, it's free and it's easy, so don't hesitate to join the Fiesta ST Forum today!
Fiesta at catch can
- Thread starter masonsturbos
- Start date
I used stainless steel potscrubbers, like you did, on my first Mishimoto catch can. Worked great. I mounted mine to the passengers side, strut housing. I used an existing stud and drilled a hole and attached a shet metal screw to it.
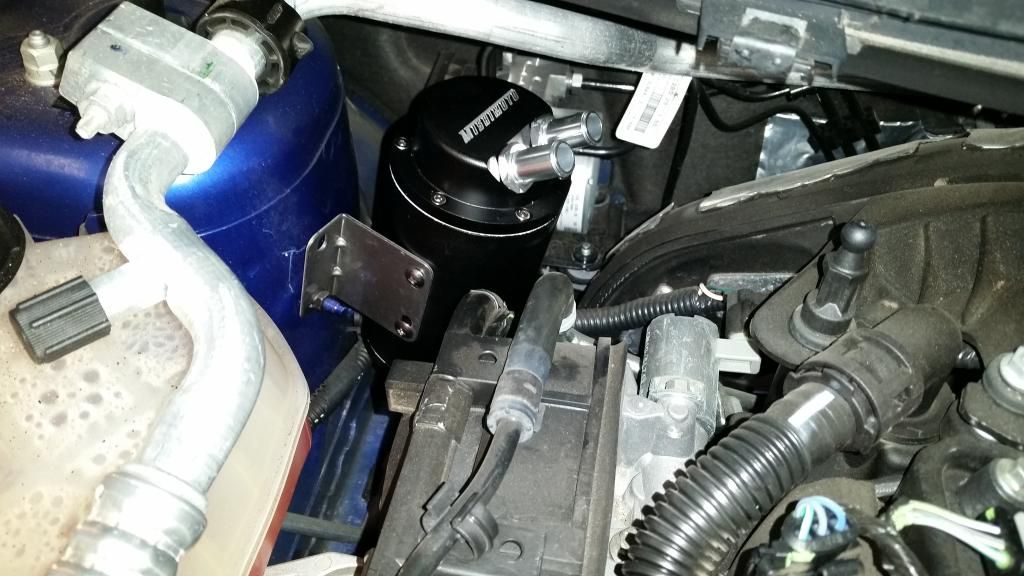
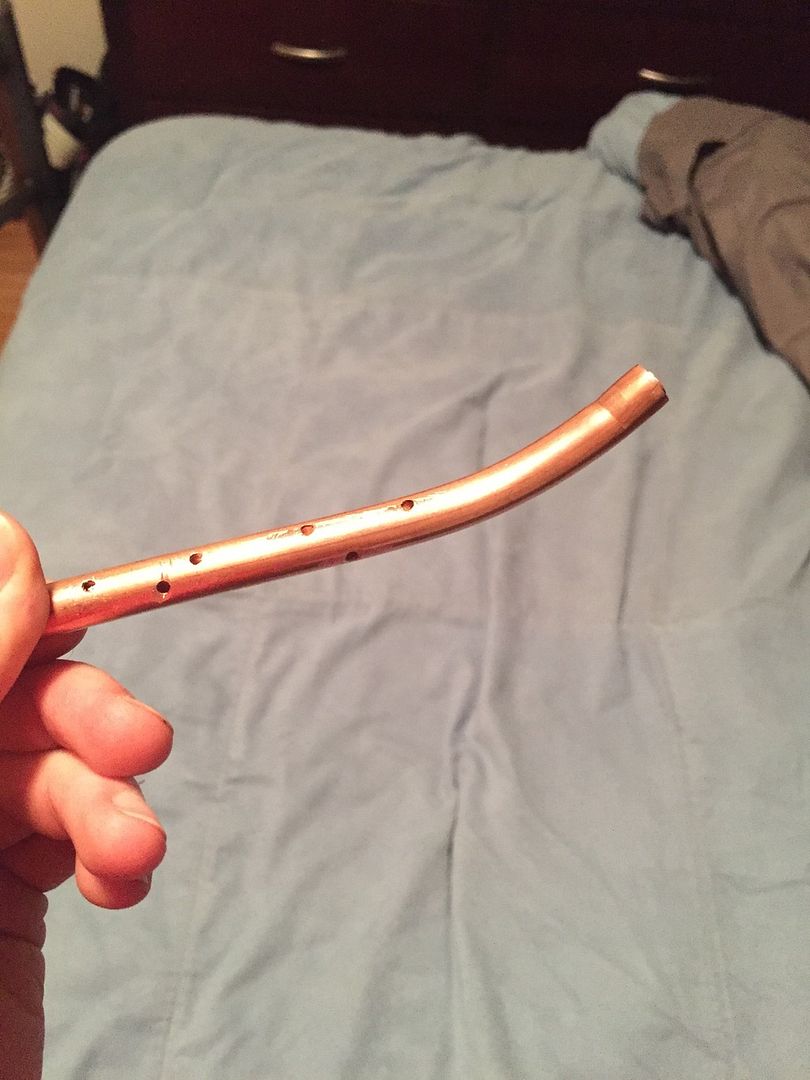
A frend wanted a plug and play setup so I sold him this one. He loved it and still has it installed. I added a copper tube that we epoxied to the top cover. We drilled it with holes along the side, so that the PCV gases are forced through the pot scrubber, and back up through the scrubber and out the outlet.
I also added a drain with silicone hose. We just put a coke bottle below the OCC and drain it without having to remove it. Details are in my build thread.
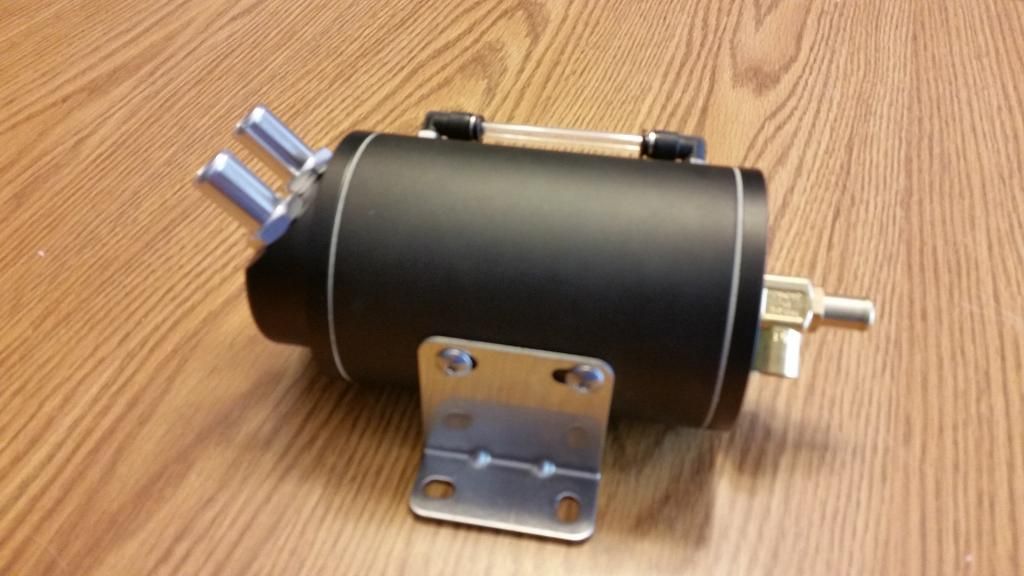
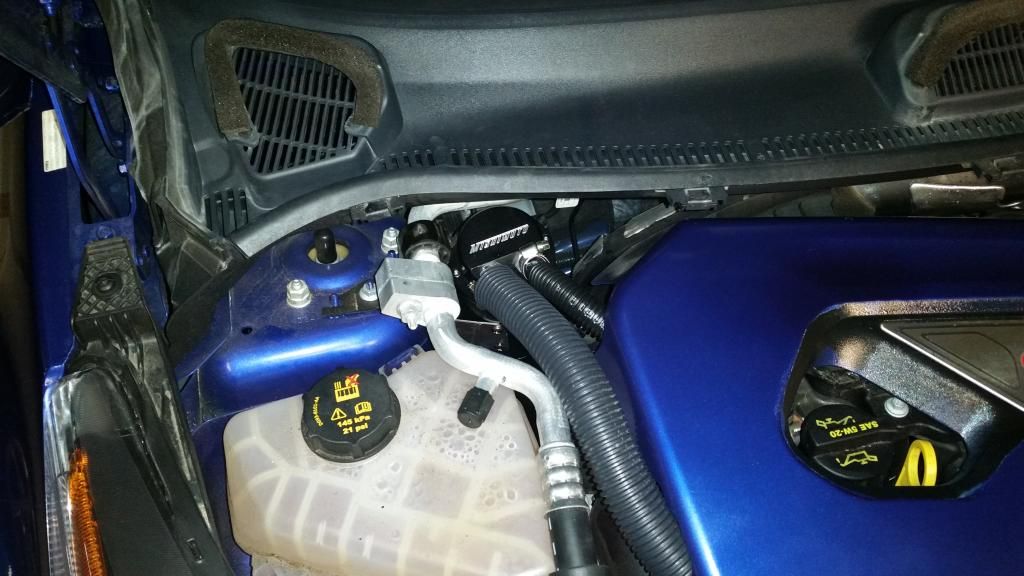
http://www.fiestastforum.com/forum/threads/2353-WestcoaST-Performance-blue-build

A frend wanted a plug and play setup so I sold him this one. He loved it and still has it installed. I added a copper tube that we epoxied to the top cover. We drilled it with holes along the side, so that the PCV gases are forced through the pot scrubber, and back up through the scrubber and out the outlet.
I also added a drain with silicone hose. We just put a coke bottle below the OCC and drain it without having to remove it. Details are in my build thread.


http://www.fiestastforum.com/forum/threads/2353-WestcoaST-Performance-blue-build
Thread Starter
#24
Thread Starter
#24
Lol that's exactly what we did with ours. I plan on running a tube to the bottom of the car next to the tire where you place a can and turn the valve and let it drain, it's kinda tight in there for anything else.
Here are more pictures.
I plan on doing a write up once mine is installed.
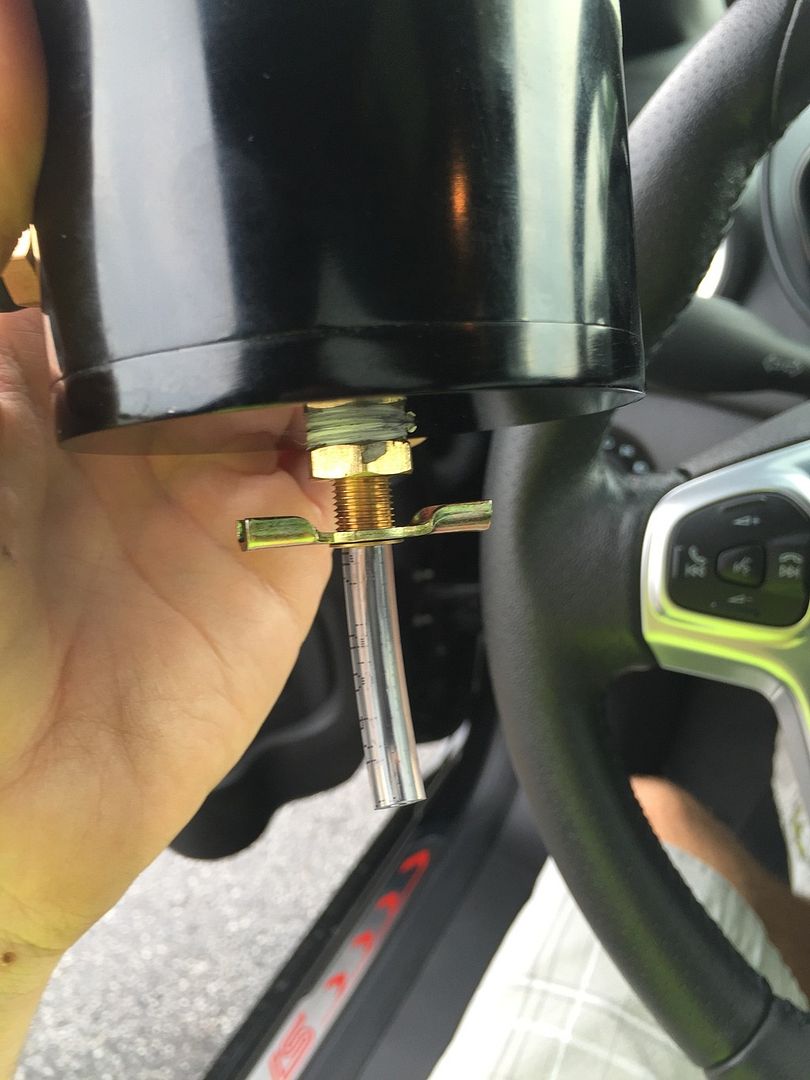
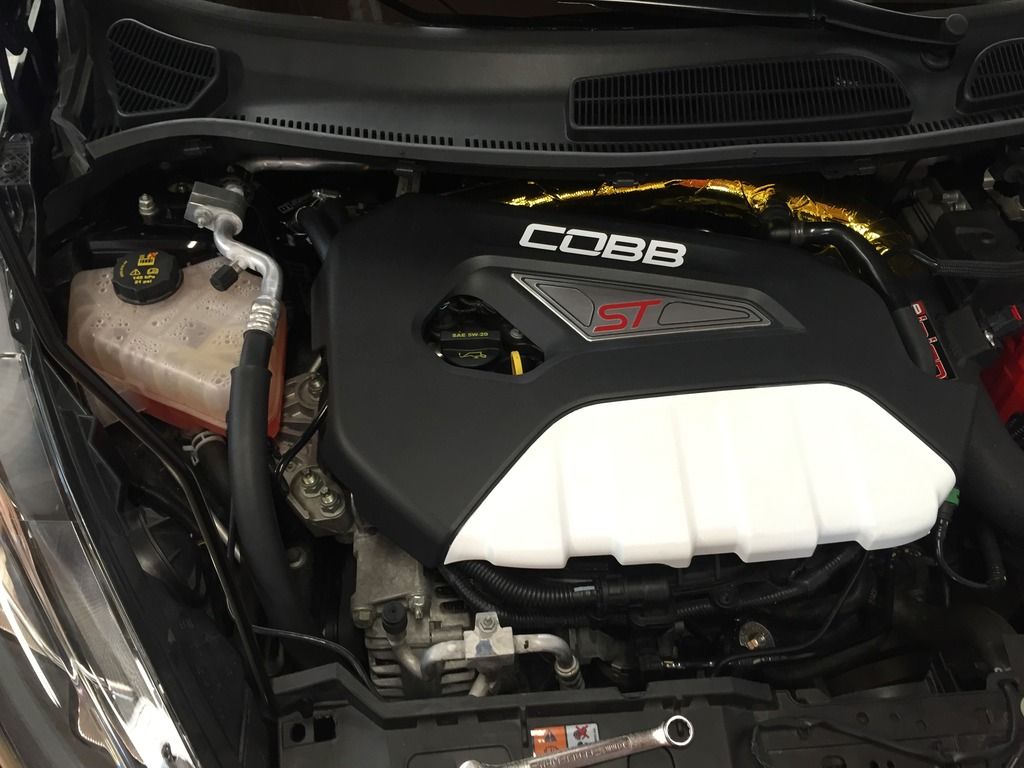
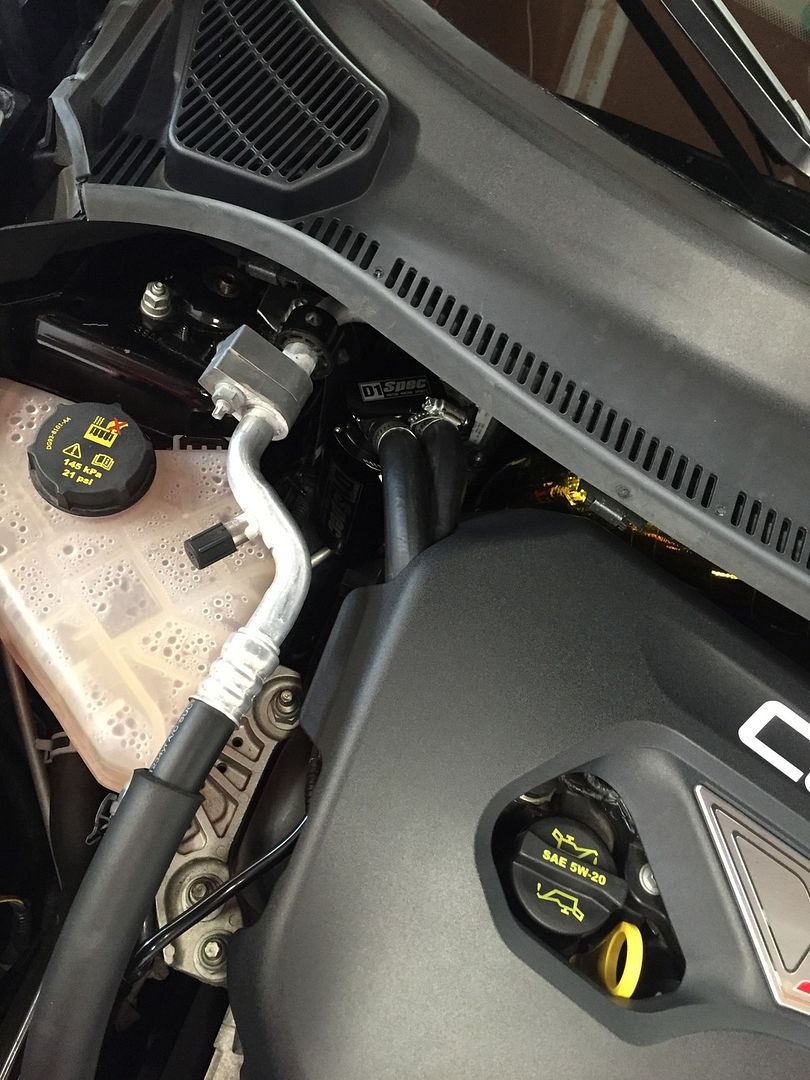
We trimmed the engine cover to clear the tube better
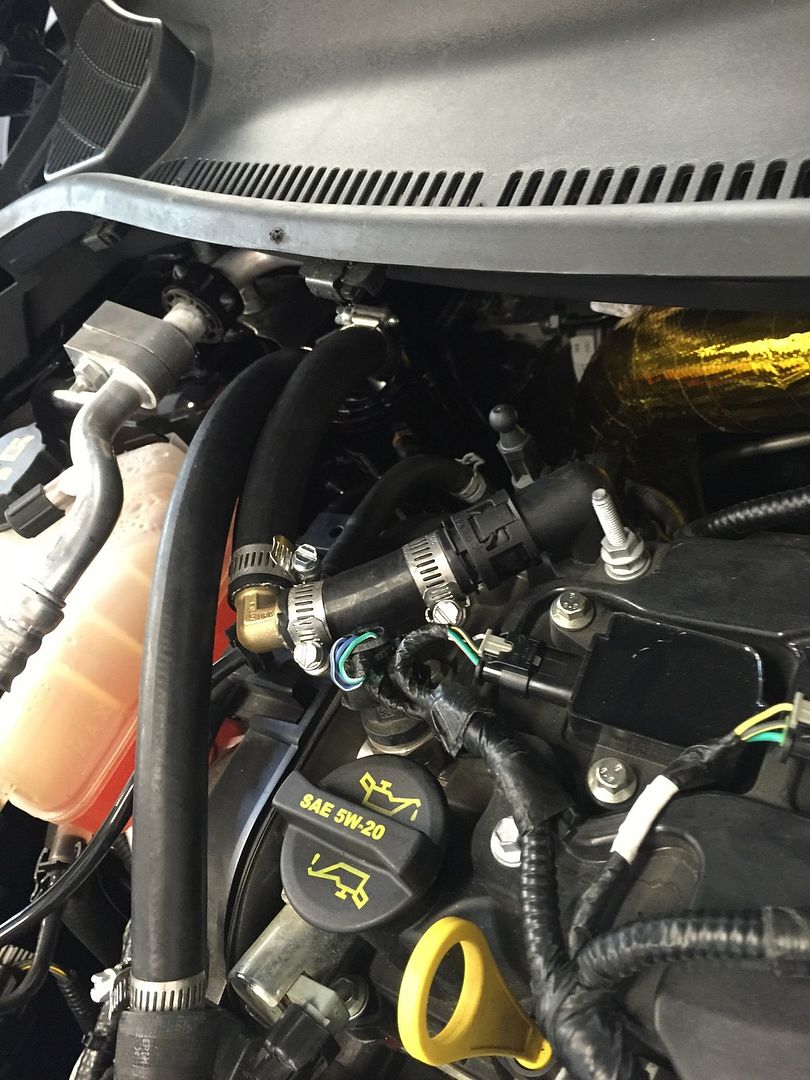

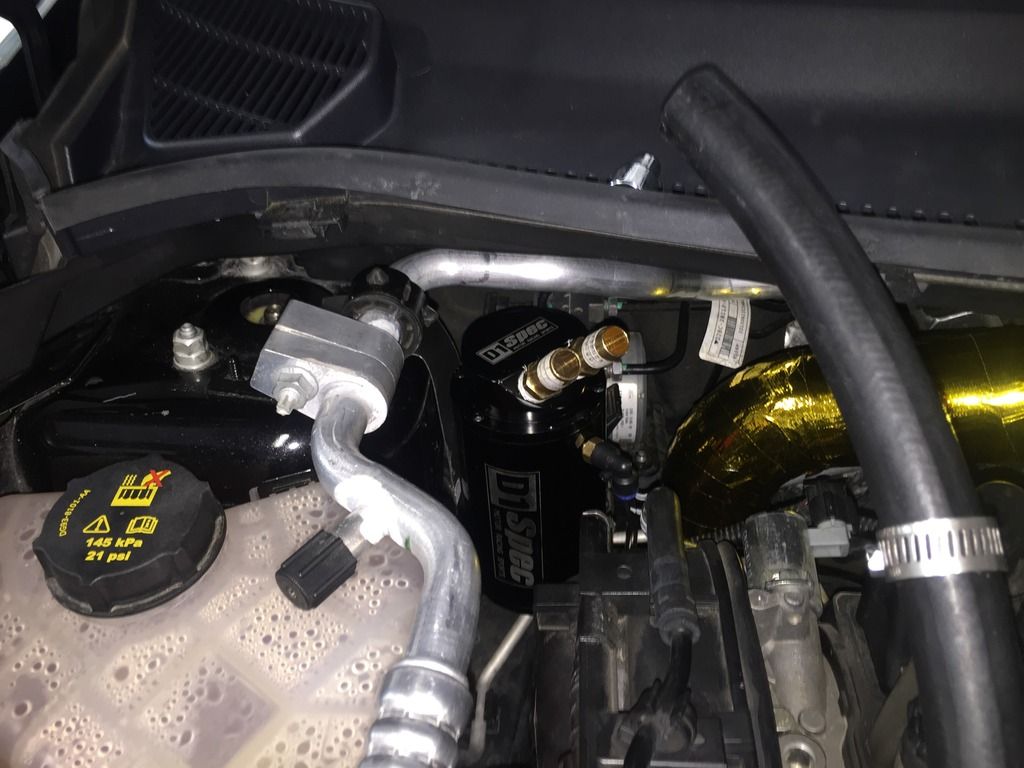
Here are more pictures.
I plan on doing a write up once mine is installed.


We trimmed the engine cover to clear the tube better


Thread Starter
#27
Thread Starter
#27
Catch can is in now.
Parts list:
D1 racing catch can
6- 1/2" hose clamps
25" of 5/8" power steering hose
2- 3/8 pipe thread 5/8 nipple fittings
1- 90* 5/8"-5/8" barbed fitting
1- straight 5/8"- 5/8" barbed fitting
Copper tube to fit inside the 5/8 fitting
Jb weld
Black permatex
2- Stainless steel scrubbers
A piece of 2"x10" piece of aluminum or other metal for mounting bracket
So- the hardest part was tapping the baby unknown threads of the stock can to 3/8 pipe thread, a local hardware store tapped our cans with the fittings installed for 22 bucks.
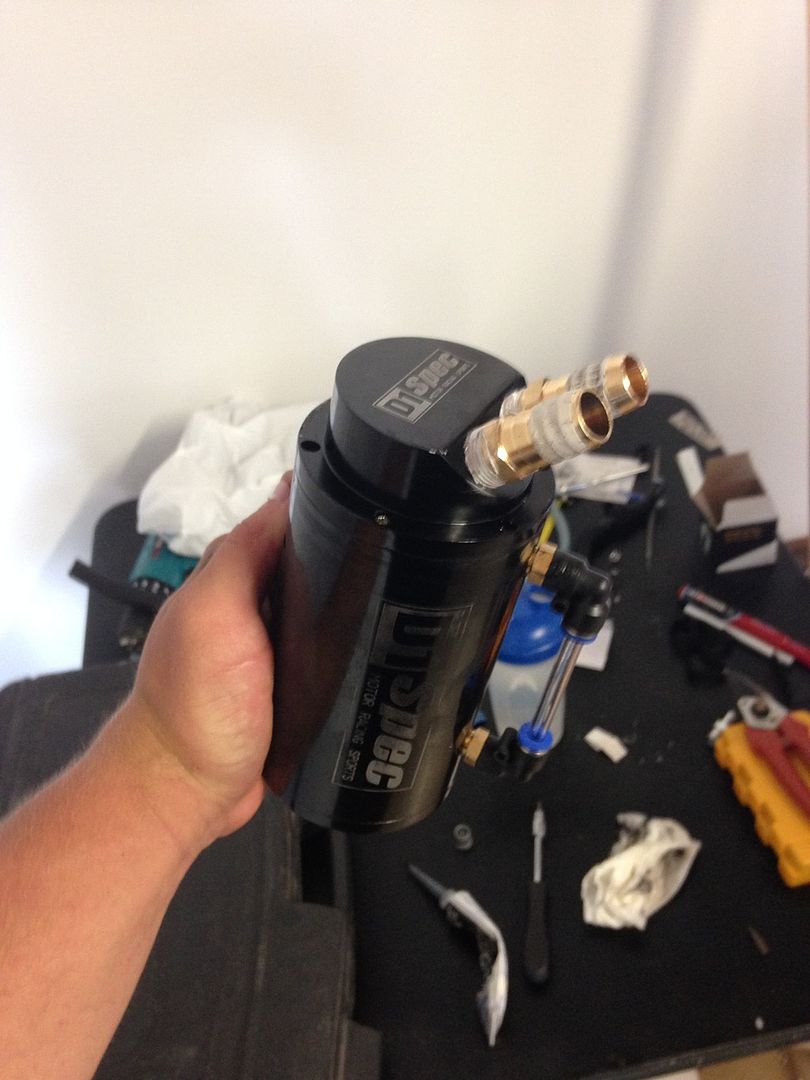
After that, we went home, we drilled numerous holes in a copper pipe that could fit in the fitting and bent it to turn the pipe into the can.
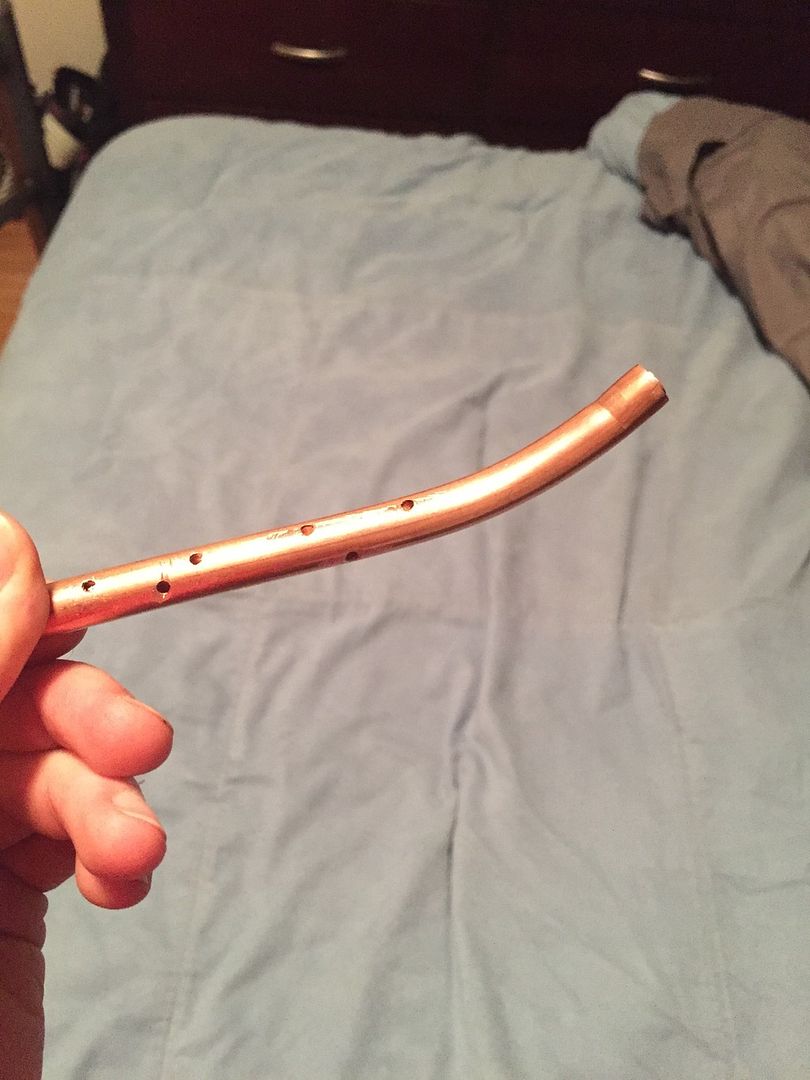
Then jb welded the copper pipe into the right fitting in the top of the can.
Take your stainless scrubber and open them up where there is a hole in the middle then put the copper pipe through the hole. We used two scrubbers per can.
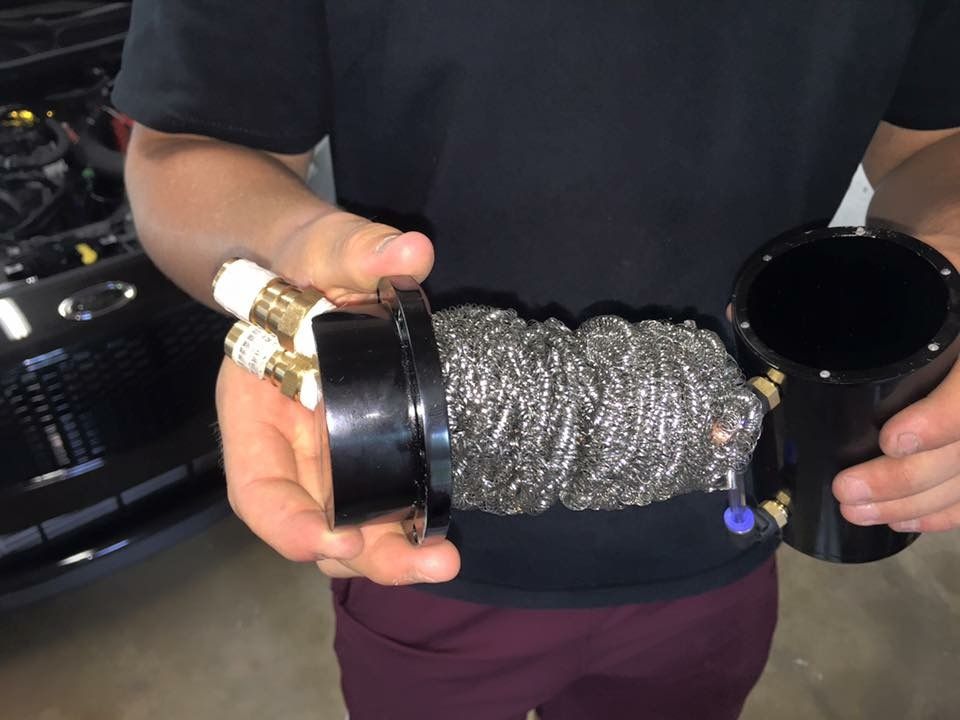
Take your permatex and run a bead around the top of the can then place the top to the can, including the copper pipe and scrubbers into the can, put the 6 screws back and tighten down.
The can is finished- baffled- and ready to be installed.
Now, mark the holes where you need to drill in your 2x10 plate to mount to the can.
Drill the holes and mount to the can.
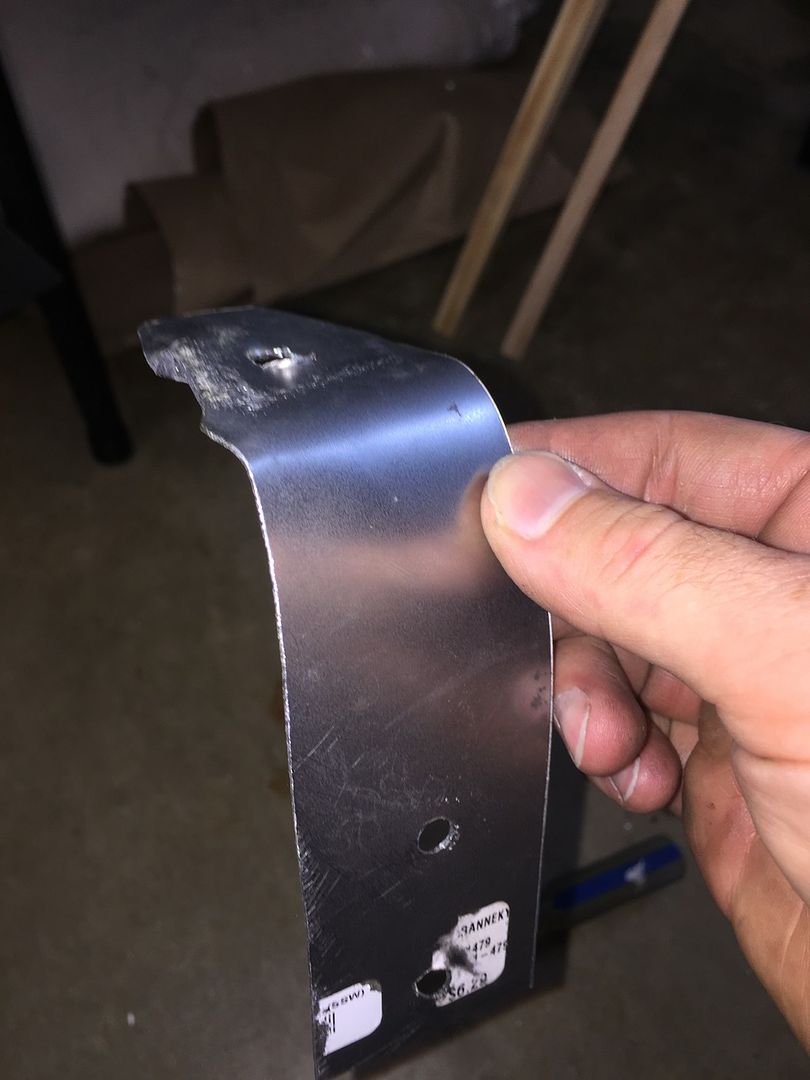
We used some old seatbelt to act as a isolator and keep the can from being scratched and rattled.
Attach the two screws to the can.
Remove the 13mm nut from the shock mount and mark the hole to drill, remove, drill, then mount it all up.
The can is in place and ready to go.
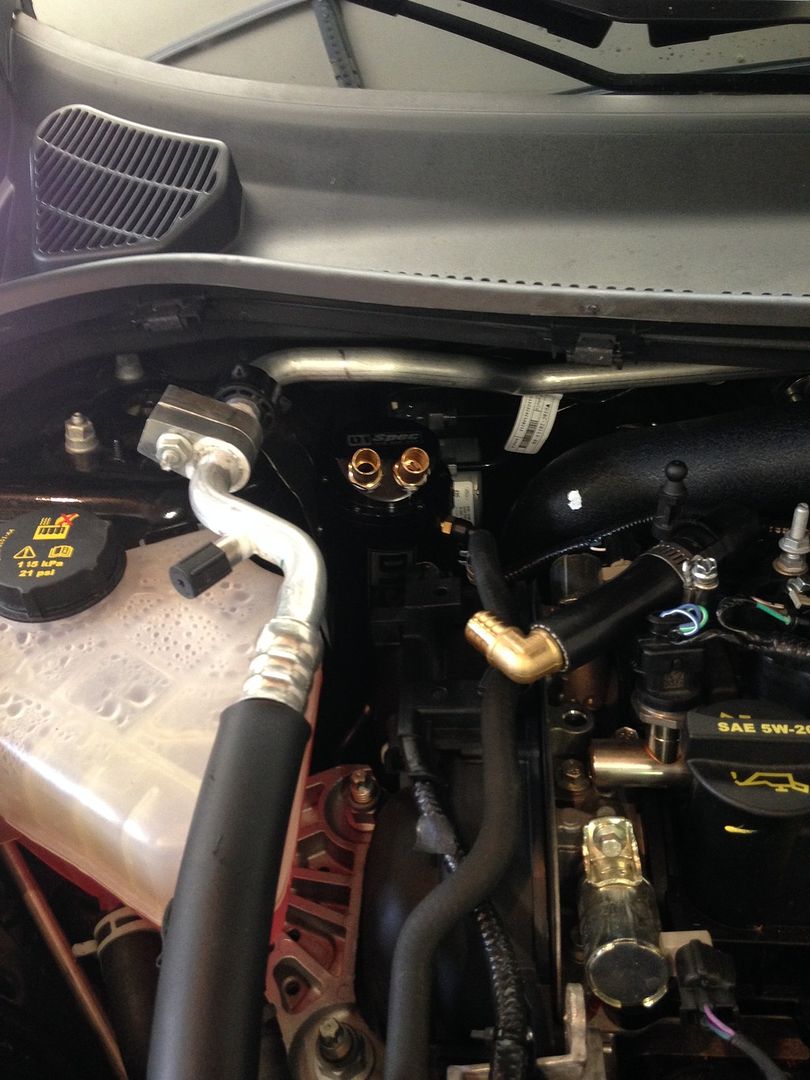
Take your pcv line, cut it in two where the plastic is smooth, basically right in the middle of the hose.
This side will now need to be boiled to let the plastic expand, take your straight 5/8" fitting and work it in the hose. It's very challenging but getting a couple barbed on is more than enough. After you run it under cool water it should form to the barb and it won't come off. Now take some of your power steering hose and put it over the other end of the barb, then measure the distance to the left side fitting on the can, cut, and put hose clamps on the two barbs.
Now, on the other side of the pcv hose, you will need to take a razor and remove the hose from the fitting going to the motor. The fitting is barbed and again, the plastic hose is form fitted to it. Cut it off and keep the fitting. Slide the power steering hose over.
Now, take the power steering hose and put it on the catch can, run the hose straight out, and cut it where the two hoses would intersect. Now insert your 90* fitting and put clamps on.
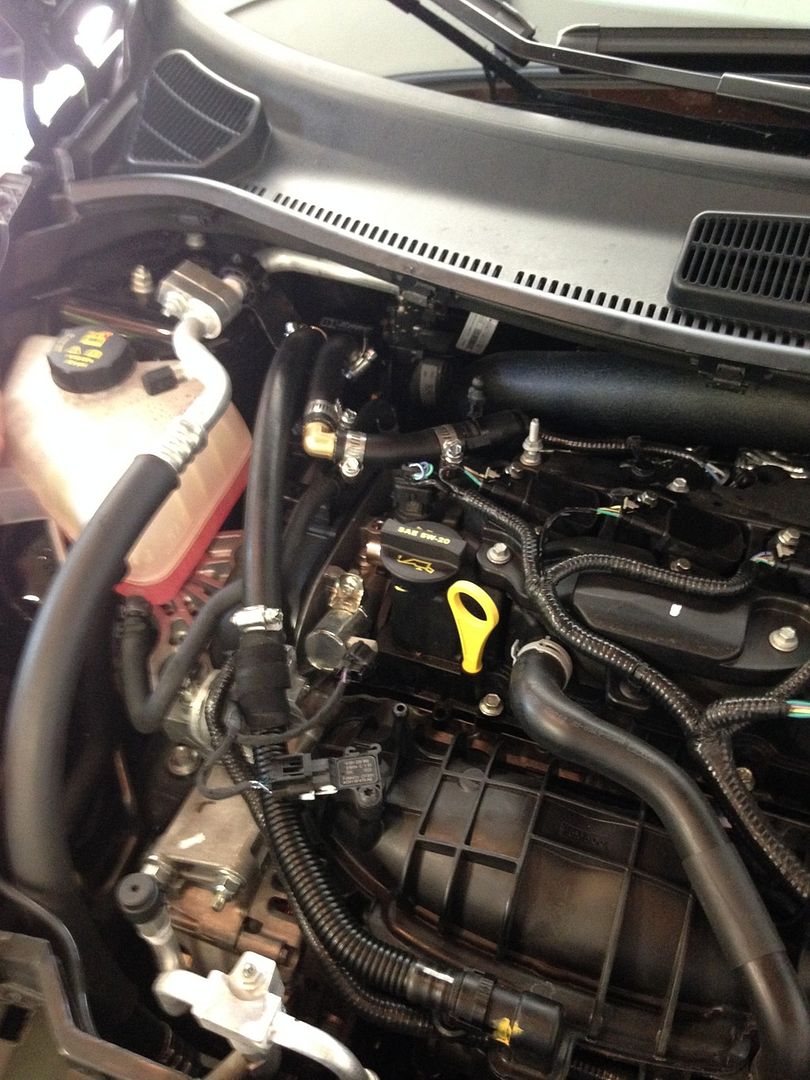
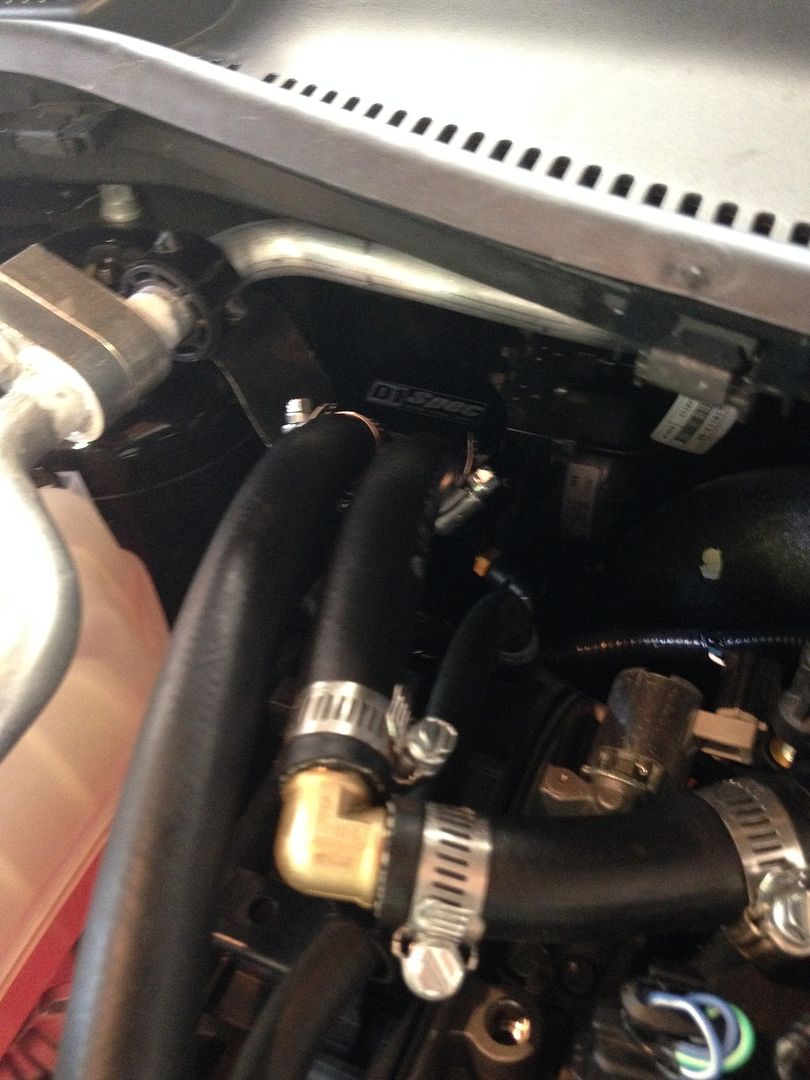
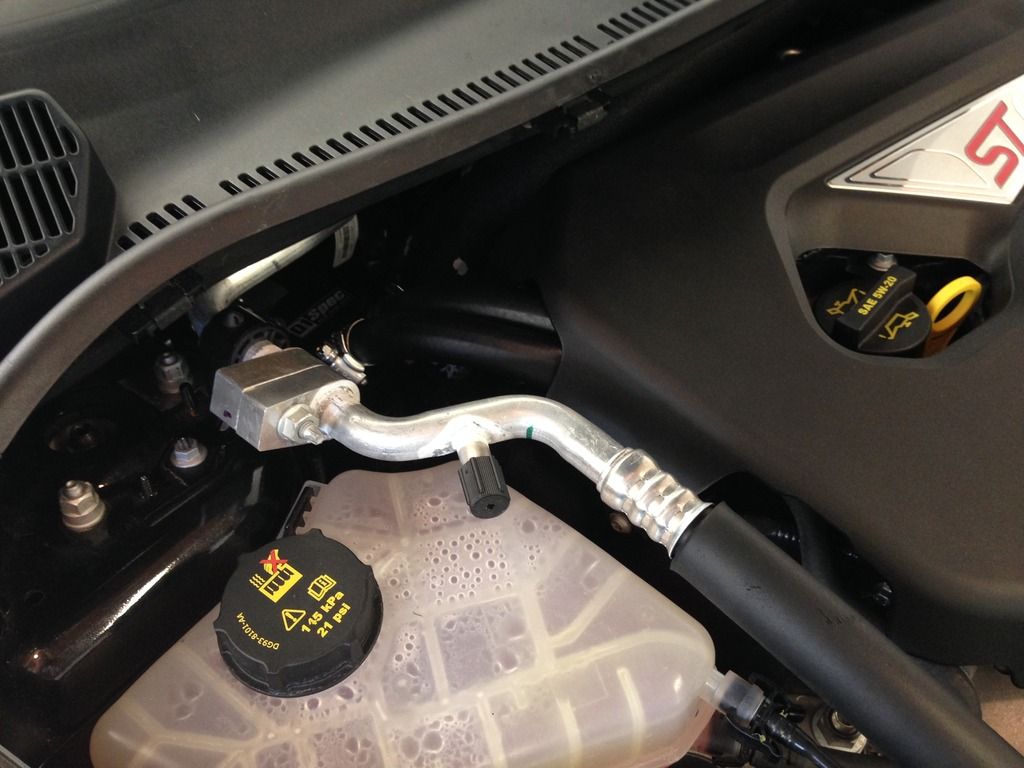
Guess what:
Your catch can system is finished.
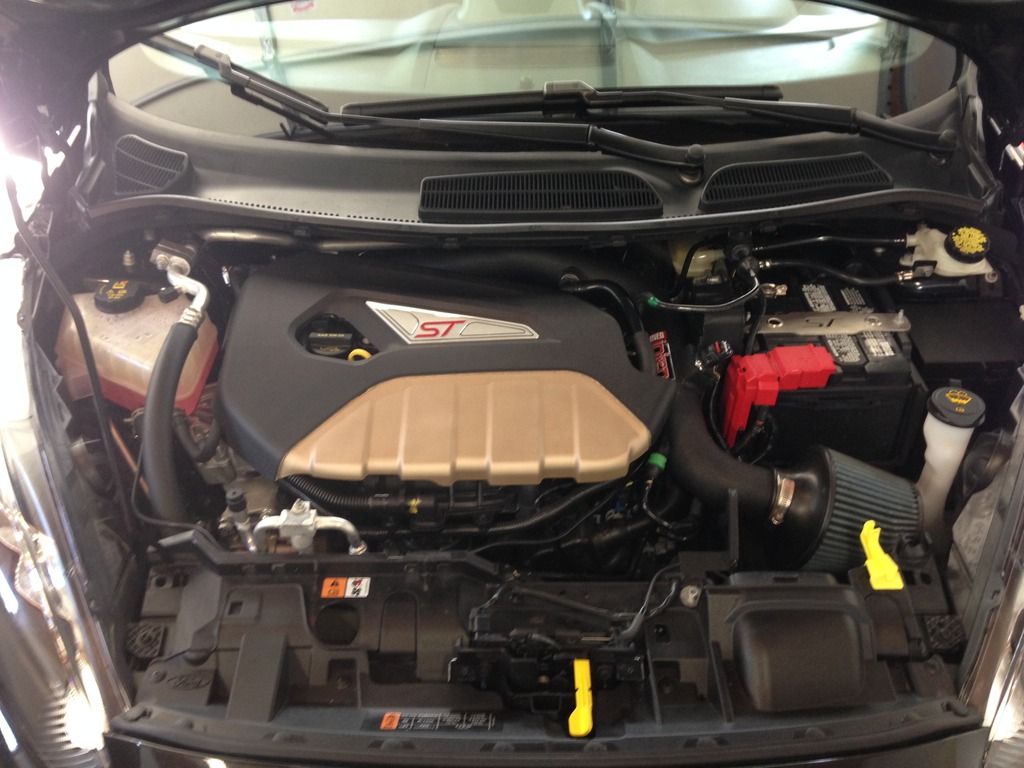
Parts list:
D1 racing catch can
6- 1/2" hose clamps
25" of 5/8" power steering hose
2- 3/8 pipe thread 5/8 nipple fittings
1- 90* 5/8"-5/8" barbed fitting
1- straight 5/8"- 5/8" barbed fitting
Copper tube to fit inside the 5/8 fitting
Jb weld
Black permatex
2- Stainless steel scrubbers
A piece of 2"x10" piece of aluminum or other metal for mounting bracket
So- the hardest part was tapping the baby unknown threads of the stock can to 3/8 pipe thread, a local hardware store tapped our cans with the fittings installed for 22 bucks.

After that, we went home, we drilled numerous holes in a copper pipe that could fit in the fitting and bent it to turn the pipe into the can.

Then jb welded the copper pipe into the right fitting in the top of the can.
Take your stainless scrubber and open them up where there is a hole in the middle then put the copper pipe through the hole. We used two scrubbers per can.

Take your permatex and run a bead around the top of the can then place the top to the can, including the copper pipe and scrubbers into the can, put the 6 screws back and tighten down.
The can is finished- baffled- and ready to be installed.
Now, mark the holes where you need to drill in your 2x10 plate to mount to the can.
Drill the holes and mount to the can.

We used some old seatbelt to act as a isolator and keep the can from being scratched and rattled.
Attach the two screws to the can.
Remove the 13mm nut from the shock mount and mark the hole to drill, remove, drill, then mount it all up.
The can is in place and ready to go.

Take your pcv line, cut it in two where the plastic is smooth, basically right in the middle of the hose.
This side will now need to be boiled to let the plastic expand, take your straight 5/8" fitting and work it in the hose. It's very challenging but getting a couple barbed on is more than enough. After you run it under cool water it should form to the barb and it won't come off. Now take some of your power steering hose and put it over the other end of the barb, then measure the distance to the left side fitting on the can, cut, and put hose clamps on the two barbs.
Now, on the other side of the pcv hose, you will need to take a razor and remove the hose from the fitting going to the motor. The fitting is barbed and again, the plastic hose is form fitted to it. Cut it off and keep the fitting. Slide the power steering hose over.
Now, take the power steering hose and put it on the catch can, run the hose straight out, and cut it where the two hoses would intersect. Now insert your 90* fitting and put clamps on.


Guess what:
Your catch can system is finished.

This a very similar setup to mine (thread here). Except I've made a few improvements. I've converted to circulating system because D1JL pointed out that vacuum is required to pull the vapour through the can which is true because I started to collect a LOT more. I've also removed the drilled holes tube and replaced it with a bronze sinter filter media at the fitting, jb welded. This provides better oil-air separation and combined with SS scrubs makes it collect oil a lot easier. Getting at least 10mL per 1000km...
JBR posted they have their FiST can ready to go. Doesn't seem like they include the OE Ford quick connects though.
No... JBR doesn't provide the Ford quick connects. However, if you choose to (and I suggest it) the OEM hose is plastic and they are heat shrank in; they can be removed and reused without error. Here's the thing, unless a company has a deep relationship with Ford, you won't be getting those connections. As you all may know, or will learn, Ford isn't in the habit of selling individual pieces. They just aren't. If you happened to break one of them, guess what? You're buying the entire tube for a $10 (maybe more) connection. I'll be posting more info on the JBR catch can later today as he used my car to do it. For ~$175, it's the best deal aside from making your own.
Similar threads
-
-
-
Revised Mishimoto Fiesta ST oil catch can kit - details and pics inside
- Started by ron@whoosh
- Replies: 6
-
-
-
-
-
Keep your intake clean! Ford Fiesta ST Oil Catch Can R&D by Mishimoto
- Started by mishimoto
- Replies: 338
-
