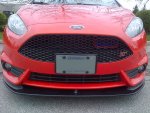
Hey CG, how did you manage to get your rally armor flaps on flush? In the front I bend the bracket but it ends up only flush until the ford end cap. Does the bracket behind that has the bolts on it need to be bent too? I've watched the videos lots of times on how to install and I just can't get the damn thing flush. If I bend the bracket much more it's probably going to snap.
-
Sign Up! To view all forums and unlock additional cool features
Welcome to the #1 Fiesta ST Forum and Fiesta ST community dedicated to Fiesta ST owners and enthusiasts. Register for an account, it's free and it's easy, so don't hesitate to join the Fiesta ST Forum today!
CG's daily fun ride
- Thread starter CanadianGuy
- Start date
Thread Starter
#162
Thread Starter
#162
Hey CG, how did you manage to get your rally armor flaps on flush? In the front I bend the bracket but it ends up only flush until the ford end cap. Does the bracket behind that has the bolts on it need to be bent too? I've watched the videos lots of times on how to install and I just can't get the damn thing flush. If I bend the bracket much more it's probably going to snap.
Thread Starter
#163
Thread Starter
#163
March 13th
Boring winter with little to do on the car but enjoy it and spend fictional money on a wish list. But I did end up picking the Boomba ultimate shift package early in the season and with the warm weather this past weekend as well as no-one to bother me I decided to install the shifter portion.
Well the install went very smoothly (follow the directions carefully). Had to fill a bit from the original reverse lock out to remove any binding. With the bushings and the lever it is amazing.![Thumbs Up [thumb] [thumb]](/images/smilies/icon_smile_thumb.gif) Tried it in position 2 and position 3 (currently). I seriously love it. Mushiness gone, nice crisp shifts. Just love it. Once it's warmer i'll tackle the transmission adapter and bushings there. Likely change the tranny fluids as well since I will be in the area.
Tried it in position 2 and position 3 (currently). I seriously love it. Mushiness gone, nice crisp shifts. Just love it. Once it's warmer i'll tackle the transmission adapter and bushings there. Likely change the tranny fluids as well since I will be in the area.
Boring winter with little to do on the car but enjoy it and spend fictional money on a wish list. But I did end up picking the Boomba ultimate shift package early in the season and with the warm weather this past weekend as well as no-one to bother me I decided to install the shifter portion.
Well the install went very smoothly (follow the directions carefully). Had to fill a bit from the original reverse lock out to remove any binding. With the bushings and the lever it is amazing.
Boring winter with little to do on the car but enjoy it and spend fictional money on a wish list. But I did end up picking the Boomba ultimate shift package early in the season and with the warm weather this past weekend as well as no-one to bother me I decided to install the shifter portion.
Well the install went very smoothly (follow the directions carefully). Had to fill a bit from the original reverse lock out to remove any binding. With the bushings and the lever it is amazing.![Thumbs Up [thumb] [thumb]](/images/smilies/icon_smile_thumb.gif) Tried it in position 2 and position 3 (currently). I seriously love it. Mushiness gone, nice crisp shifts. Just love it. Once it's warmer i'll tackle the transmission adapter and bushings there. Likely change the tranny fluids as well since I will be in the area.
Tried it in position 2 and position 3 (currently). I seriously love it. Mushiness gone, nice crisp shifts. Just love it. Once it's warmer i'll tackle the transmission adapter and bushings there. Likely change the tranny fluids as well since I will be in the area.
Well the install went very smoothly (follow the directions carefully). Had to fill a bit from the original reverse lock out to remove any binding. With the bushings and the lever it is amazing.
How is your EZ LIP holding up in the weather? I had one on my last car, after about six months he grit from the road made its way into the adhesive and corrupted it.
Thread Starter
#165
Thread Starter
#165
Nice updates. I have the Boomba adapter, it's an easy 10 minute install, do it after work today don't wait! 10 minutes!
How is your EZ LIP holding up in the weather? I had one on my last car, after about six months he grit from the road made its way into the adhesive and corrupted it.
How is your EZ LIP holding up in the weather? I had one on my last car, after about six months he grit from the road made its way into the adhesive and corrupted it.
As far as the EZ lip, one spot let go do to the fact I installed it when it was cold. One screw helped keep it in place. I do not see any damage on it and went through car washes once a week during the winter months to remove salt and sand. For $30 I am satisfied.
Thread Starter
#166
Thread Starter
#166
April 19th
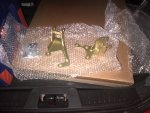
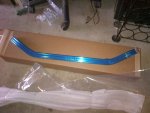
Picked up a couple of parts. A mountune Spliter and a Mountune tower brace. Installed the tower brace. The install is fairly easy but the print outs I got were very poor. I got the PDF version if you require them or contact mountuneusa and they will provide them quickly. Overall I am satisfied with the tower brace. Very high quality product with zero fitment issues. It feels like it adds some stiffness when really pushing it but I would have to test it with and without it on back to back for me to be sure it is not placebo.
Few challenges.
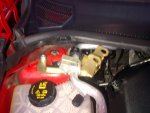
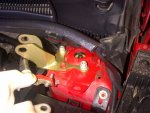
1- Start with the driver side brake reservoir removal. IF you cannot do it removal the cowling (wiper, etc..) or you will not be able to reinstall it. I had to use a stubby ratcheting wrench and needle nose pliers, got it done but slow.
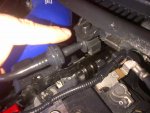
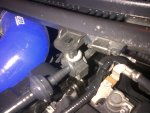
2- The clip for the hose relocation is not too clear in the drawings. It what I am pointing at and make sure the oval hole is toward the bottom to reinsert the clip. If you are forcing anything its not correct.
3- Do not tighten ANY bolts or nuts until everything is assembled to help align everything.
4- Make sure the brake reservoir hose is behind the bracket One picture it is wrong.
Now this will block the engine cover from being taken off but all you require is to remove the passenger side bolt and it will be enough to lift the cover off.
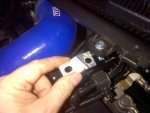
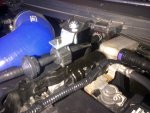
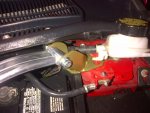
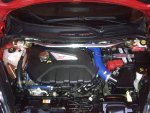


Thread Starter
#167
Thread Starter
#167
April 20-21st
Got the Mountune splitter hung and giving it a bunch or black trim paint (flat black like the shark fin) to protect it and make it really nice. Paint is wet on the pictures hence the glossy look. It is a nice and sturdy piece. Much bigger than I though. Will be installing in the coming weeks.
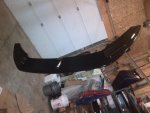
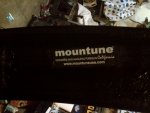
Got the Mountune splitter hung and giving it a bunch or black trim paint (flat black like the shark fin) to protect it and make it really nice. Paint is wet on the pictures hence the glossy look. It is a nice and sturdy piece. Much bigger than I though. Will be installing in the coming weeks.


Thread Starter
#169
Thread Starter
#169
Looking good. I love the splitter but I will personally have to do an EZ lip or something because I do a lot of work using ramps and there's no way the splitter will clear then without scraping, even stock height
Sent from my iPhone using Tapatalk
Sent from my iPhone using Tapatalk
Thread Starter
#170
Thread Starter
#170
April 24th. Splitter
Lazy Sunday and needed to get the splitter installed. I knew it was going to be a chore as I had to remove the Ezlip. Took an hour or more to remove the ezlip with some bug&tar remover and WD40. More it soaked easier it was. Nothing wrong with the Ezlip. It worked well and is very economical. For the moutune splitter the install is easy. Remove the bumper cover, preinstall it drill some holes and then install it. The hardest is the rivnut. Now I will redo the install in the future to also add rivnuts for the new bolts to allow the splitter to be easily removed for winter. One thing to note there is one 7mm you may not be able to install near the center post but it is not required. I did by using a 7mm ratcheting wrench 1/4 socket is too big.
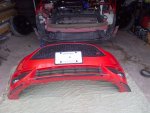
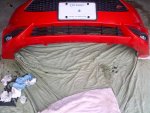
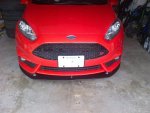

Lazy Sunday and needed to get the splitter installed. I knew it was going to be a chore as I had to remove the Ezlip. Took an hour or more to remove the ezlip with some bug&tar remover and WD40. More it soaked easier it was. Nothing wrong with the Ezlip. It worked well and is very economical. For the moutune splitter the install is easy. Remove the bumper cover, preinstall it drill some holes and then install it. The hardest is the rivnut. Now I will redo the install in the future to also add rivnuts for the new bolts to allow the splitter to be easily removed for winter. One thing to note there is one 7mm you may not be able to install near the center post but it is not required. I did by using a 7mm ratcheting wrench 1/4 socket is too big.


Thread Starter
#173
Thread Starter
#173
Sunday May 1st. Big Mouth
Install the [MENTION=3407]VelossaTech[/MENTION] Big Mouth today. Other than the nut everything is very easy. Solid product and well worth the investment. Sorry I have a shitty cell phone. Will get better pictures tomorrow. Glad they included an extra nut but a rivnut would have been better for me (which I did end up using). Quick cruise and it was fine. More giggles per mile and seems to keep temp down at speed (60+miles per hour). At WOT @ 60mph I was at ambient on the log, 2 back to back pulls. Now I know the FMIC was a huge factore but before I would be around 2-3 degree above. I love it.
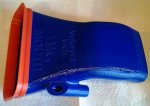
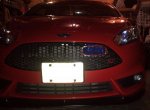
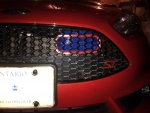
Install the [MENTION=3407]VelossaTech[/MENTION] Big Mouth today. Other than the nut everything is very easy. Solid product and well worth the investment. Sorry I have a shitty cell phone. Will get better pictures tomorrow. Glad they included an extra nut but a rivnut would have been better for me (which I did end up using). Quick cruise and it was fine. More giggles per mile and seems to keep temp down at speed (60+miles per hour). At WOT @ 60mph I was at ambient on the log, 2 back to back pulls. Now I know the FMIC was a huge factore but before I would be around 2-3 degree above. I love it.


Thread Starter
#176
Thread Starter
#176
Do you have any pics with the hood up where you had to do the cutting. I'm sitting on the fence on this one I'm just concerned with hacking up the panel. Thanks.
Thread Starter
#178
Thread Starter
#178
May 28th 2016; Lower chassis brace installation and update on Big Mouth
After almost a month of usage and about 3000 km (1800m) I looked into the Big Mouth while doing my oil change.
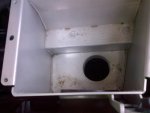
Due to the constructions on the roads I use and some off road, as I expected, there is most debris in the air box. I had added a piece of window screen between the BM and the air box snorkel to prevent any big pieces (rock, leaves, etc..) from being sucked in. There was no real evidence of water ingression. After the month of driving the BM, to me, is the best CAI. It gets the cold air from the front of the car and drives it into the air box. At highway speeds, I swear the turbo seems more responsive, power easier to tap into, but I don't have any factual data to back that up. All and all I highly recommend it.
---------------
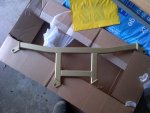
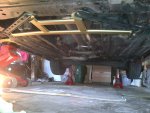
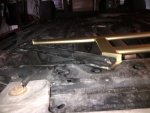
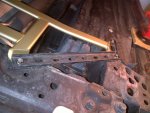
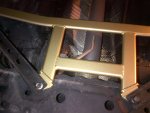
As part of the oil change I also took the time to install the Mountune lower chassis brace. This brace does not interfere with the skid plat I have and is very straight forward to install. Remove the 4 bolts holding the current braces and reinstall the new brace along with the old. I recommend to start with the front two bolts and only get 2 turns on them before trying to align the last 2 bolts. Along with the upper strut brace the car is now more stable in the front when tacking hard corners, even over uneven roads. The front stays flat and pointed in the direction you want with little roll. Now I need to get the rear tighten up a wee bit. I recommend this brace and it can be added to other brace kits on the markets to even further stiffen the front.
After almost a month of usage and about 3000 km (1800m) I looked into the Big Mouth while doing my oil change.

Due to the constructions on the roads I use and some off road, as I expected, there is most debris in the air box. I had added a piece of window screen between the BM and the air box snorkel to prevent any big pieces (rock, leaves, etc..) from being sucked in. There was no real evidence of water ingression. After the month of driving the BM, to me, is the best CAI. It gets the cold air from the front of the car and drives it into the air box. At highway speeds, I swear the turbo seems more responsive, power easier to tap into, but I don't have any factual data to back that up. All and all I highly recommend it.
---------------
As part of the oil change I also took the time to install the Mountune lower chassis brace. This brace does not interfere with the skid plat I have and is very straight forward to install. Remove the 4 bolts holding the current braces and reinstall the new brace along with the old. I recommend to start with the front two bolts and only get 2 turns on them before trying to align the last 2 bolts. Along with the upper strut brace the car is now more stable in the front when tacking hard corners, even over uneven roads. The front stays flat and pointed in the direction you want with little roll. Now I need to get the rear tighten up a wee bit. I recommend this brace and it can be added to other brace kits on the markets to even further stiffen the front.


Similar threads
-
-
-
-
-
-
-
WRX to FiST? (for autocross and daily)
- Started by AriaFury
- Replies: 5
-
-
2015 Daily driver build project (first project car) -
- Started by TalkToTheFiST
- Replies: 18
-

