CG's daily fun ride

OP
CanadianGuy

CanadianGuy

4000 Post Club
Member ID
#2134
Messages
4,097
Likes
945
Thread Starter #21
June 23rd

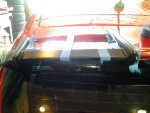
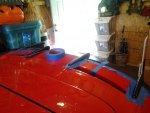
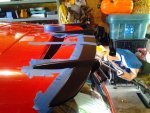
Well I started by only wanting to get the Mountune Winglets attached and ended up doing more.

Started off by fitting the winglets in place and taping off their profiles. This helps 2 ways. Keeps the glue where you want it and off the paint. Also helps relocate the part once you apply the glue to the pieces.
20150623_091823.jpg
20150623_091834.jpg
20150623_095751.jpg

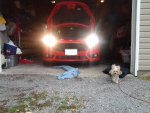
Driver side had led low beam and cool white high beams passenger is is default. Helper in toe.
20150623_130120.jpg

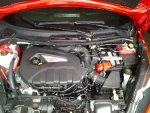
[MENTION=678]no-pistons[/MENTION] battery tie down (several bolts have been lathered with anti seize and all turbo lines have been tighten
)
20150623_142042.jpg

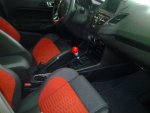
Much bigger (2 1/8" orange with rally stripes and shift positions)
20150623_143104.jpg

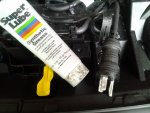
Lubricated electrical connections with dielectric greases, especially the block heater.
20150623_151048.jpg
20150623_151111.jpg

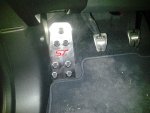
and of course the [MENTION=678]no-pistons[/MENTION] dead pedal.
20150623_162259.jpg

long day but well worth it. This weekend will be the rally armor flaps[tongue]


shouldbeasy

1000 Post Club
Member ID
#1098
Messages
1,469
Likes
824
#22
Now I'm curious as to why you got rid of the COBB RMM. In my mind, after having installed it, it's a world of difference and you can actually feel the car / tires grip more and then lose traction smoothly as opposed to the hopping that happened with the stock RMM.

Glad you've got the car finally - enjoy it and drive the heck out of it! 18,xxx km and I love mine still!


OP
CanadianGuy

CanadianGuy

4000 Post Club
Member ID
#2134
Messages
4,097
Likes
945
Thread Starter #23
Now I'm curious as to why you got rid of the COBB RMM. In my mind, after having installed it, it's a world of difference and you can actually feel the car / tires grip more and then lose traction smoothly as opposed to the hopping that happened with the stock RMM.
I replaced it with "Moutune RMM" No real reason other than Mountune was my first choice. So I first ordered the Cobb through Modbargain at a wicked deal, since February Ford racing has released most of the Mountune stuff, including the RMM and exhaust. So I re-jiged my package with the Ford sales guy to get what I wanted (MP215, Catback(mountune instead of Ford Racing) and RMM) so that I can get it all for 0% financing. I guess I could have tried it and than picked the best one but I figure someone else could get a new instead of used. And Yes I agree it is required I felt the motor a few time move in spirited driving already.


shouldbeasy

1000 Post Club
Member ID
#1098
Messages
1,469
Likes
824
#24
I replaced it with "Moutune RMM" No real reason other than Mountune was my first choice. So I first ordered the Cobb through Modbargain at a wicked deal, since February Ford racing has released most of the Mountune stuff, including the RMM and exhaust. So I re-jiged my package with the Ford sales guy to get what I wanted (MP215, Catback(mountune instead of Ford Racing) and RMM) so that I can get it all for 0% financing. I guess I could have tried it and than picked the best one but I figure someone else could get a new instead of used. And Yes I agree it is required I felt the motor a few time move in spirited driving already.
Nice! 0% is great...

The Mountune Exhaust is a Borla if I'm not mistaken - quality product for sure.


OP
CanadianGuy

CanadianGuy

4000 Post Club
Member ID
#2134
Messages
4,097
Likes
945
Thread Starter #25
The Mountune Exhaust is a Borla if I'm not mistaken - quality product for sure.
Unfortunately you are mistaken

Ford Racing = Borla
http://fordperformanceracingparts.com/parts/part_details.asp?PartKeyField=23471

Mountune is,well, Mountune but sold via Ford Racing, which means ANY Ford dealer can get it as a part in their system, at least in Canada.
http://fordperformanceracingparts.com/parts/part_details.asp?PartKeyField=25223


OP
CanadianGuy

CanadianGuy

4000 Post Club
Member ID
#2134
Messages
4,097
Likes
945
Thread Starter #26
Just returned from a fun drive at night testing new things

Today's list of things
1- Washed, waxed and detailed interior and exterior; Man are there lots of mix media (leather/cloth, paint to trim); Sheesh the Edge is twice as big but twice as easy. Not complaining it was fun!
2- Installed Diode Dynamic LED fog; I love the white and clear colour they project
3- Installed the Rally Armor mudflaps. Very easy install and I highly recommend some medium strength thread lock to keep those screws tight
4- Changed the back-up lights; Need better ones. I tried just the interior ones that I had extras
5- Greased the axle nuts; I used farm grade grease that will not wash out with water or salt. This is for when I change the bearings down the road.
6- Applied more antiseize; mainly on the lugs, ran out of day light or I would have disassembled the brakes.
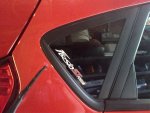
7- Applied the forum decals; Messed one up but that is ok for now.

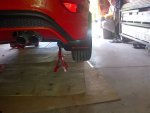
IMG-20150626-00185 (1).jpg

IMG-20150626-00190 (1).jpg


Kip2MyLou

2000 Post Club
Member ID
#568
Messages
2,819
Likes
168
#27
Just returned from a fun drive at night testing new things

Today's list of things
1- Washed, waxed and detailed interior and exterior; Man are there lots of mix media (leather/cloth, paint to trim); Sheesh the Edge is twice as big but twice as easy. Not complaining it was fun!
2- Installed Diode Dynamic LED fog; I love the white and clear colour they project
3- Installed the Rally Armor mudflaps. Very easy install and I highly recommend some medium strength thread lock to keep those screws tight
4- Changed the back-up lights; Need better ones. I tried just the interior ones that I had extras
5- Greased the axle nuts; I used farm grade grease that will not wash out with water or salt. This is for what I change the bearings down the road.
6- Applied more antiseize; mainly on the lugs, ran out of day light or I would have disassembled the brakes.
7- Applied the forum decals; Messed on up but that is ok for now.

View attachment 5484

View attachment 5485
I think you're the first person that has stated the installation of the mud flaps being very easy. I've been debating getting them but have read some stories of it not being so easy. And then I watched the install video posted by Spoon tuning and they were drilling into their fenders which is something I definitely don't want to do. Here's that video if you haven't seen it.

[video=youtube;T0AhWAhT73k]https://www.youtube.com/watch?v=T0AhWAhT73k[/video]

Did you have problems at all with the installation?


OP
CanadianGuy

CanadianGuy

4000 Post Club
Member ID
#2134
Messages
4,097
Likes
945
Thread Starter #28
I think you're the first person that has stated the installation of the mud flaps being very easy. I've been debating getting them but have read some stories of it not being so easy. And then I watched the install video posted by Spoon tuning and they were drilling into their fenders which is something I definitely don't want to do. Here's that video if you haven't seen it.

Did you have problems at all with the installation?
I would not call it a problem but there is a step missing the instruction but in the video you attached where you need to form/bend the front brackets. I to was concerned about the drilling. But the front one is to add 3 mounting points in the plastic lining that are covered by the plugs and the rear is also in the plastic bumper cover to replace a rivet with another plug/screw. Therefore only the front ones a new holes. Now a large drill will be a challenge to position on the rear rivet so a smaller or right angle works best but you can bend the bumper away from the car to get a straight shot.

I will say this, this will not be an item someone will easily be able to sell used. Those plugs are one way trips in some instances. I took my time and spent 2 hours or so doing it, stopping often for a drink of coffee or to chat.

And I will vouch that even after 1 week the amount of sand and kicked up rocks in the rear bumper and INSIDE the rocker panel cover was mind blowing. So glad I got them.

If you do get them and get hung up on a step let me know i'll walk you through it.


OP
CanadianGuy

CanadianGuy

4000 Post Club
Member ID
#2134
Messages
4,097
Likes
945
Thread Starter #29
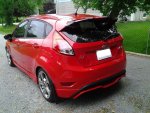
There she sits full of 94 octane.

20150627_082355 1.jpg

I did also change the plate holder after this picture.

But man I can tell you the brake dust is something fierce. I coast and brake to lights instead of down shifting. Not complaining just got to keep up with the cleaning before it bakes in.


OP
CanadianGuy

CanadianGuy

4000 Post Club
Member ID
#2134
Messages
4,097
Likes
945
Thread Starter #30
Here is another vantage


OP
CanadianGuy

CanadianGuy

4000 Post Club
Member ID
#2134
Messages
4,097
Likes
945
Thread Starter #31
One minor update today:

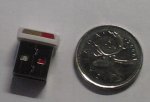
20150628_191922.jpg

USB drive (using a micro sd card). Wanted to show how tiny it is. That is a quarter.

I warn anyone getting into the car I have eclectic music taste. Opera, classical, rap, country, metal, trance, dance, rock, classic rock, you name it is likelyu on the usb. Be warned... [rockon]


Member ID
#1960
Messages
48
Likes
4
#32
How do you like the Xeon Depot LED?
I been seeing mixed review on them.


OP
CanadianGuy

CanadianGuy

4000 Post Club
Member ID
#2134
Messages
4,097
Likes
945
Thread Starter #33
How do you like the Xeon Depot LED?
I been seeing mixed review on them.
I like them. They are nice, clear, bright and white. To me it was worth the money especially since where I drive there is no street lights. Had to adjust the height (not much) of one but that is a factory issue. There is a spur/edge on the light due to the reflector but it is very livable.


Member ID
#2071
Messages
312
Likes
125
#34
I like them. They are nice, clear, bright and white. To me it was worth the money especially since where I drive there is no street lights. Had to adjust the height (not much) of one but that is a factory issue. There is a spur/edge on the light due to the reflector but it is very livable.
You're better off doing an h9 bulb, double the light of those LEDS.


OP
CanadianGuy

CanadianGuy

4000 Post Club
Member ID
#2134
Messages
4,097
Likes
945
Thread Starter #35
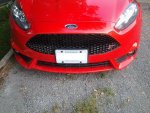
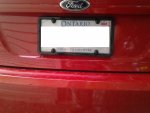
Stopped at the local parts store to get rid of the dealer plate. Picked up a clear shell, black trim, stainless steel screws and black screw cap covers.
20150629_192807.jpg
20150629_192827.jpg

Turned out pretty good. I tried without the black frame, but it seem lacking. Ya she is dirty but the rain and the gravel is what I have to contend with.


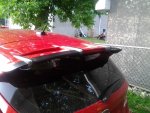
Also got another shot of the winglet.

20150629_192854.jpg


Kip2MyLou

2000 Post Club
Member ID
#568
Messages
2,819
Likes
168
#36
Stopped at the local parts store to get rid of the dealer plate. Picked up a clear shell, black trim, stainless steel screws and black screw cap covers.
View attachment 5537
View attachment 5538

Turned out pretty good. I tried without the black frame, but it seem lacking. Ya she is dirty but the rain and the gravel is what I have to contend with.


Also got another shot of the winglet.

View attachment 5539
I just noticed your front plate is positioned higher, out of the way of the intercooler. What are the top two bolts attached to? And I'm guessing the bottom two are attached the pre existing top holes that came from the dealer plate?


OP
CanadianGuy

CanadianGuy

4000 Post Club
Member ID
#2134
Messages
4,097
Likes
945
Thread Starter #37
I just noticed your front plate is positioned higher, out of the way of the intercooler. What are the top two bolts attached to? And I'm guessing the bottom two are attached the pre existing top holes that came from the dealer plate?
The plate is attached to a form fitting mount similar to:


It is riveted to the bumper. The plate screws into the mount not the bumper.

-------------------
Edited since I found the correct one


Kip2MyLou

2000 Post Club
Member ID
#568
Messages
2,819
Likes
168
#38
The plate is attached to a form fitting mount similar to:


It is riveted to the bumper. The plate screws into the mount not the bumper.
Very nice. Where'd you get that type of plate? I just bought bumper plugs to get rid of my plate hanging over my intercooler. But just in case I get hit with not having a front plate I'd still like something like this to stay out of my intercooler slot.


OP
CanadianGuy

CanadianGuy

4000 Post Club
Member ID
#2134
Messages
4,097
Likes
945
Thread Starter #39
Actually came with the vehicle. Curiously I went looking. Its a Ford part


Found the ST one
OEM NEW 2014-2015 Ford Fiesta Front Bumper License Plate Bracket D2BZ17A385AA

http://www.ebay.com/itm/OEM-NEW-201...iesta|Submodel:ST&hash=item3aa6a73b1e&vxp=mtr

Has the supports to hold it in place. I drilled two more holes on the bottom to make it symmetrical cutting the L pockets


Kip2MyLou

2000 Post Club
Member ID
#568
Messages
2,819
Likes
168
#40
Okay cool thanks man. Those two holes should fit into the two holes I already have from my current plate.


Similar threads


Top