• Sign Up! To view all forums and unlock additional cool features

    Welcome to the #1 Fiesta ST Forum and Fiesta ST community dedicated to Fiesta ST owners and enthusiasts. Register for an account, it's free and it's easy, so don't hesitate to join the Fiesta ST Forum today!


koozy's ST

OP
koozy

koozy

3000 Post Club
Messages
3,213
Likes
1,899
Location
Los Angeles, CA, USA
Thread Starter #321
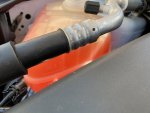
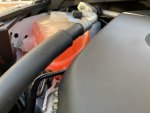
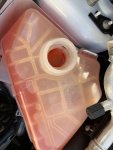
Fun fact. Unlike gear or motor oil, it's ok to overfill coolant beyond the MAX indicator. I recently did this after installing the 180 thermostat, flushing the cooling system and bleeding air out. I wanted to make sure I was not going to run low on coolant while out on the road in addition to carrying gallon in the rear hatch.

First the built in filter and now I discover there's a safety bleed that built into the reservoir in the event the coolant cap has failed or overfilling beyond what the system can handle. I'm really finding appreciation for the OE coolant reservoir.

This is my current coolant level, it hasn’t gone down and it's perfectly fine. IMO, it's better to have a little more coolant than not enough. Kudos if you can see the safety built in.

ps. Bleeding the system is ridiculously easy on the FiST and even easier with the Mishi radiator bleeder valve.


Attachments

M-Sport fan

9000 Post Club
Messages
14,460
Likes
7,011
Location
Princeton, N.J.
During the roadside, spot check stops, do they break out the under car mirrors, or do they just lift the hood and 'fine tooth comb' it?

That new shield setup looks 'factory' clean. [thumb]


OP
koozy

koozy

3000 Post Club
Messages
3,213
Likes
1,899
Location
Los Angeles, CA, USA
Thread Starter #324
Depends on which enforcement and at their discretion.


Sent from my iPhone using Tapatalk


Perfblue15

1000 Post Club
Messages
1,375
Likes
342
Location
Canyon country
I really like the heat shield! I need to make something similar for my car. I keep finding barbeque'd harnesses and melted wires on the back side of my engine. Wanna sell me the old one lol [emoji23]

Sent from my SM-G965U using Tapatalk


OP
koozy

koozy

3000 Post Club
Messages
3,213
Likes
1,899
Location
Los Angeles, CA, USA
Thread Starter #326
Interesting that you have cooked some parts, IIRC you wrapped your manifold. My old shield is no longer worthy lol.


Sent from my iPhone using Tapatalk


Perfblue15

1000 Post Club
Messages
1,375
Likes
342
Location
Canyon country
Interesting that you have cooked some parts, IIRC you wrapped your manifold. My old shield is no longer worthy lol.


Sent from my iPhone using Tapatalk
Yes sir it is wrapped which in theory should have protected the wiring back there. I'm gonna blame it on 20 minute open track sessions lol. I also think that wrap doesn't help as much as some of us think it does. I'm going to be cutting the wrap off and going for something similar to your set up soon. I may even coat the header while I'm at it.

I'm tired of replacing pigtails and chasing electrical gremlins.[emoji12]

Sent from my SM-G965U using Tapatalk


Last edited:
OP
koozy

koozy

3000 Post Club
Messages
3,213
Likes
1,899
Location
Los Angeles, CA, USA
Thread Starter #328
Not sure what material you're going to use, but some are not cheap. My only advice is to measure twice and cut once. [thumb]
I made sure I was going to be near the mark by making one out of cardboard first.


V_2

Active member
Messages
504
Likes
166
Location
Murfreesboro
Looks great! What product did you go with? I have been looking at headershield for doing something like this.

Edit: header armor, not shield.


OP
koozy

koozy

3000 Post Club
Messages
3,213
Likes
1,899
Location
Los Angeles, CA, USA
Thread Starter #330
Embossed layered aluminum. I have it so that it hovers over the manifold providing a gap of air and not really touching the manifold at all.


KnockOff

1000 Post Club
Messages
1,348
Likes
453
Location
Menifee
That looks really nice bro. Like brofessional.

Sent from my SM-G965U using Tapatalk


OP
koozy

koozy

3000 Post Club
Messages
3,213
Likes
1,899
Location
Los Angeles, CA, USA
Thread Starter #332
Installed the Powerflex rear spring isolators after having them for several months. This is an easy job, I just didn't have the time. I had my priorities and this was towards the least important of things to do in my life, LOL. This eurathane part replaces the OE rubber piece.

Here's the OE in place.


OE next to Powerflex.


Mock up of it in place on the spring compared to the OE part.

OE


Powerflex


To properly install, simply snap it into place before putting the springs on, otherwise it may not seat correctly.


New isolator in place.


Everything nice and snug with white indicator marks to keep track of movement, if any over time.


Last edited:

M-Sport fan

9000 Post Club
Messages
14,460
Likes
7,011
Location
Princeton, N.J.
Is there enough slack in the lowering springs, at full suspension droop to be able to do this by hand, or did you have to use a spring compressor tool, or ratcheting strap tool?


OP
koozy

koozy

3000 Post Club
Messages
3,213
Likes
1,899
Location
Los Angeles, CA, USA
Thread Starter #334
There's plenty of slack. Just jack up the rear end at the rear beam, put jack stands and lower car on to stands, support rear beam with jack, remove lower shock bolts, lower jack, remove springs, remove isolator, then repeat steps backwards for installation of new pads.


M-Sport fan

9000 Post Club
Messages
14,460
Likes
7,011
Location
Princeton, N.J.
There's plenty of slack. Just jack up the rear end at the rear beam, put jack stands and lower car on to stands, support rear beam with jack, remove lower shock bolts, lower jack, remove springs, remove isolator, then repeat steps backwards for installation of new pads.
OK, I did not realize that you disconnected the shocks at the lower mounts, which YES, is A LOT easier than using a spring compressor to do the job. [thumb]


OP
koozy

koozy

3000 Post Club
Messages
3,213
Likes
1,899
Location
Los Angeles, CA, USA
Thread Starter #337
I just installed them, haven’t driven it yet. Don’t have time LOL. I’m using my other car while the FiST is parked. My eyes say yes it’s a tad higher, but I really didn’t care to measure. I wanted them for the improved stability and consistency. It may settle some after I put some miles on it.


Sent from my iPhone using Tapatalk


OP
koozy

koozy

3000 Post Club
Messages
3,213
Likes
1,899
Location
Los Angeles, CA, USA
Thread Starter #340
I always found the lower rubber bumpers for the license plate mount odd. The plate would never sit flush and was not mounted solid with just 2 screws. So I ditched the rubber bumpers and updated to allow for 4 mounting points. The plate is also now flush and mounted solid on to the hatch.

OE setup. I removed one of the bumpers for prepping.


New and improved setup [rockon]


New hardware with OE outside the package.


Top